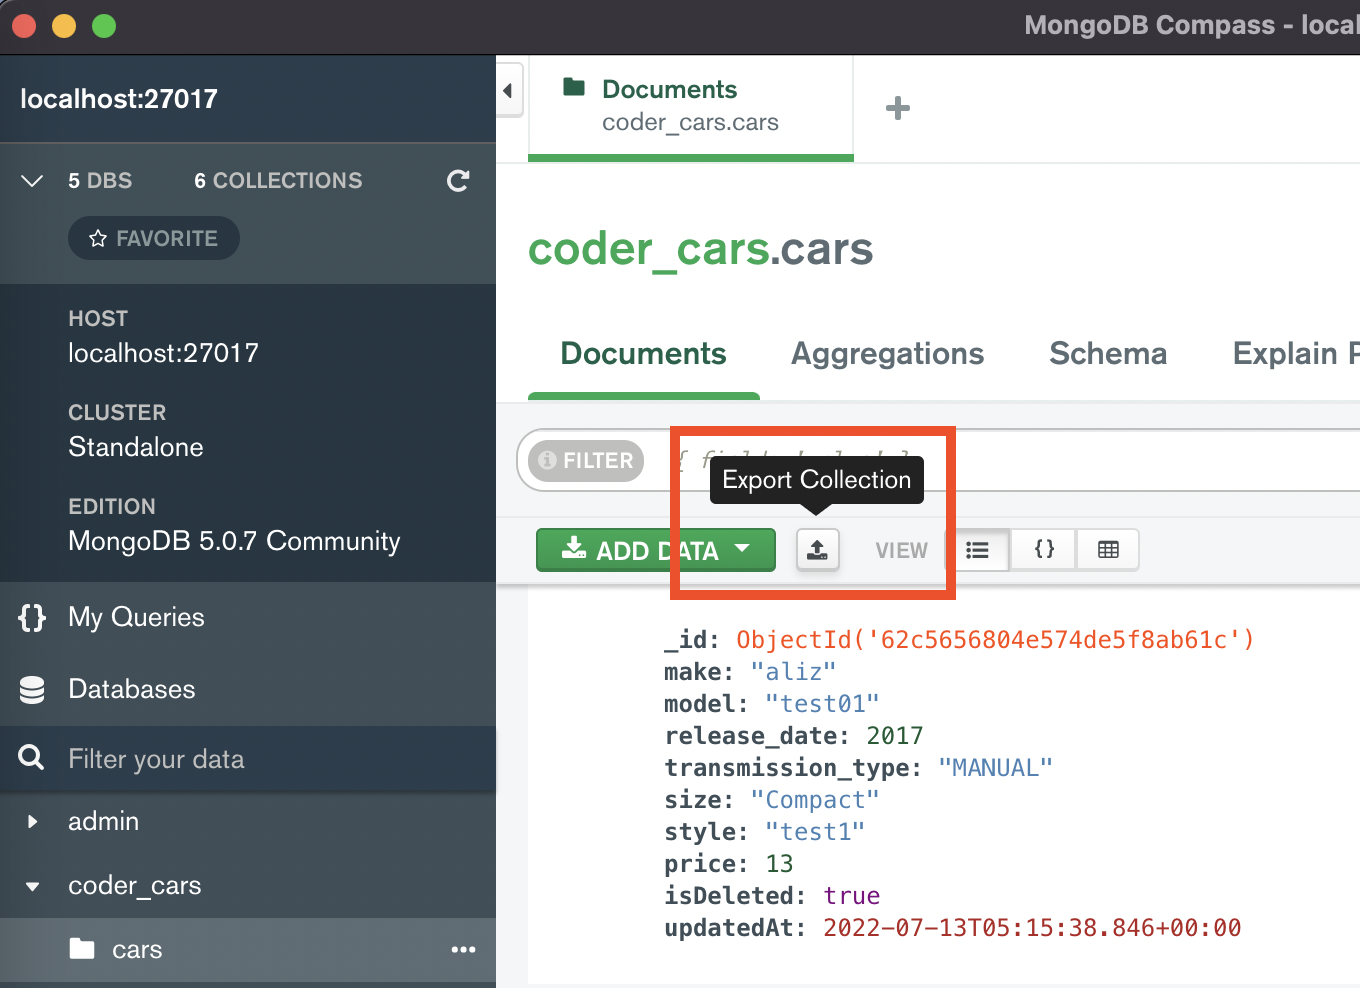
To migrate your local data to Atlas, first we have to export your local data. There are 2 ways to do this : using mongo CLI or using Compass. Let's keep it simple by using the GUI of Compass
- Click export collection.
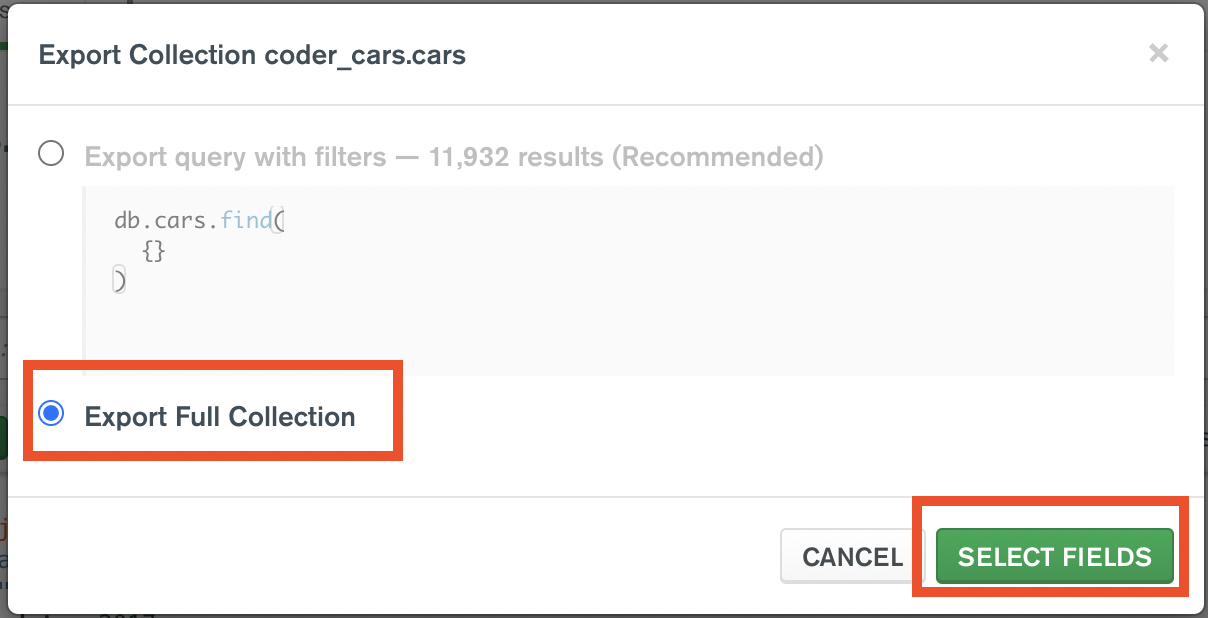
- Choose Export Full Collection
- Choose all the data fields you want in your cloud server.
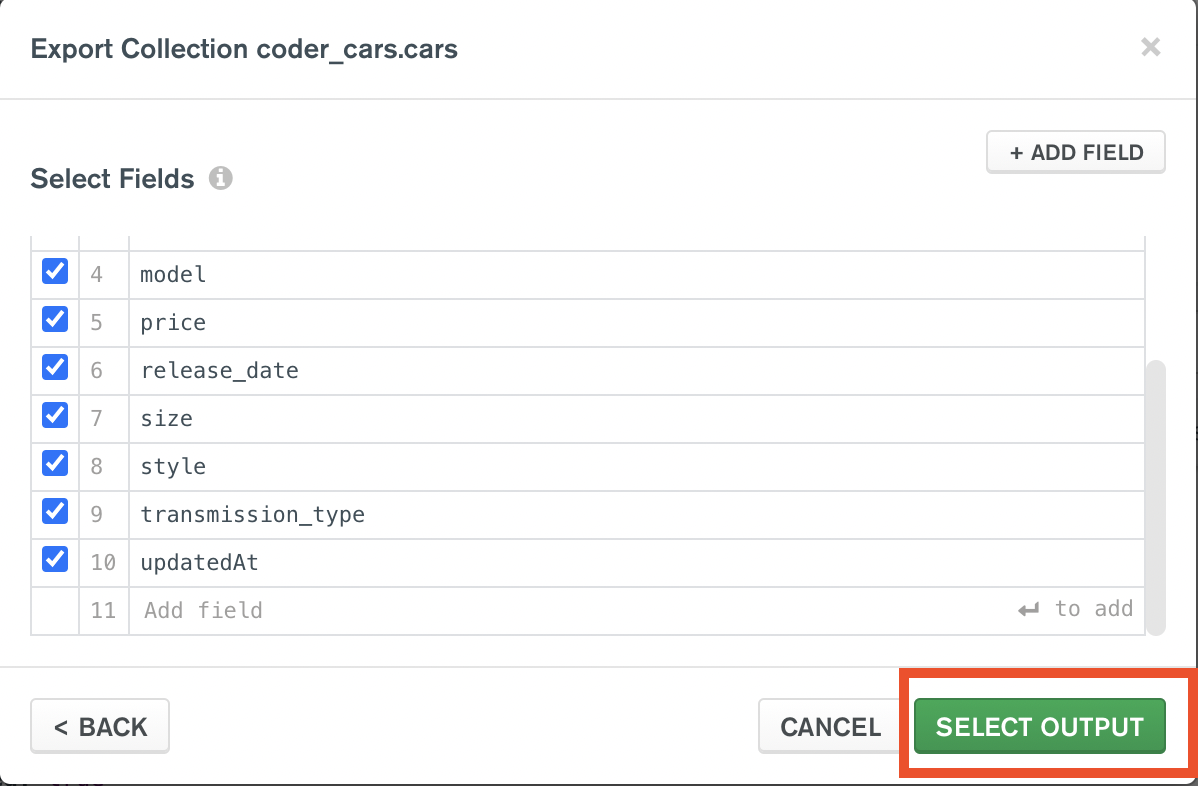
- Continue to export it under the
jsonformat. Make sure thejsonfile name matches your collection name. It is a good practice to follow.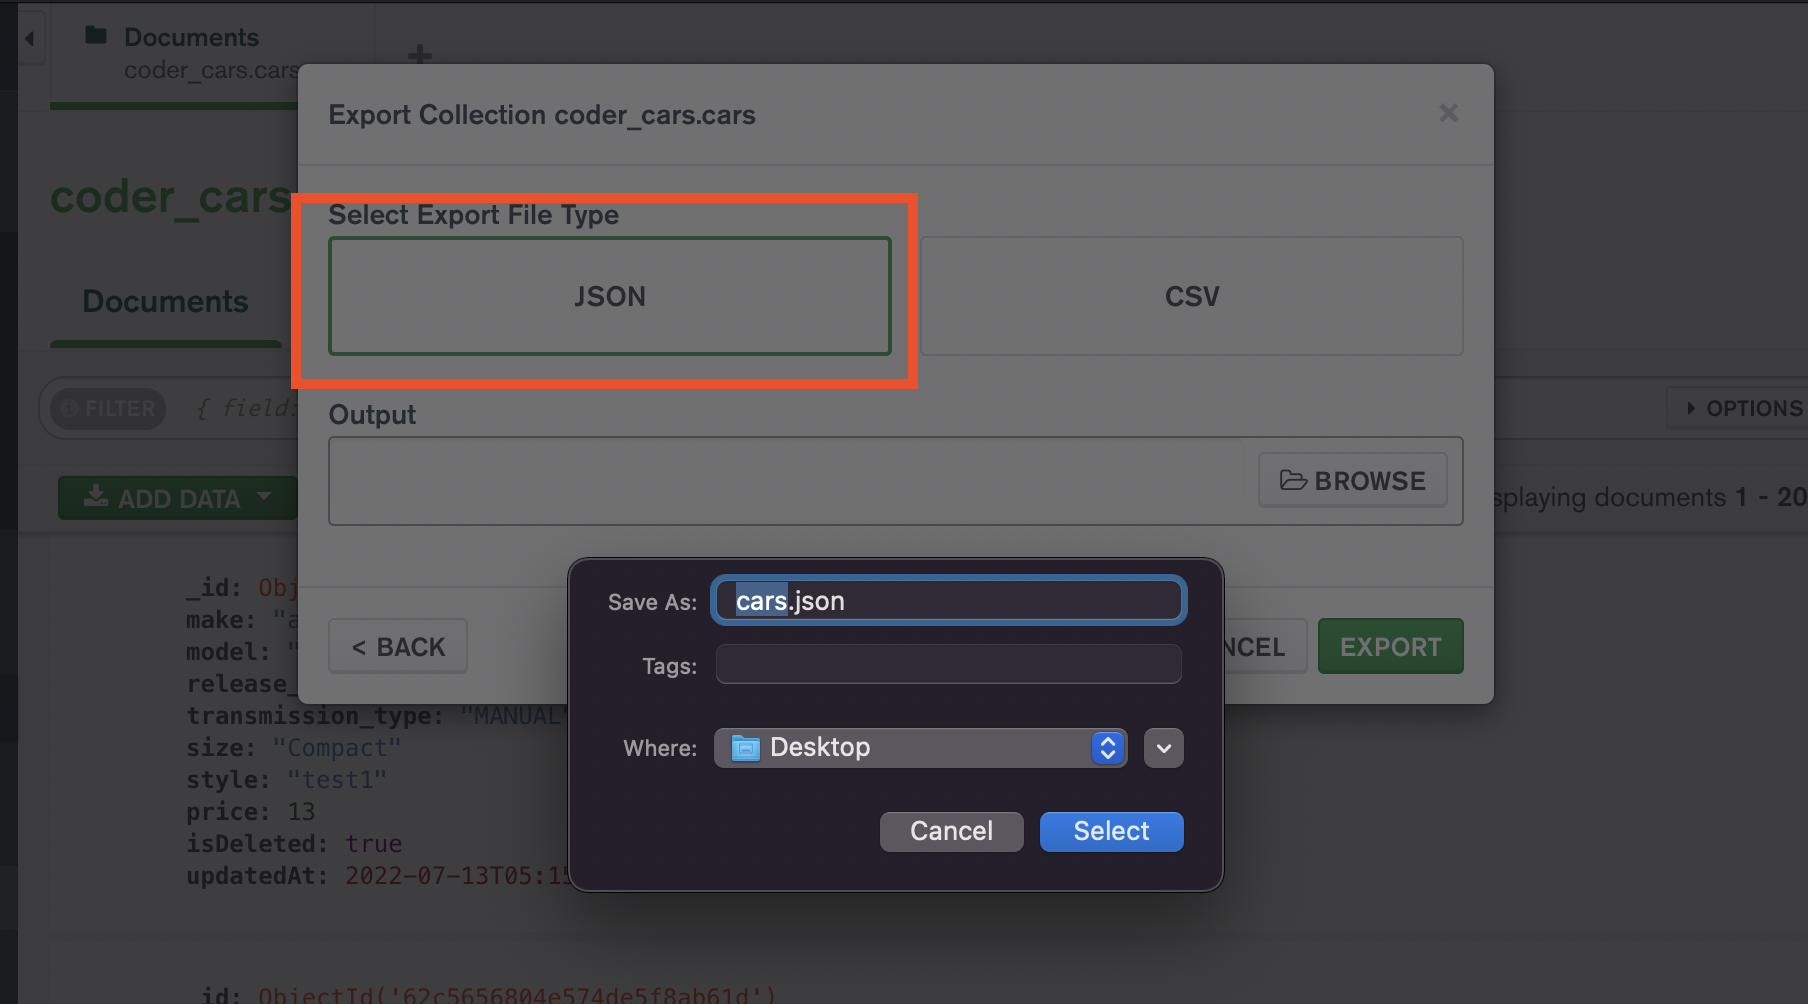
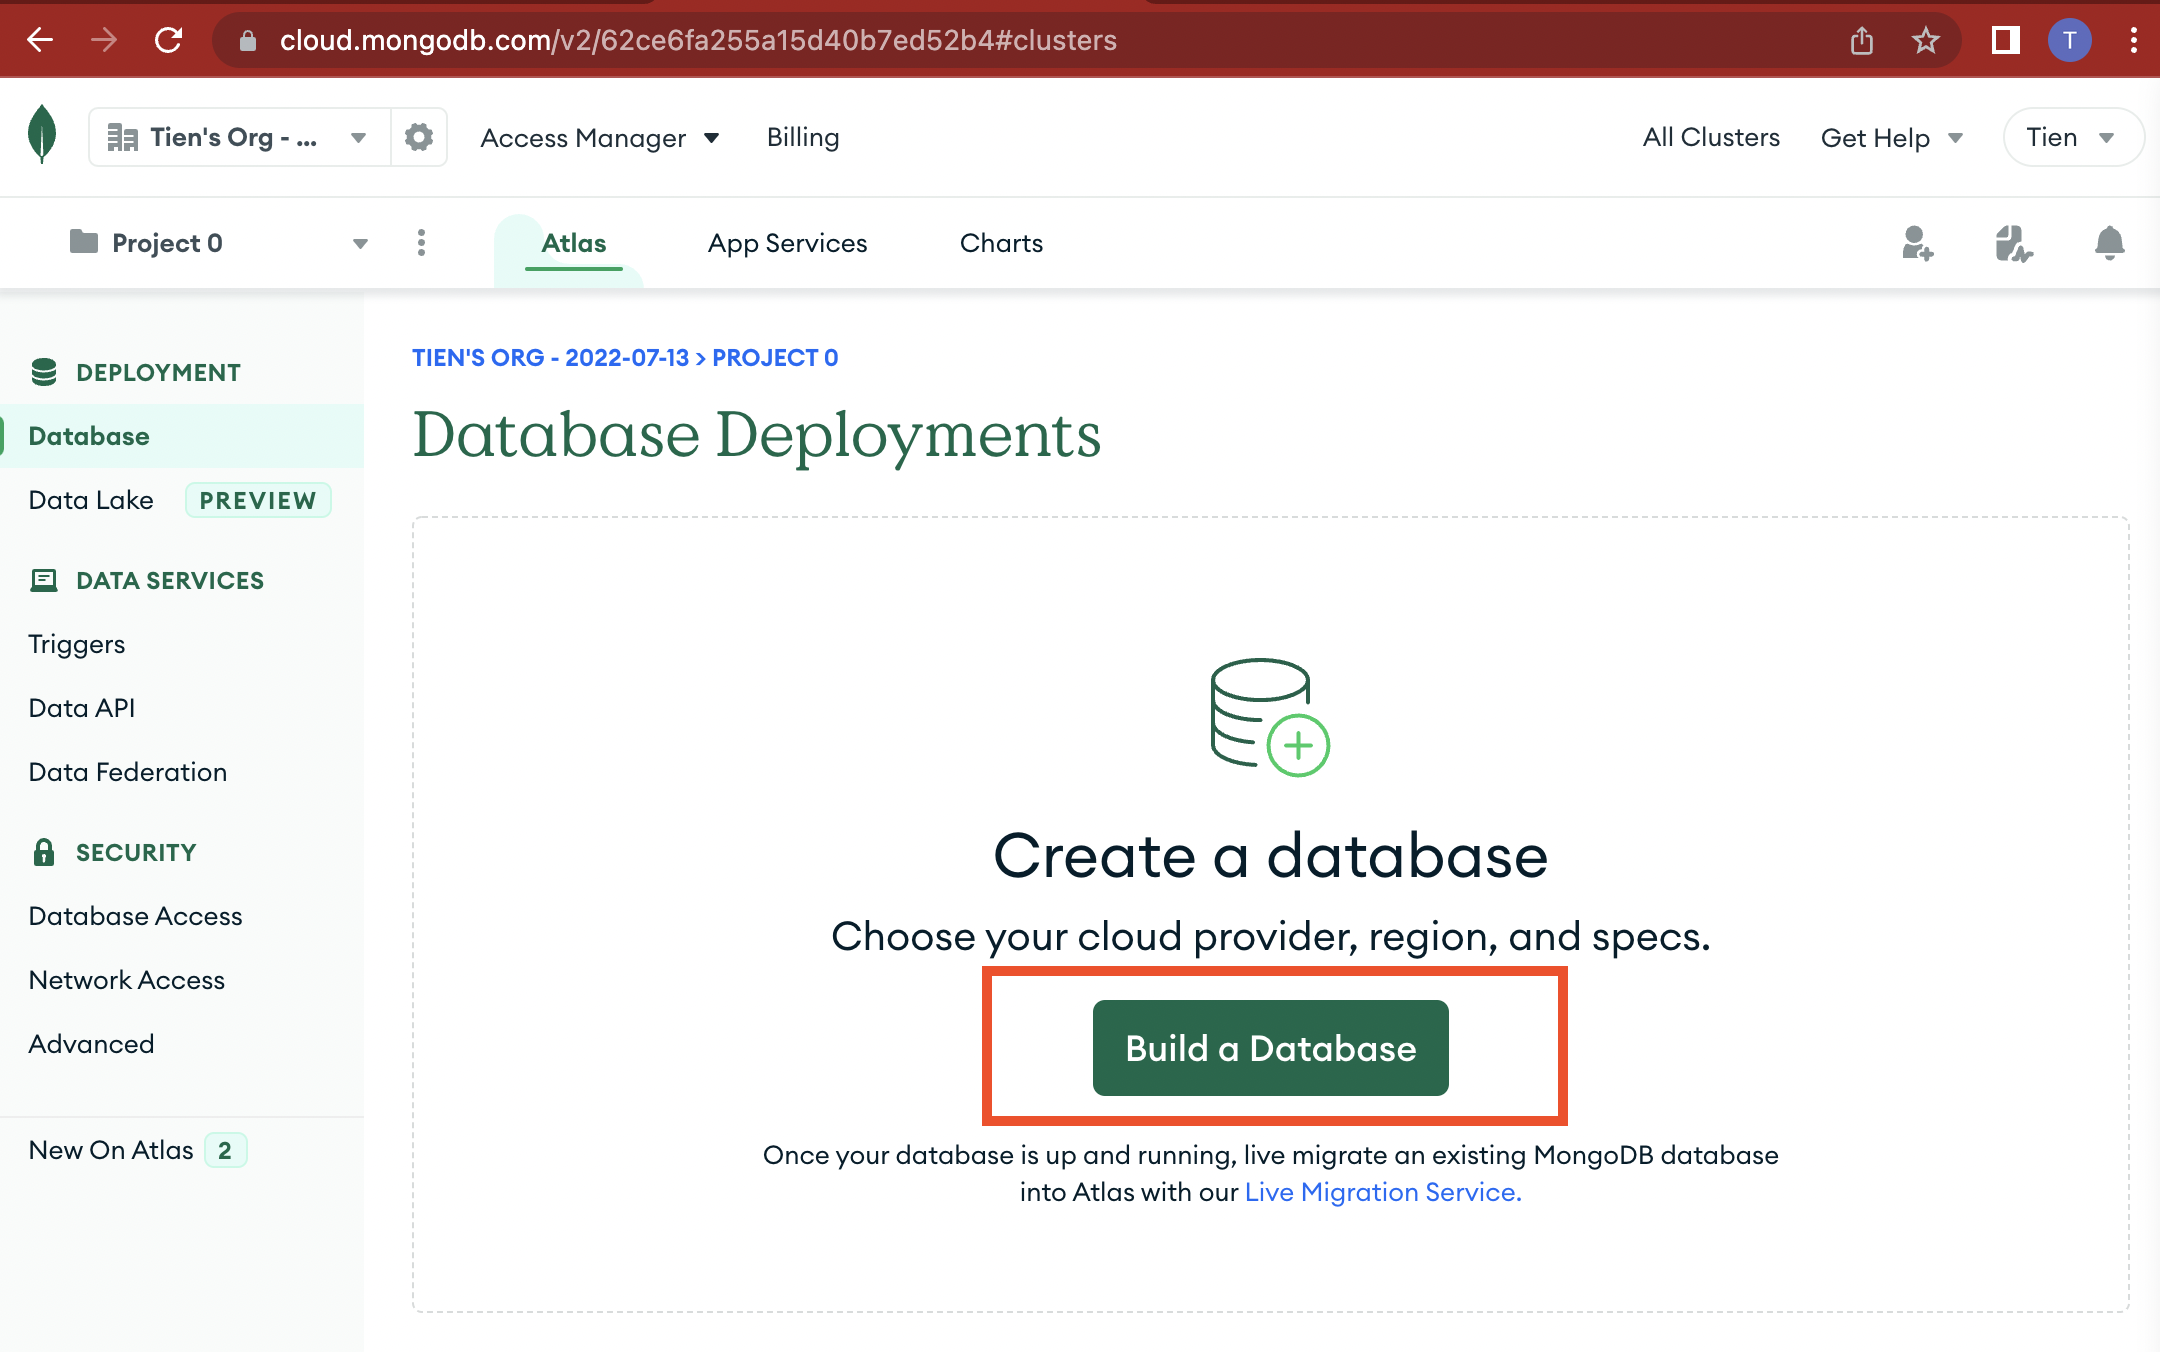
After signing in Mongo Atlas, you will be directed to the below site. From now we will start building a cloud server, and connect it to your local database.
- Click on Build a Database
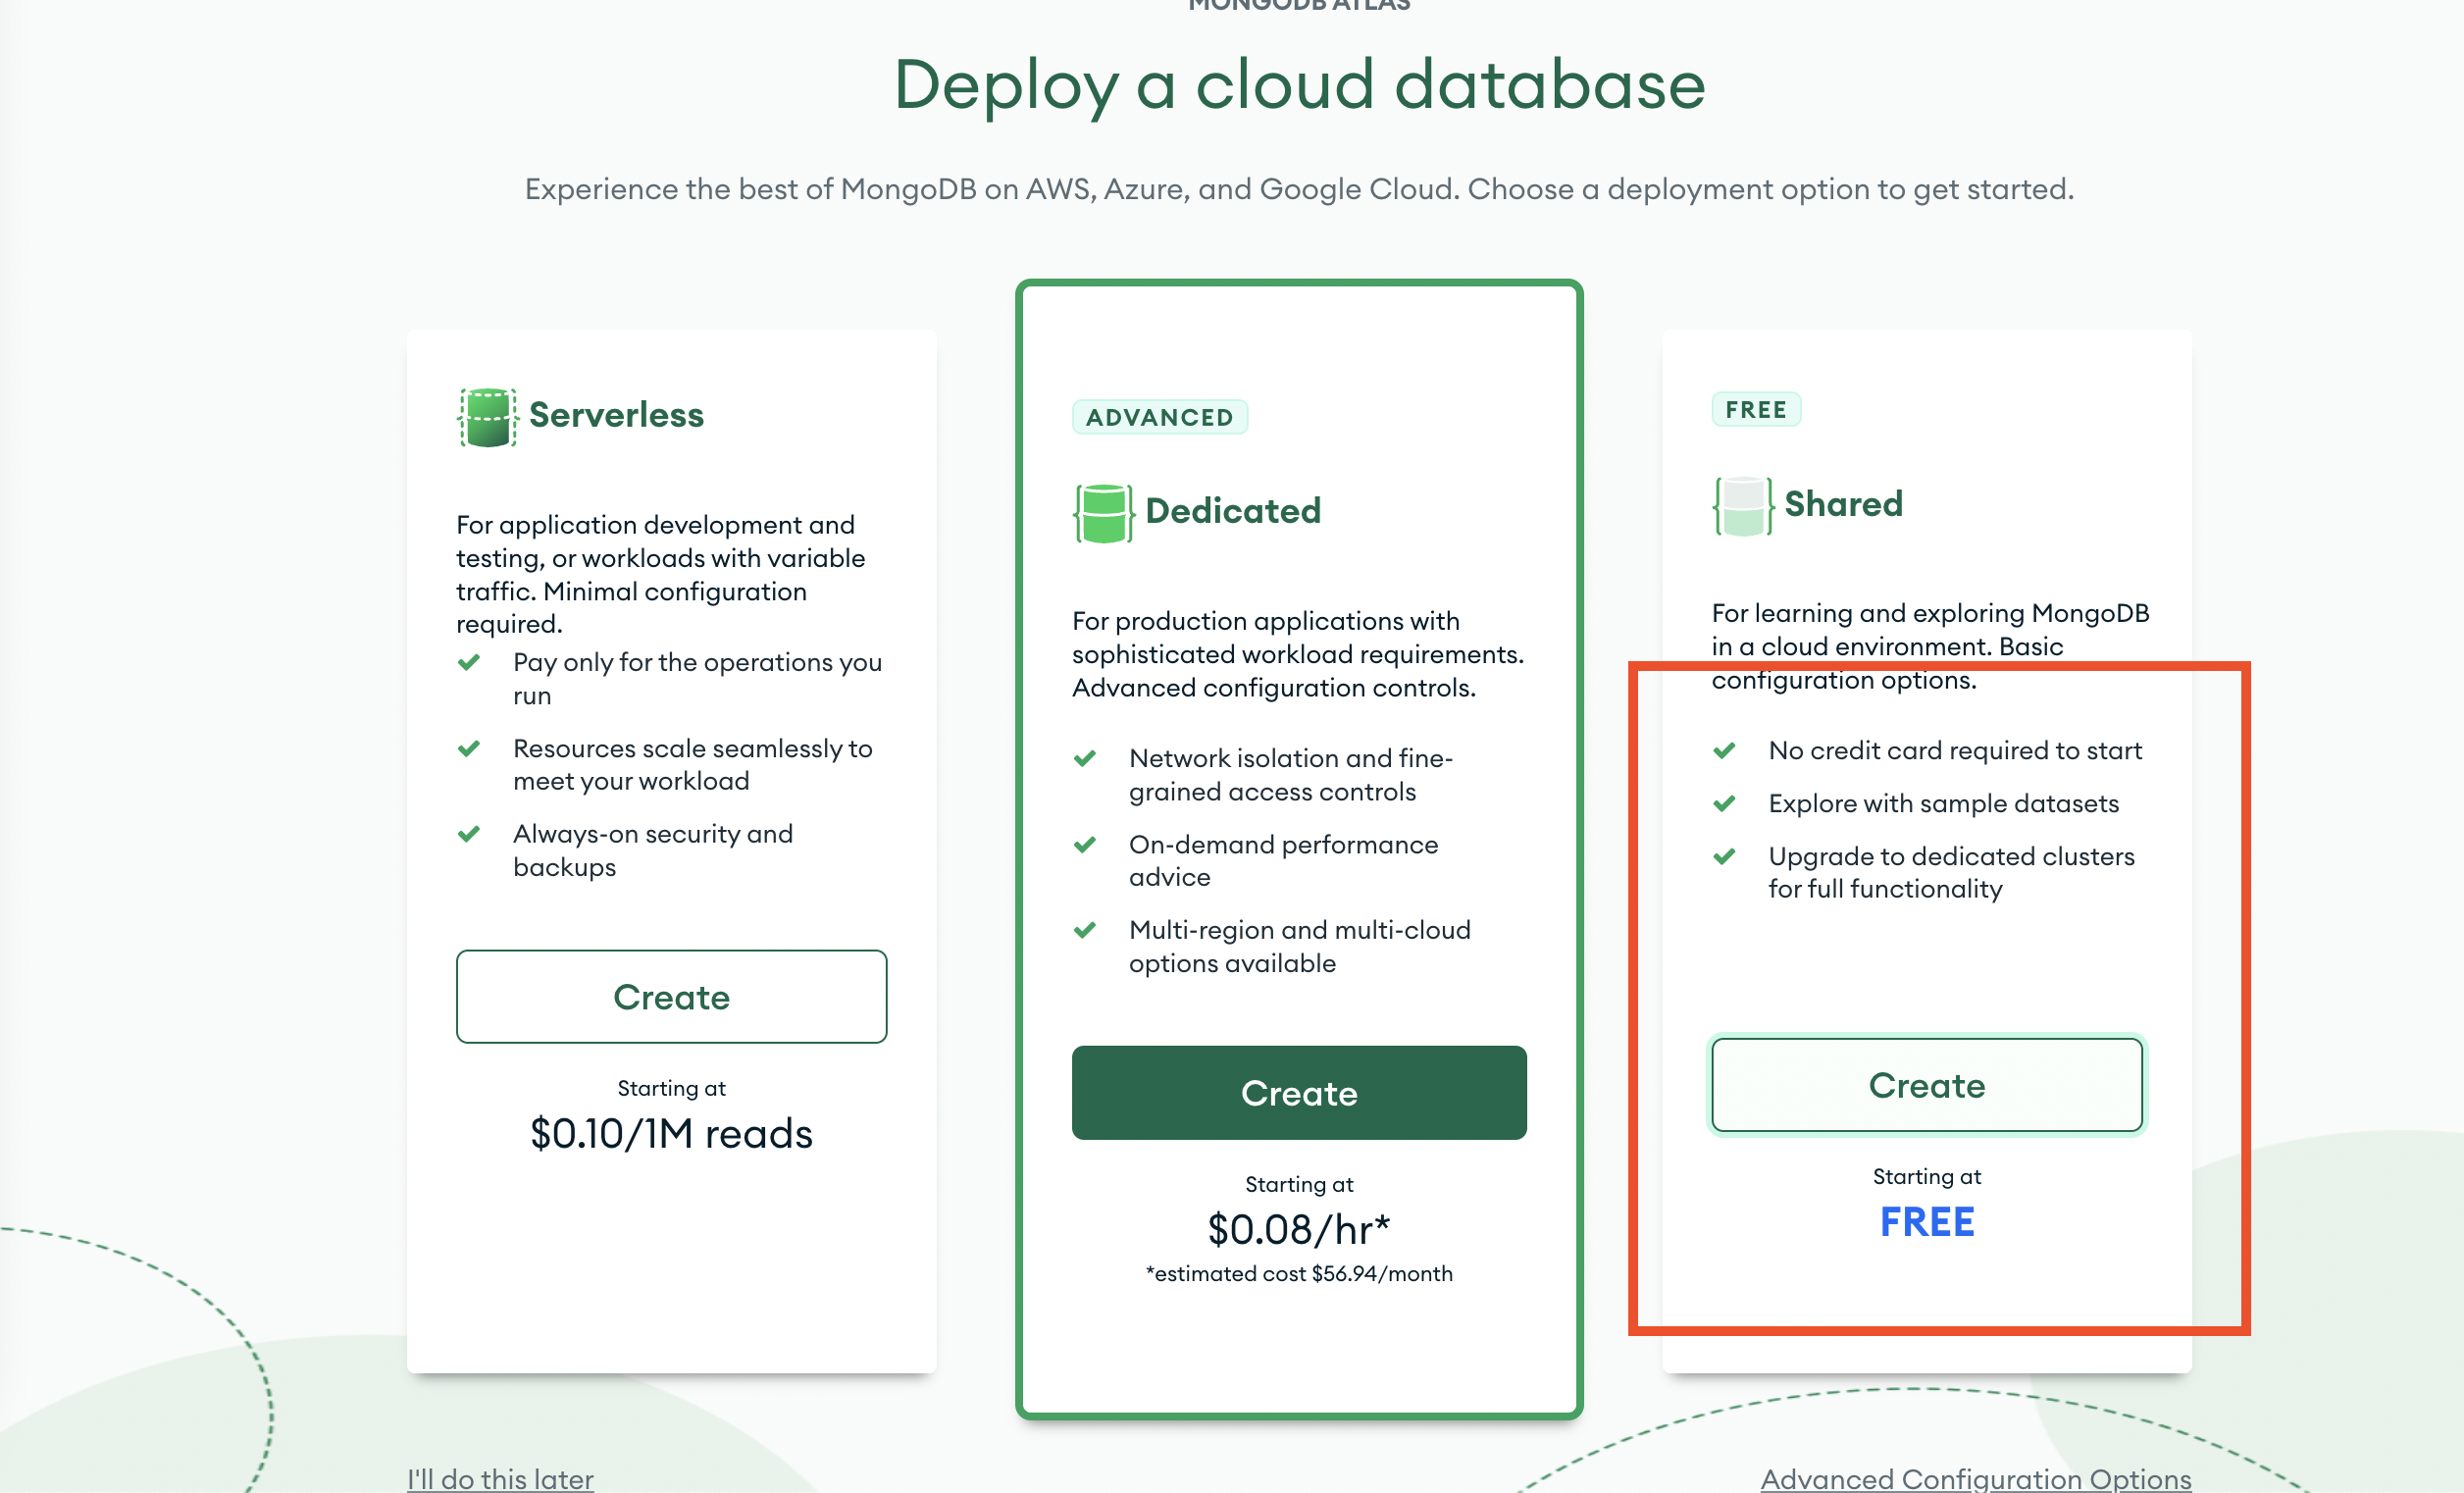
- Choose the free option for practicing purposes.
- Select the closest server to Vietnam, in this case - is HongKong.
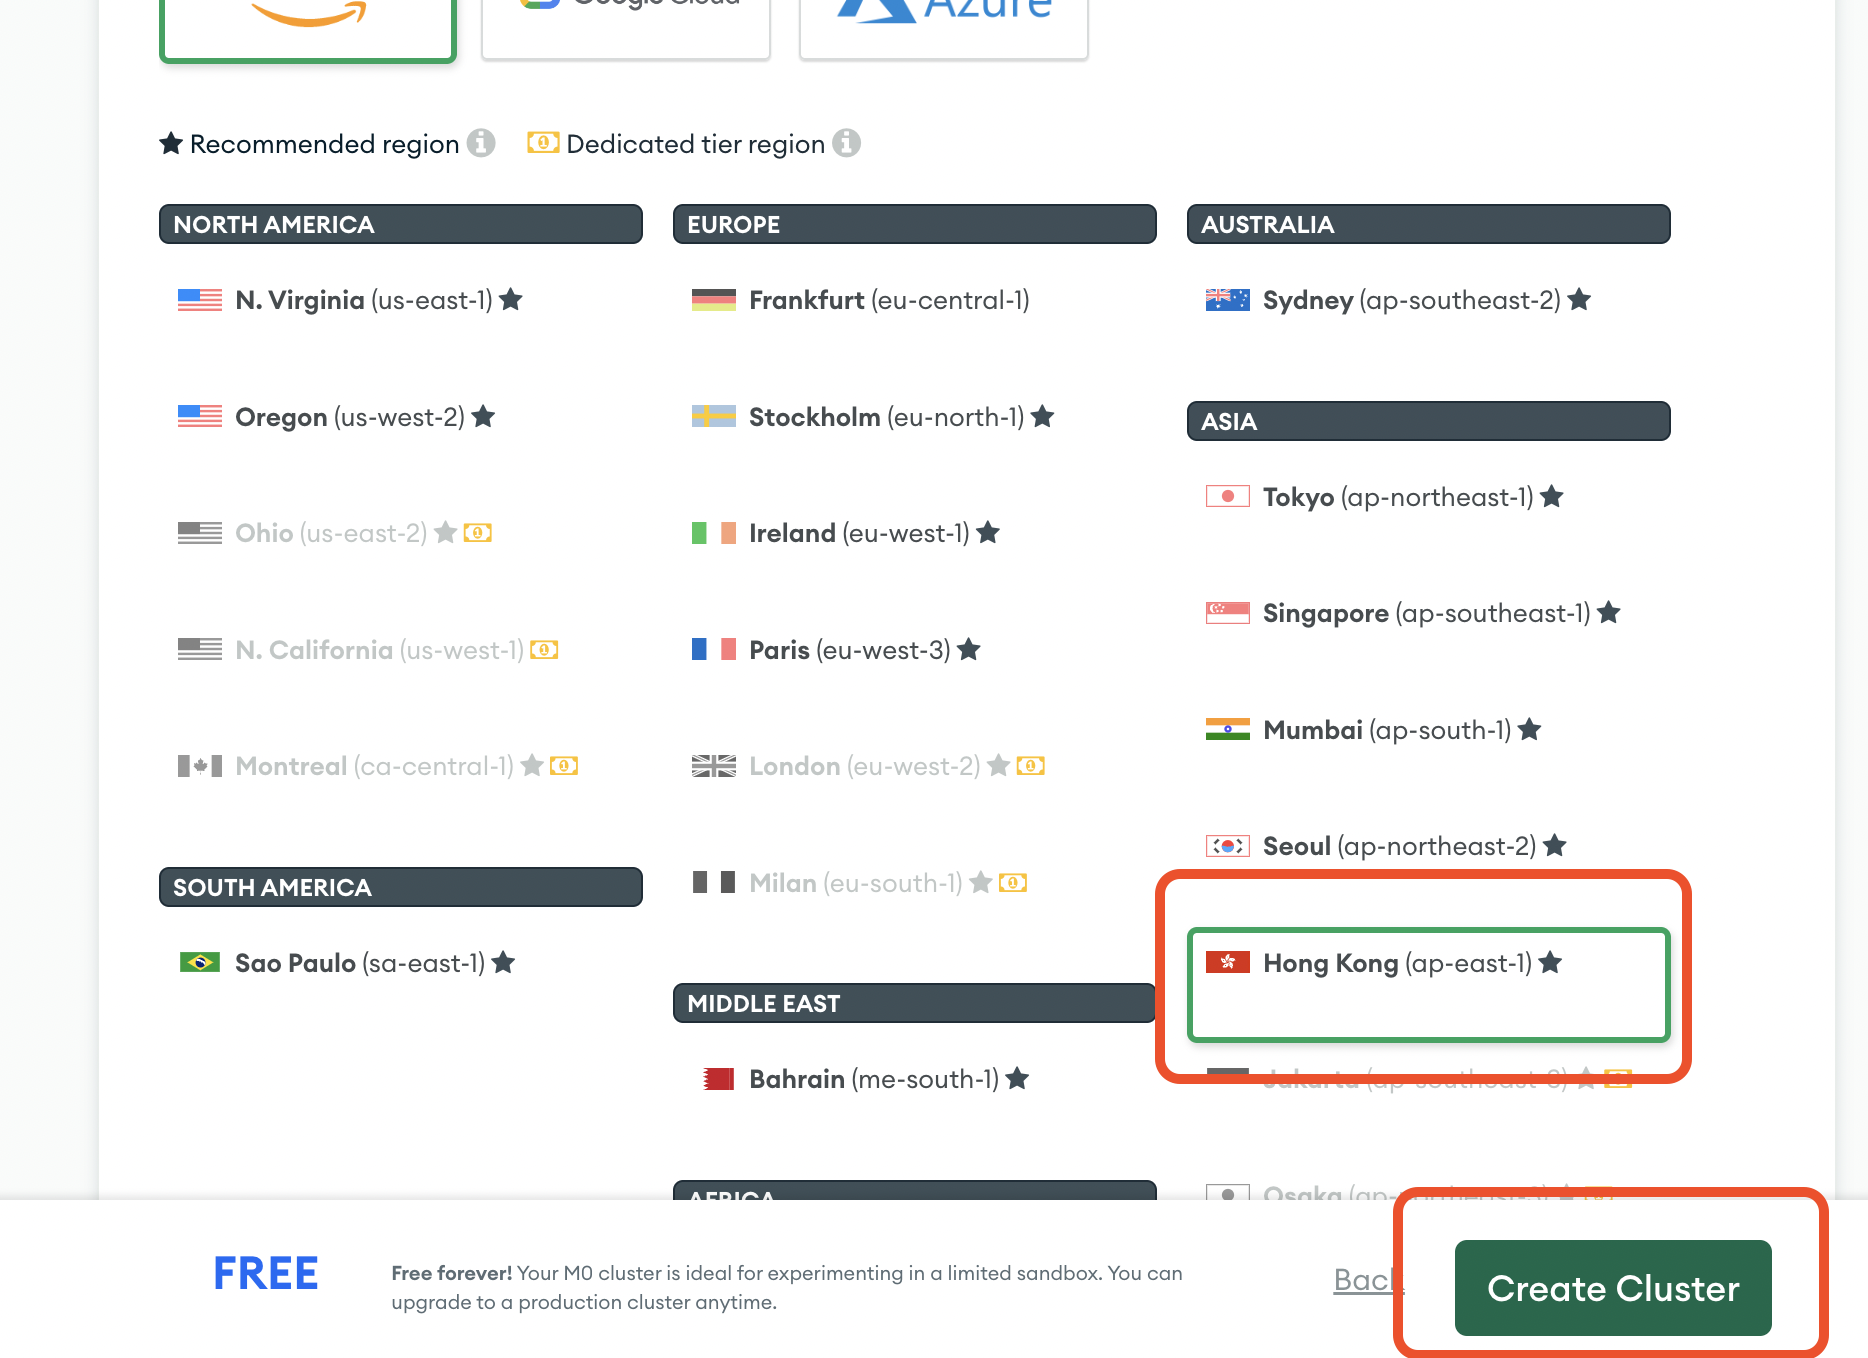
- You have created a cluster, let's continue to set up your database with
usernameandpasssword. For examples :username: admin&password: adminNote: These are important info, that will be used to connect to your cluster. ❗️ Please jot down and memorize it somewhere.
- Scroll down and add Entries - which IP address is authorized to write to your cluster? For now, let's follow the instruction and put
0.0.0.0- which means your cluster can be accessed from everywhere.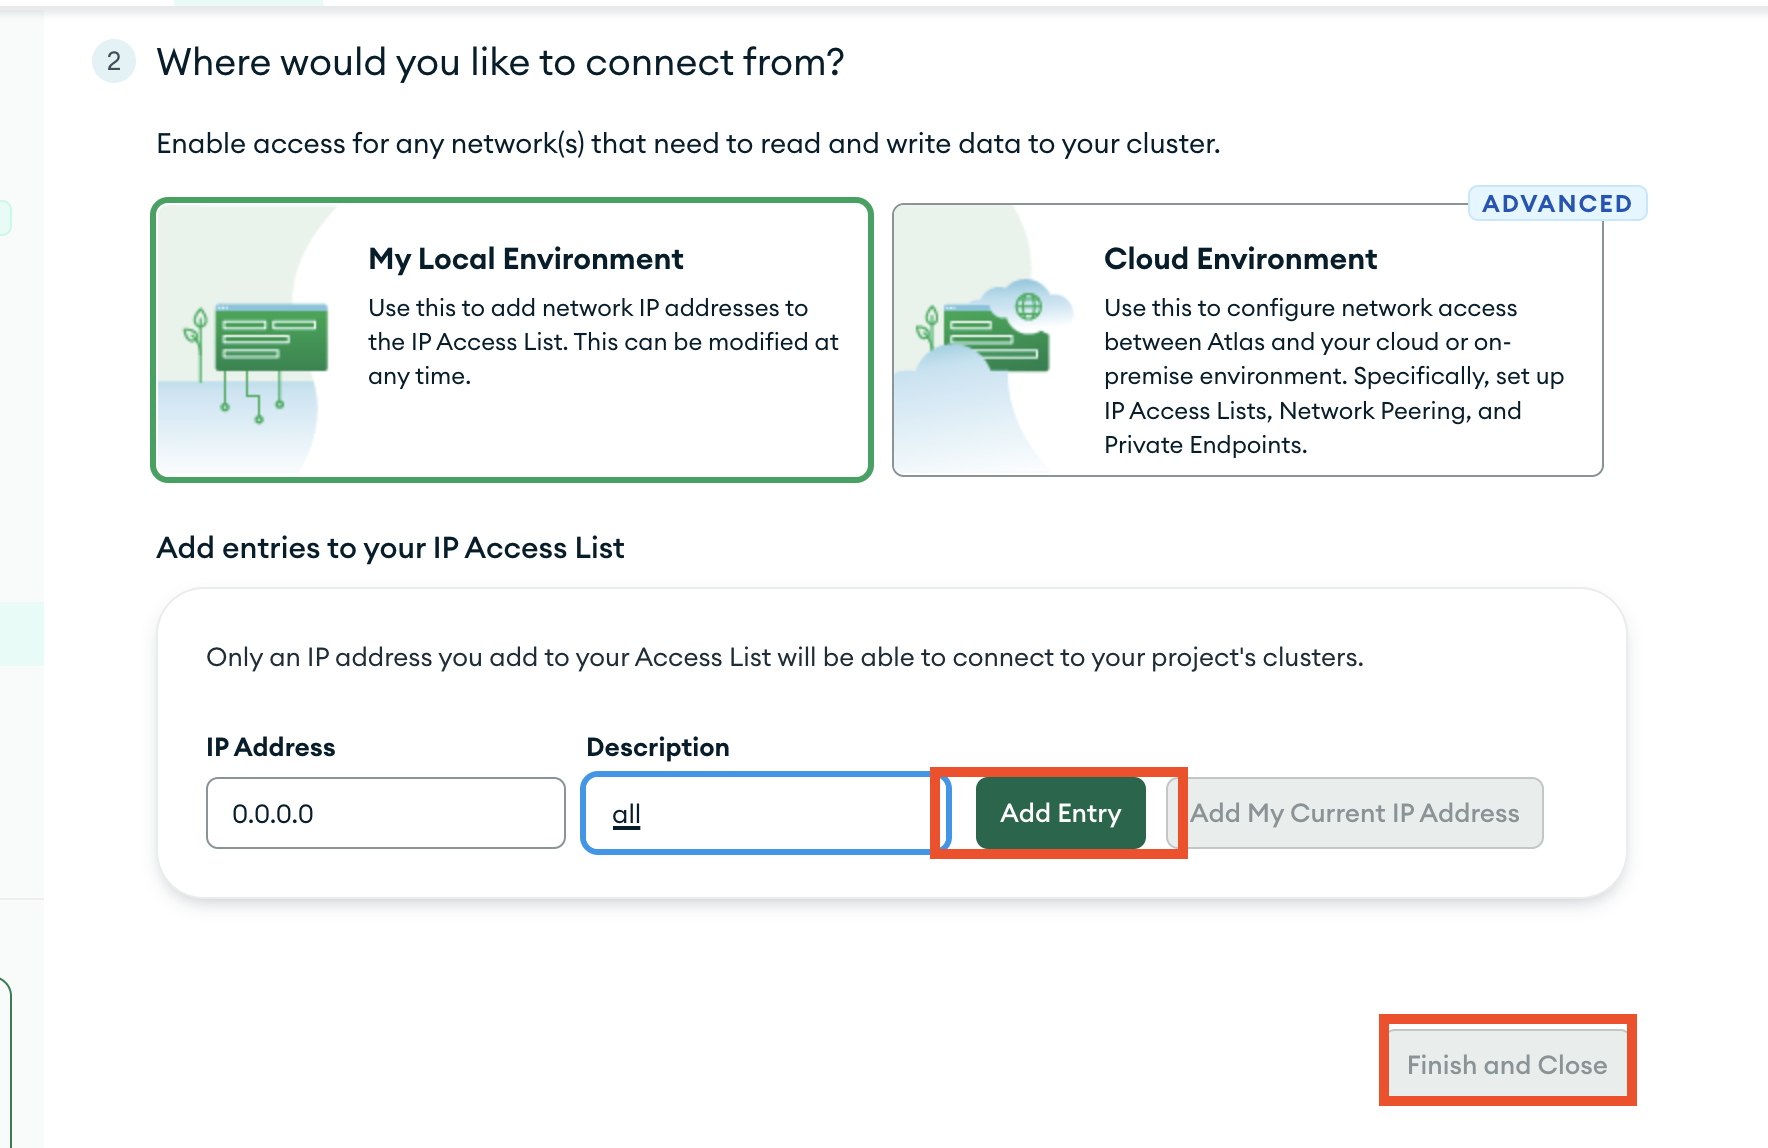
- After
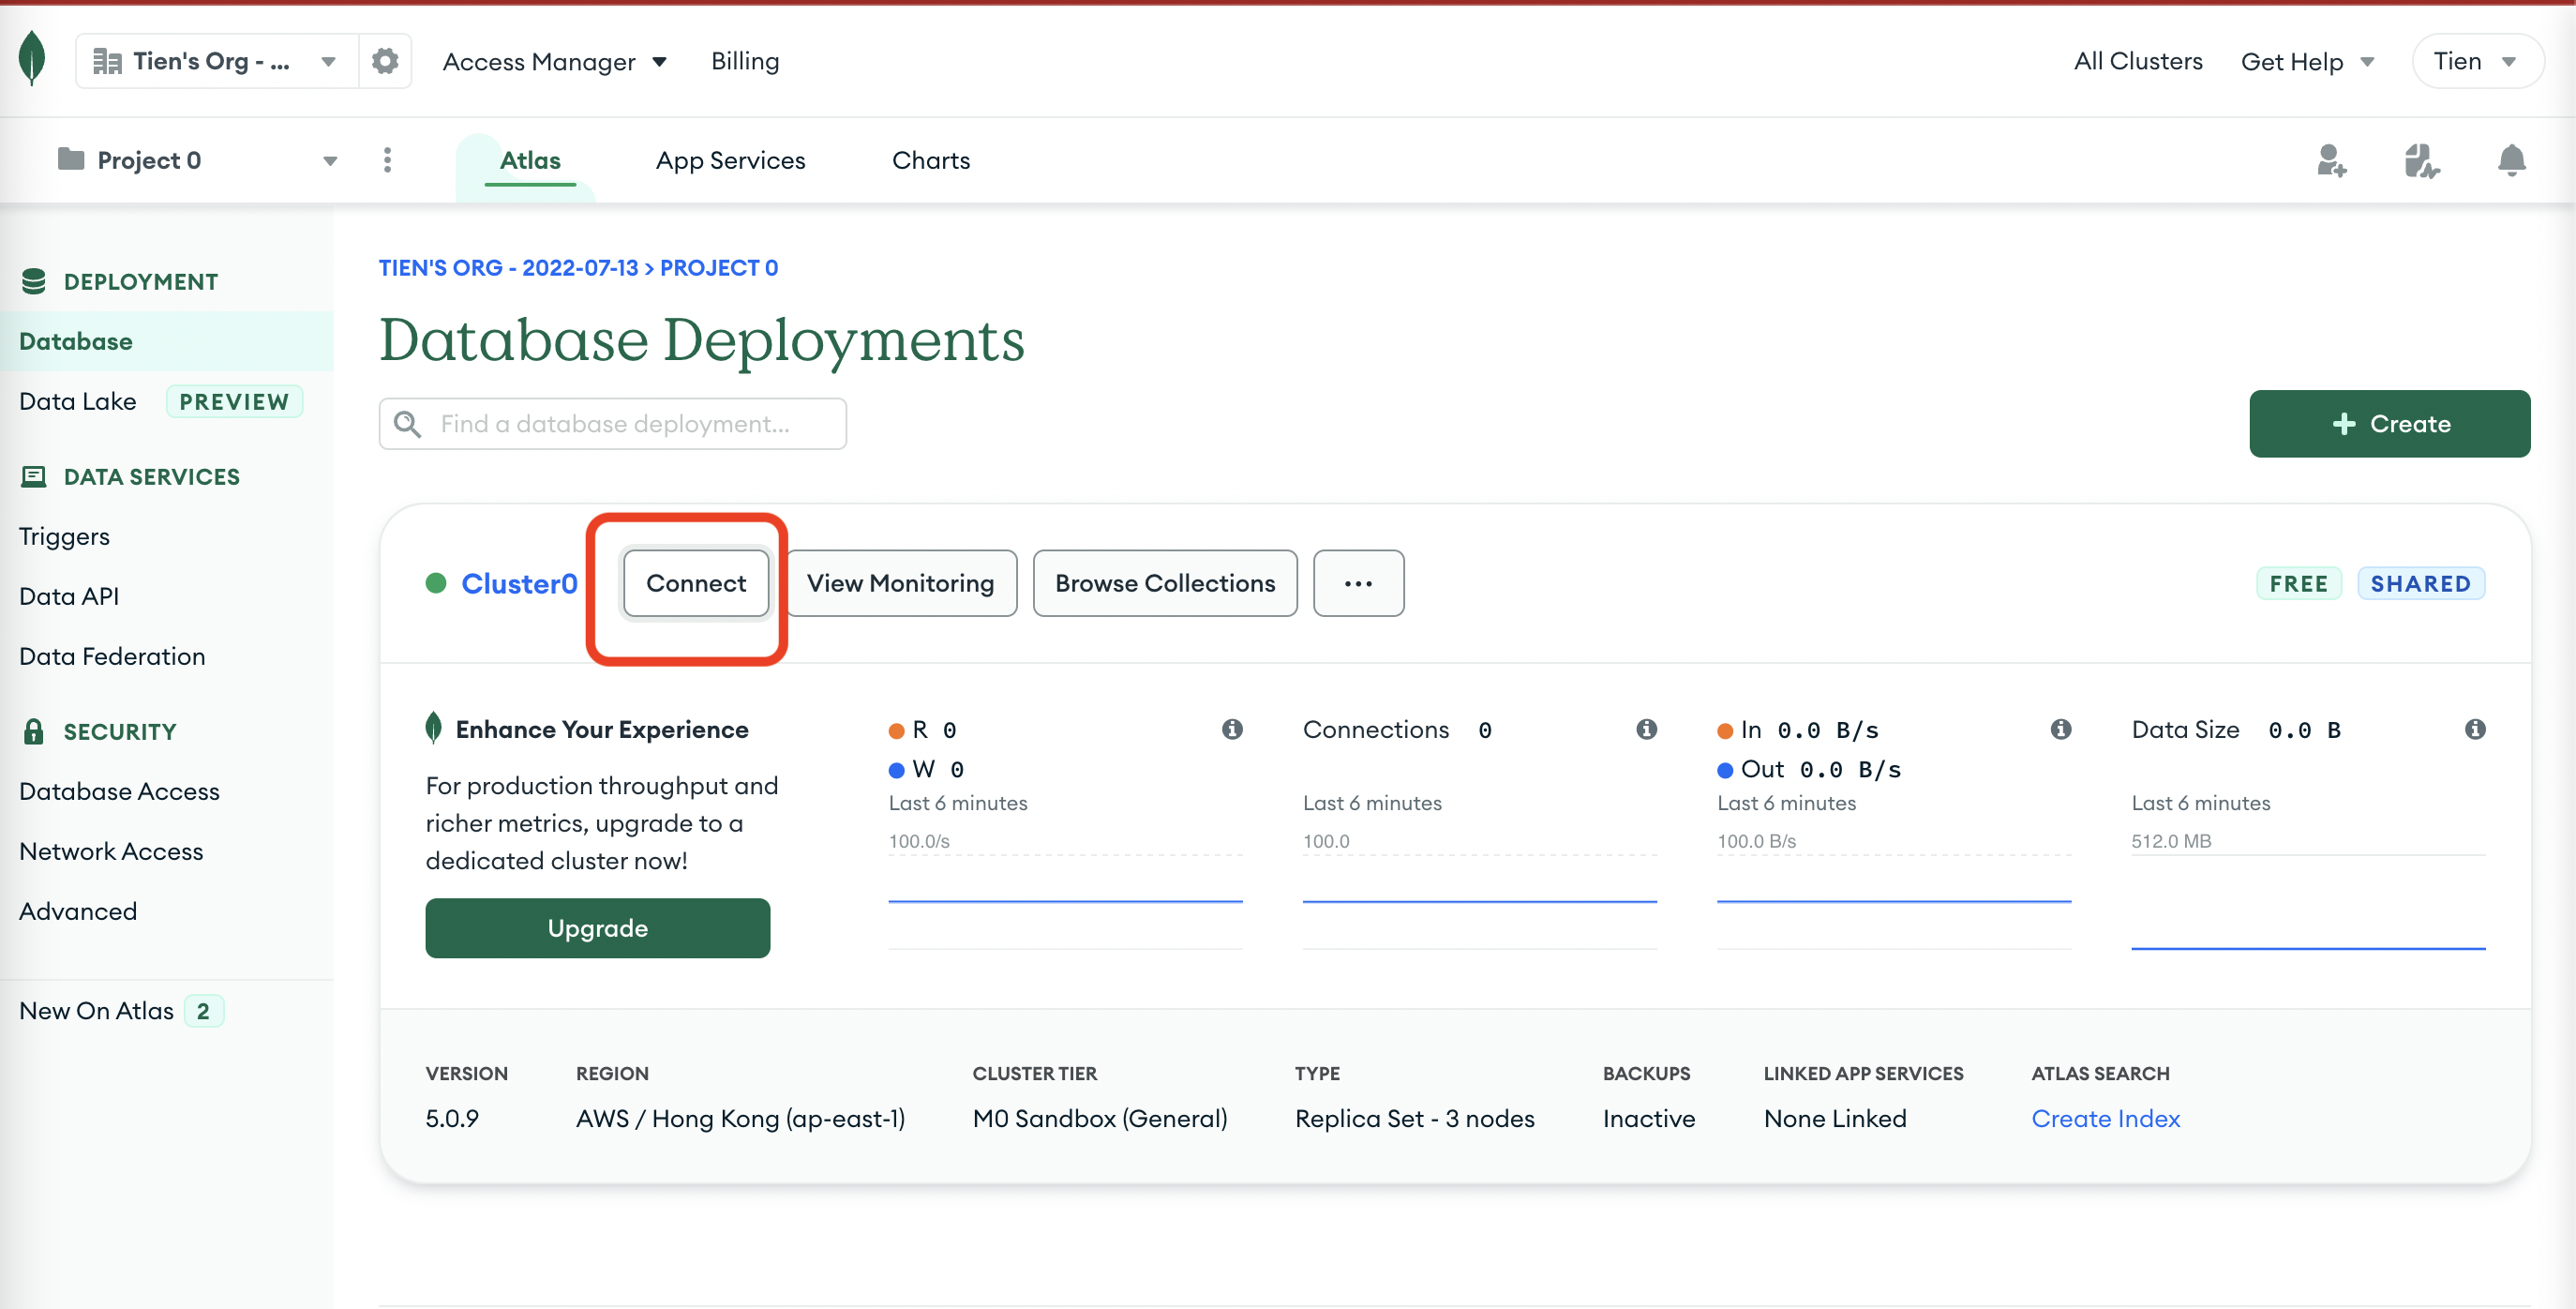
Finish and Closeyou will be redirected to the Database.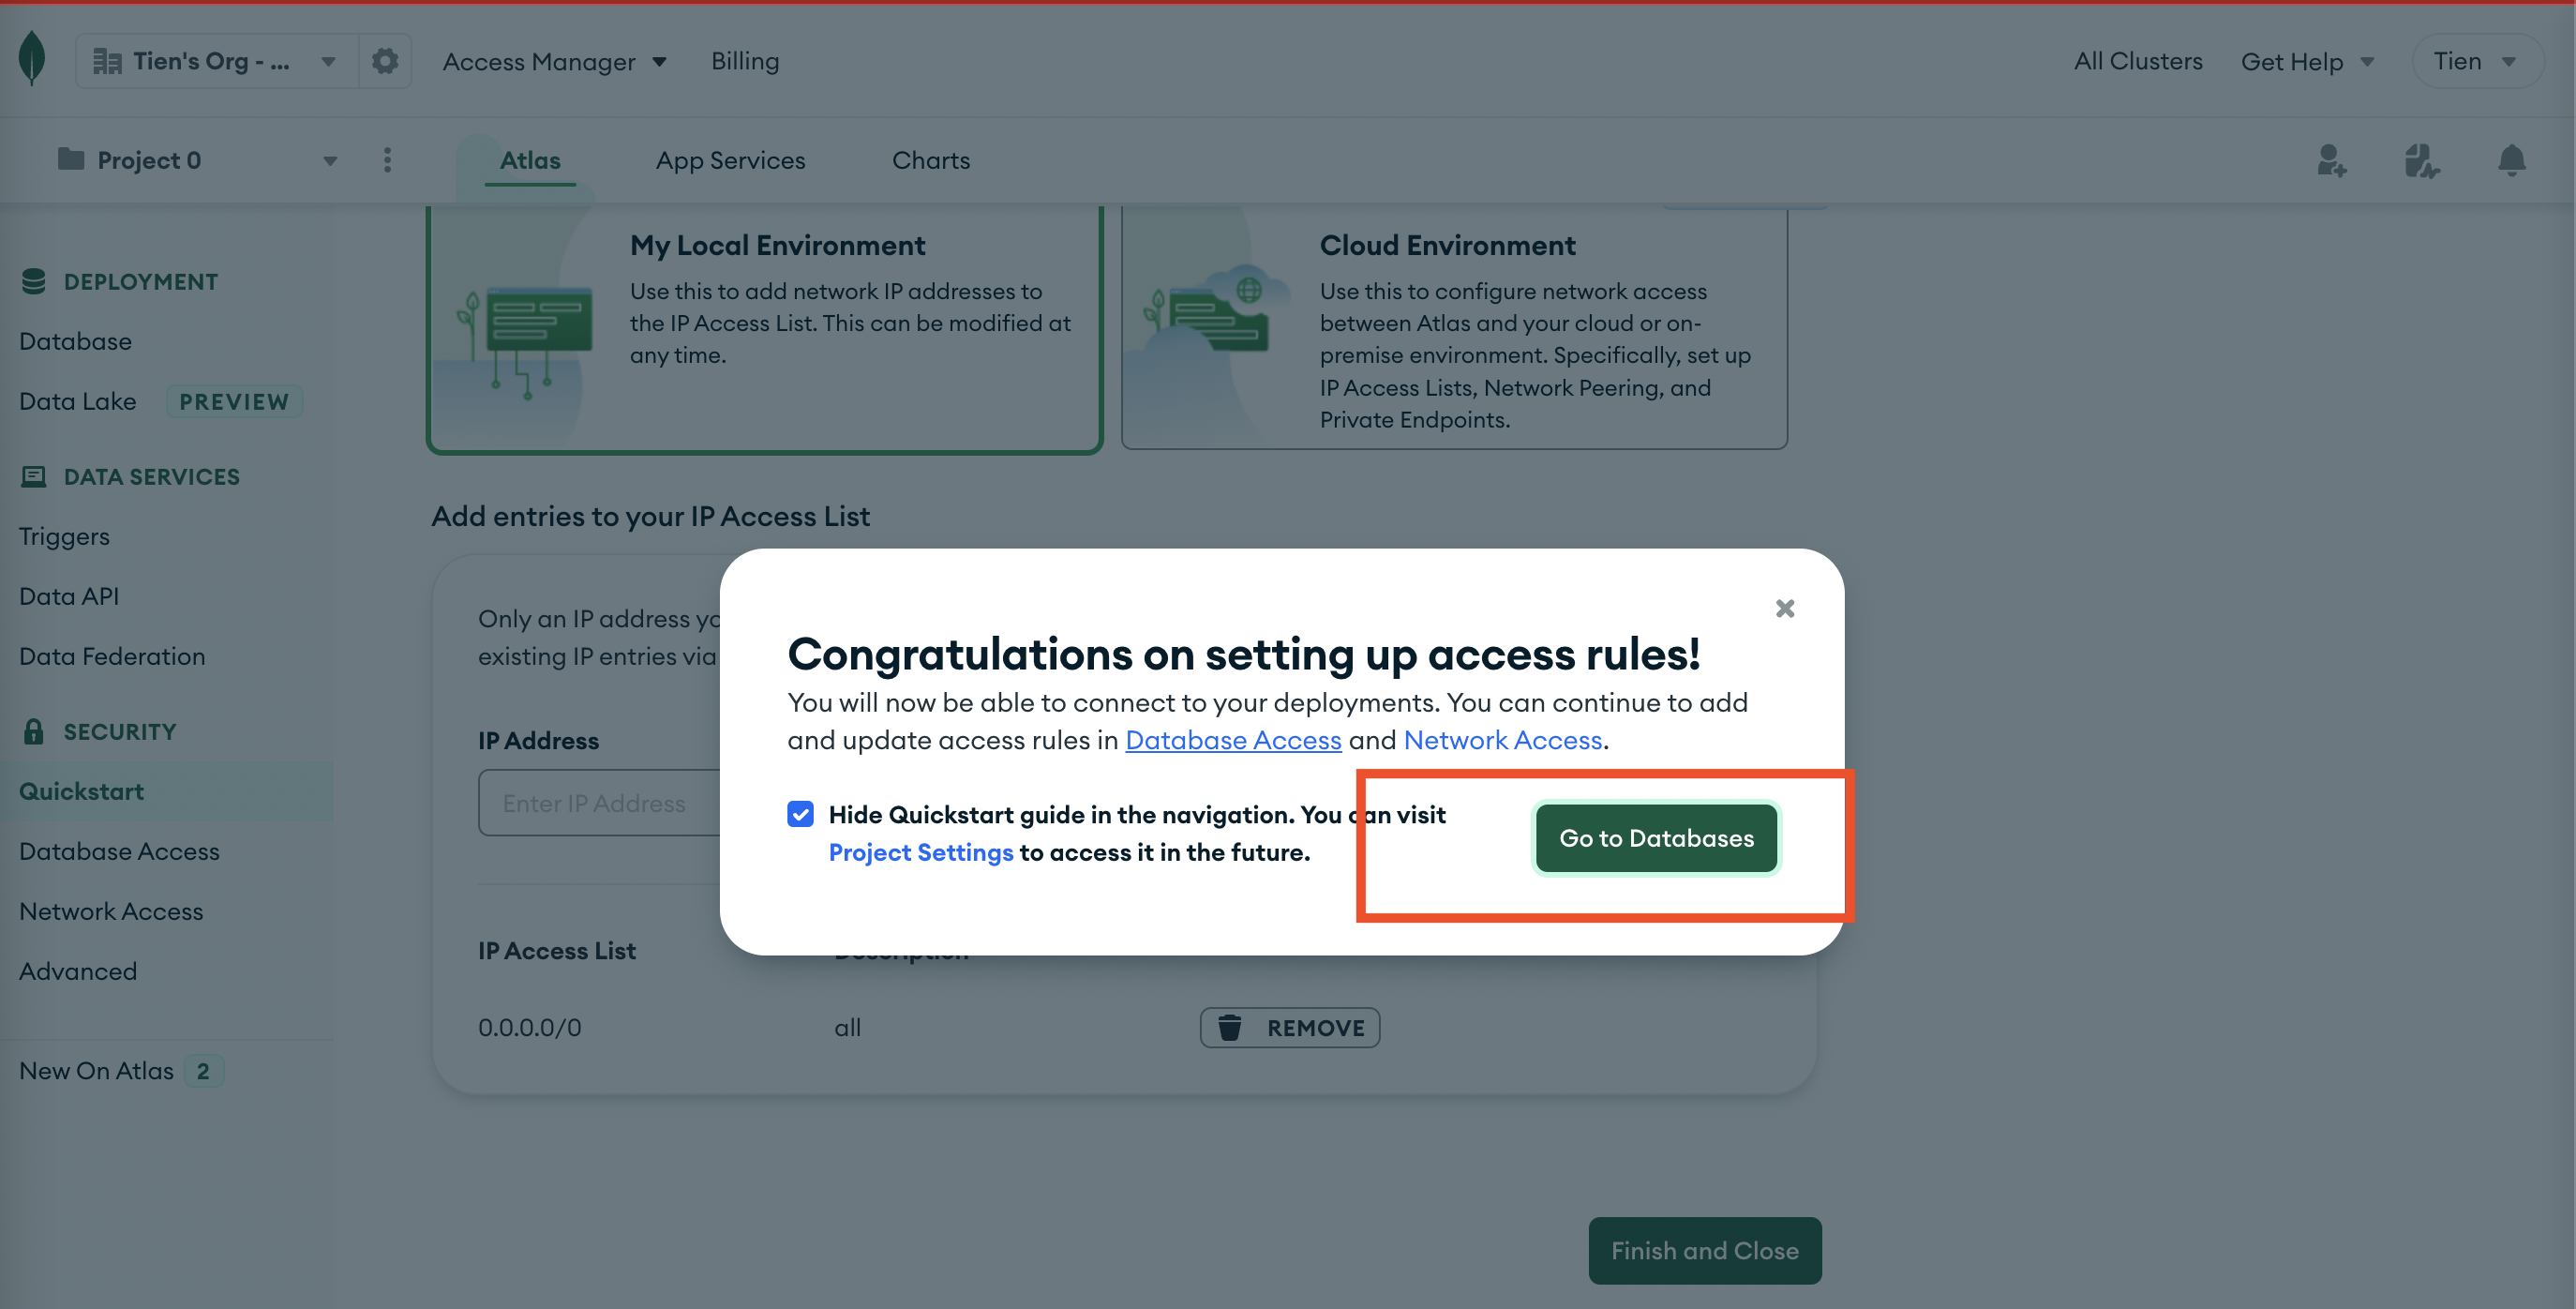
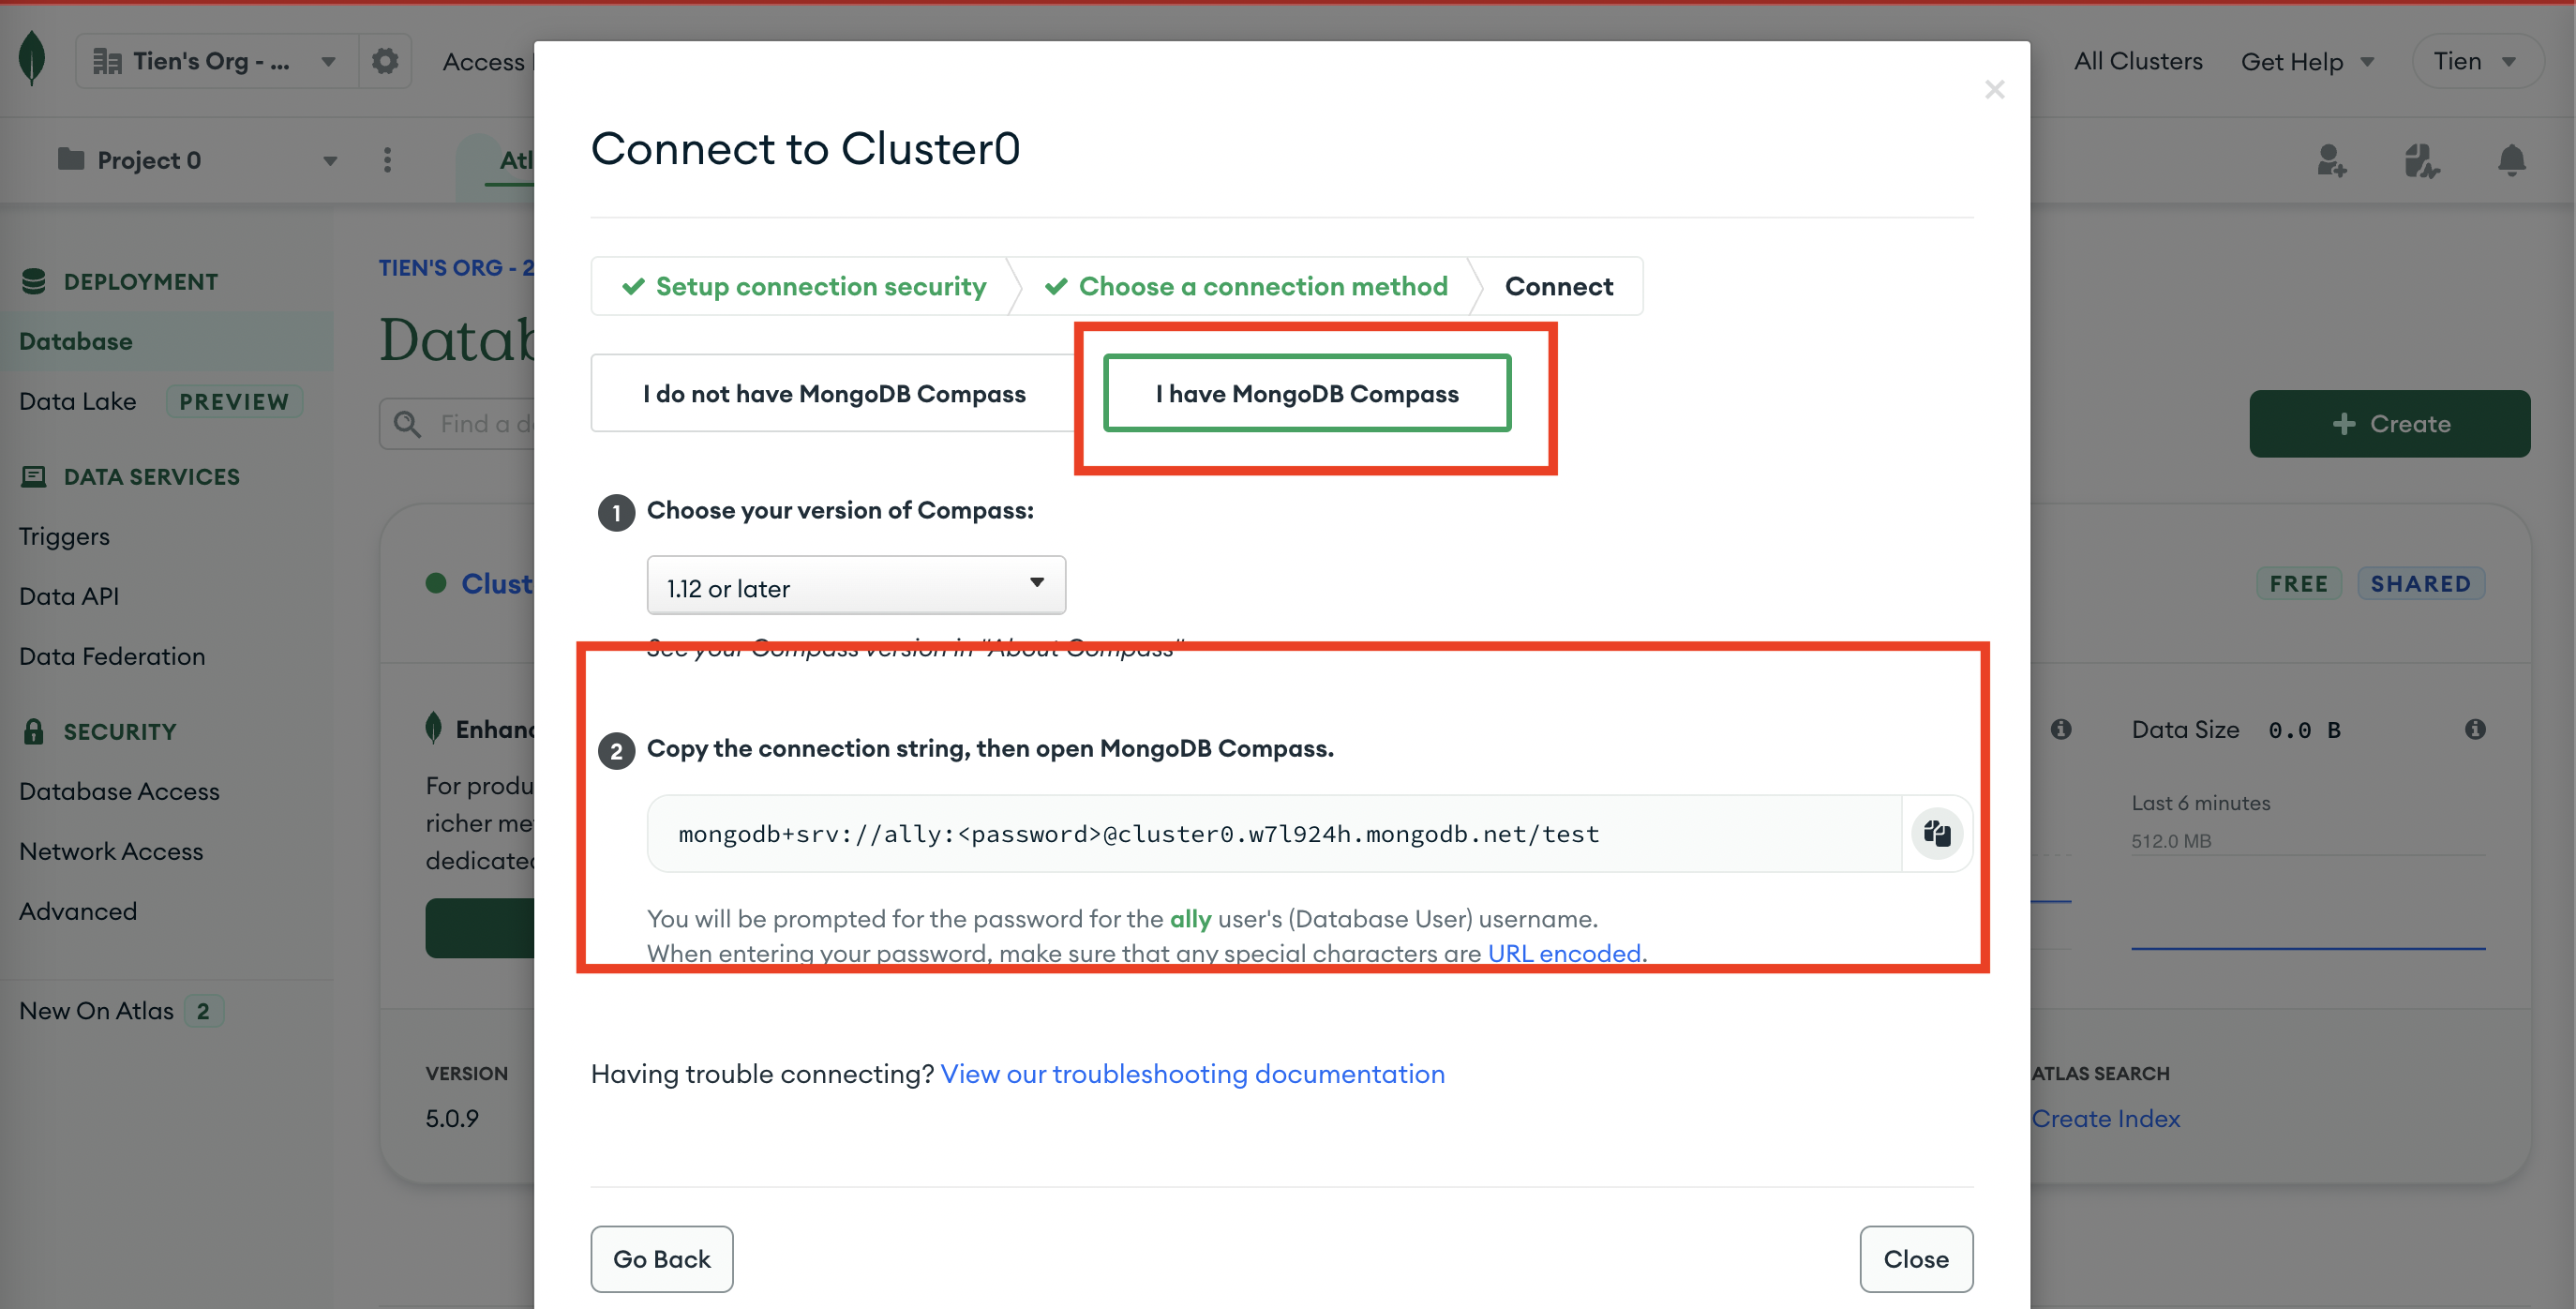
- Your cluster is now ready to connect to the local Compass. Let's get URI. (URI is short for Uniform Resource Identifier )
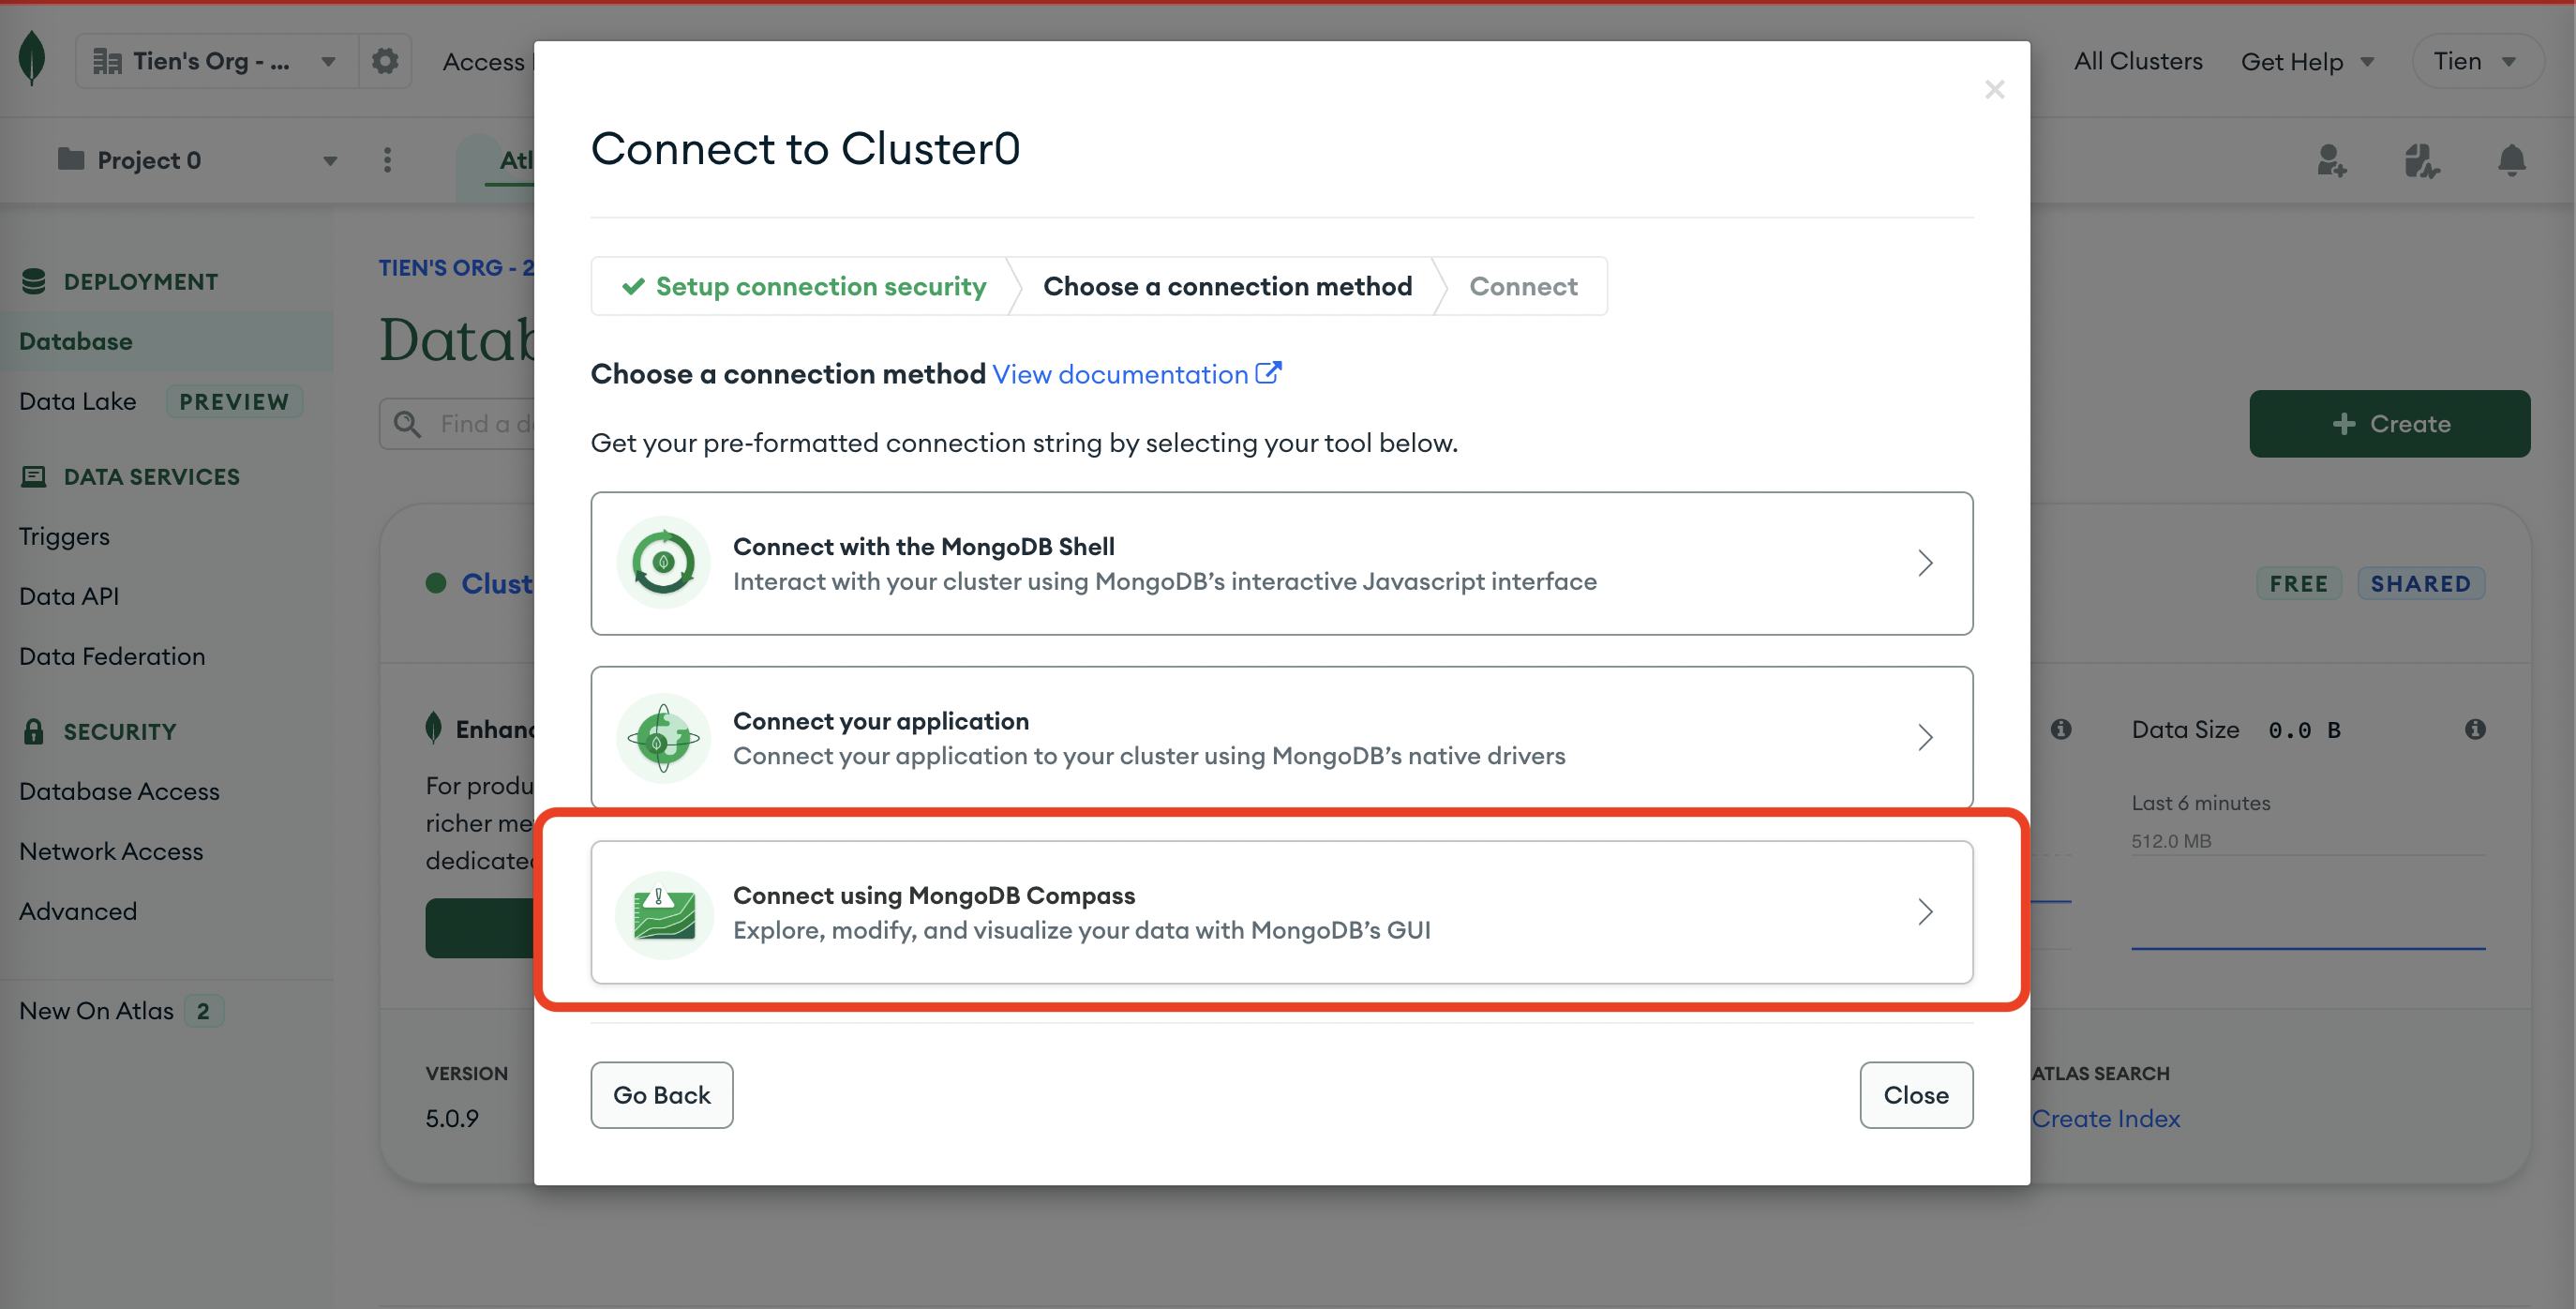
- Replace username and password with your real password and copy the URI. For example:
mogo_uri/username:password/as1245.atlas.com..
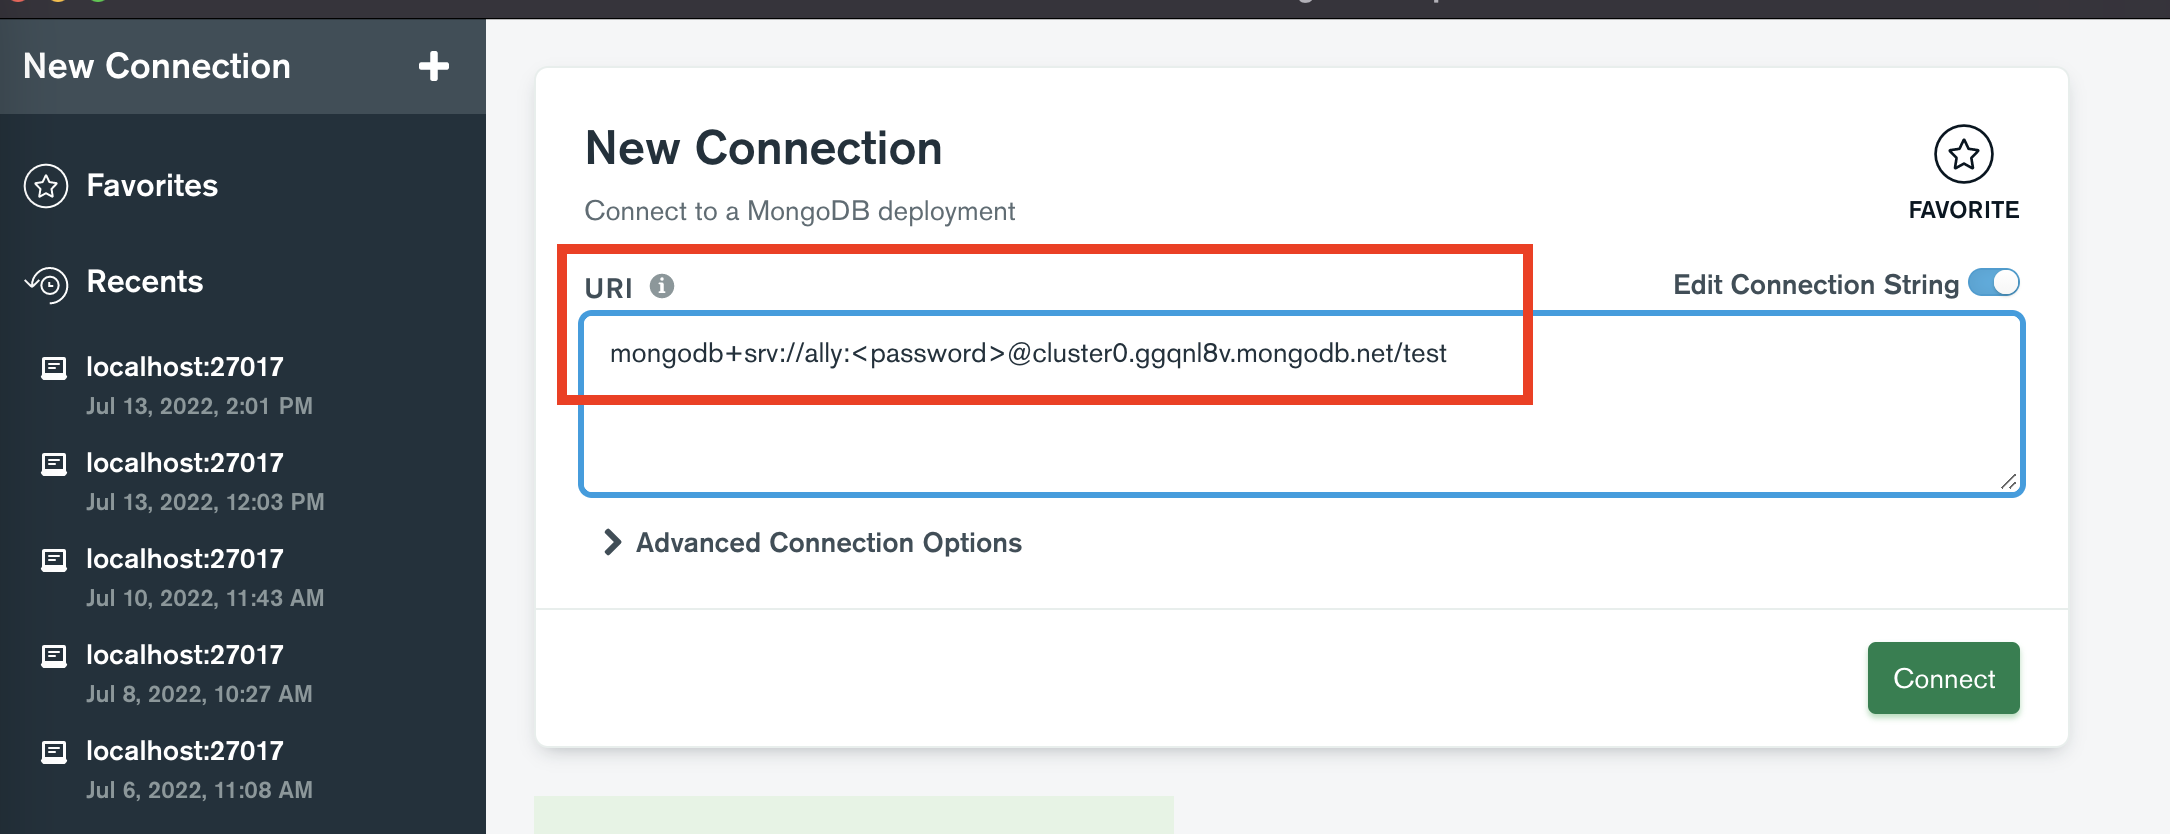
With the above steps, you already have a cloud server waiting. From now we will connect your local to the cloud via Mongo Compass.
- Paste your URI here to make new connection.
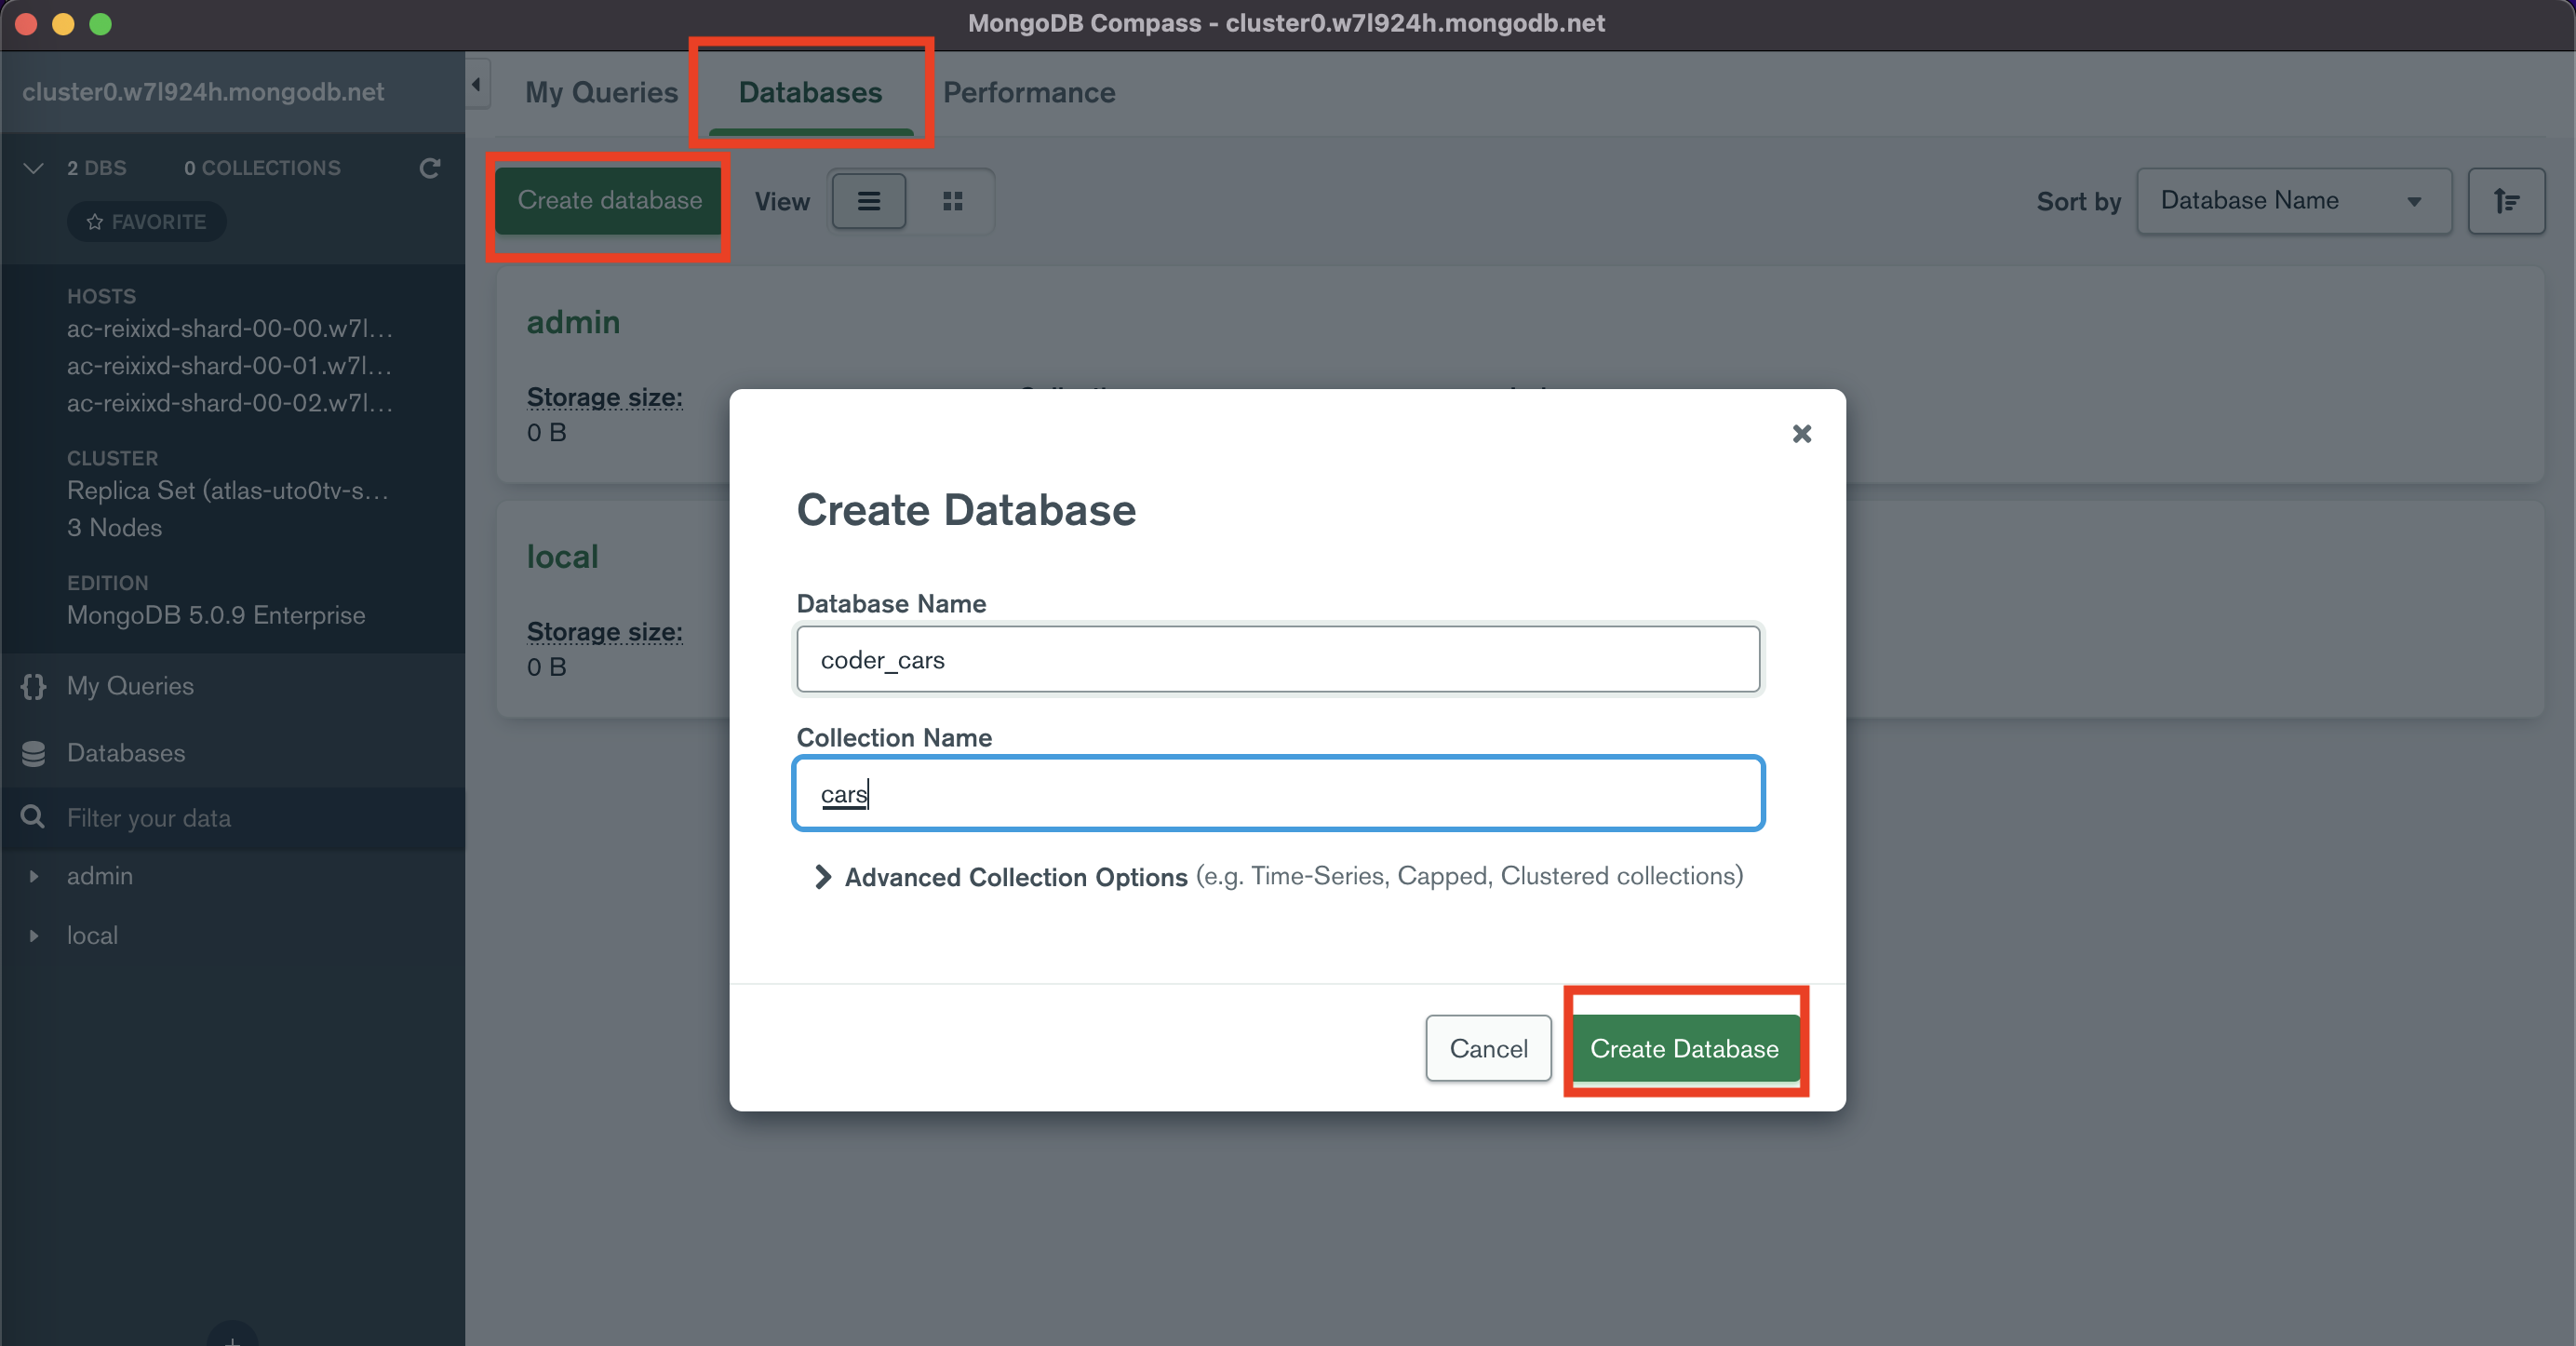
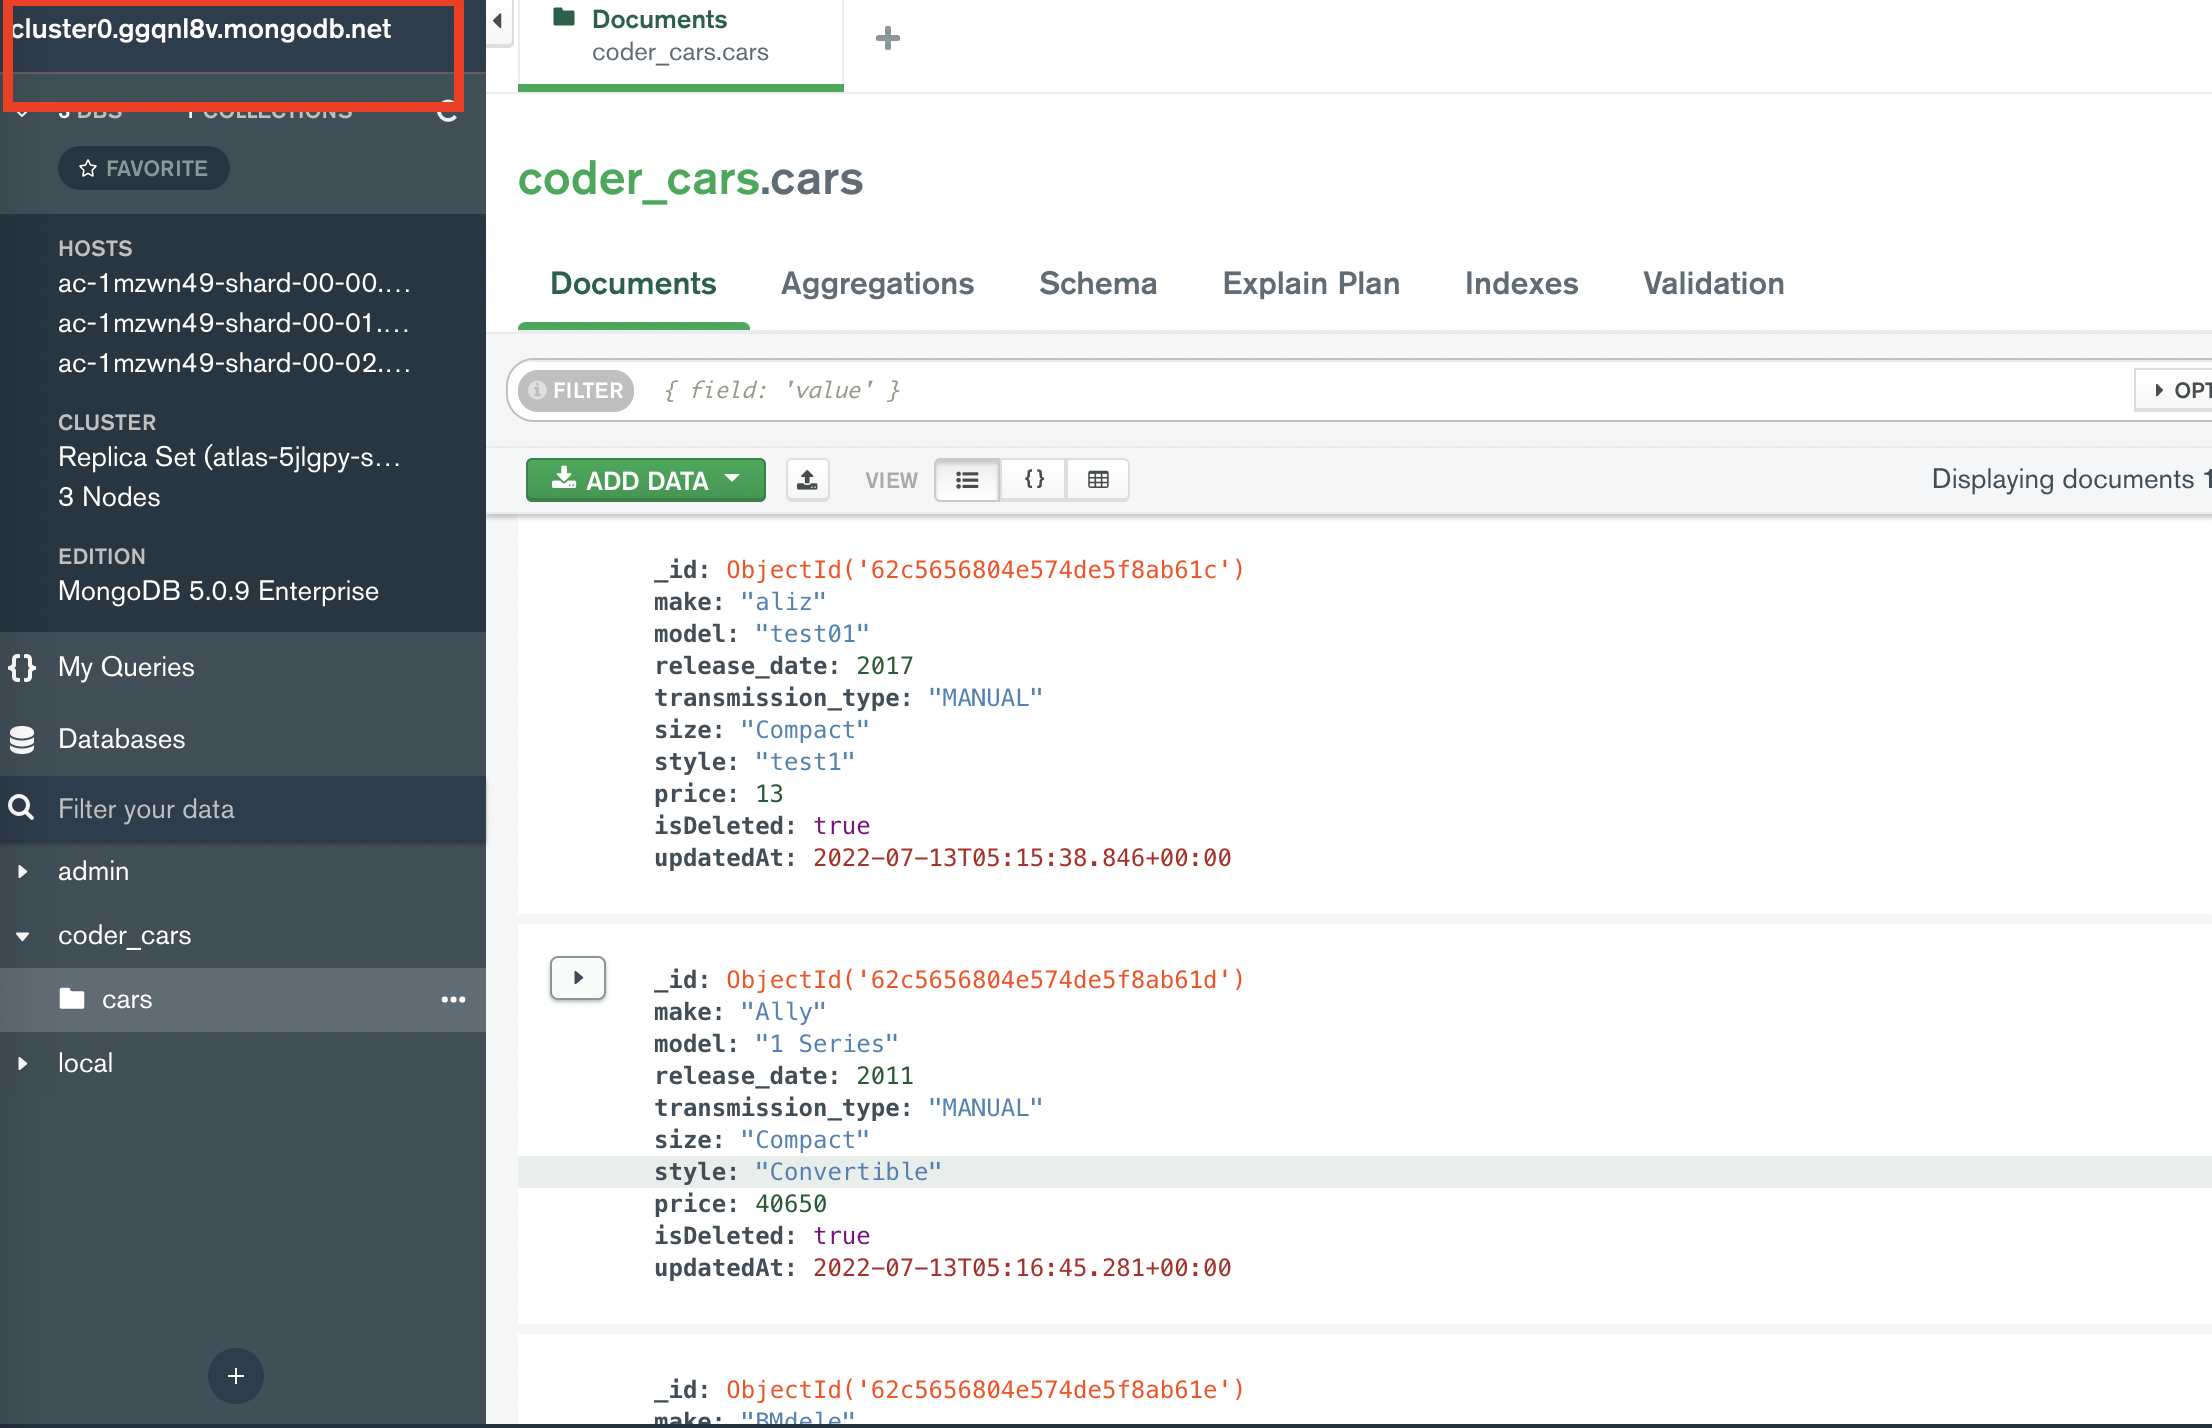
- Look at the left corner to check up what server you're connecting to. If it's a cluster, you can now start importing data.

- In tab Database, click on Create database.
- Select your data type, in this case is
jsonand Import.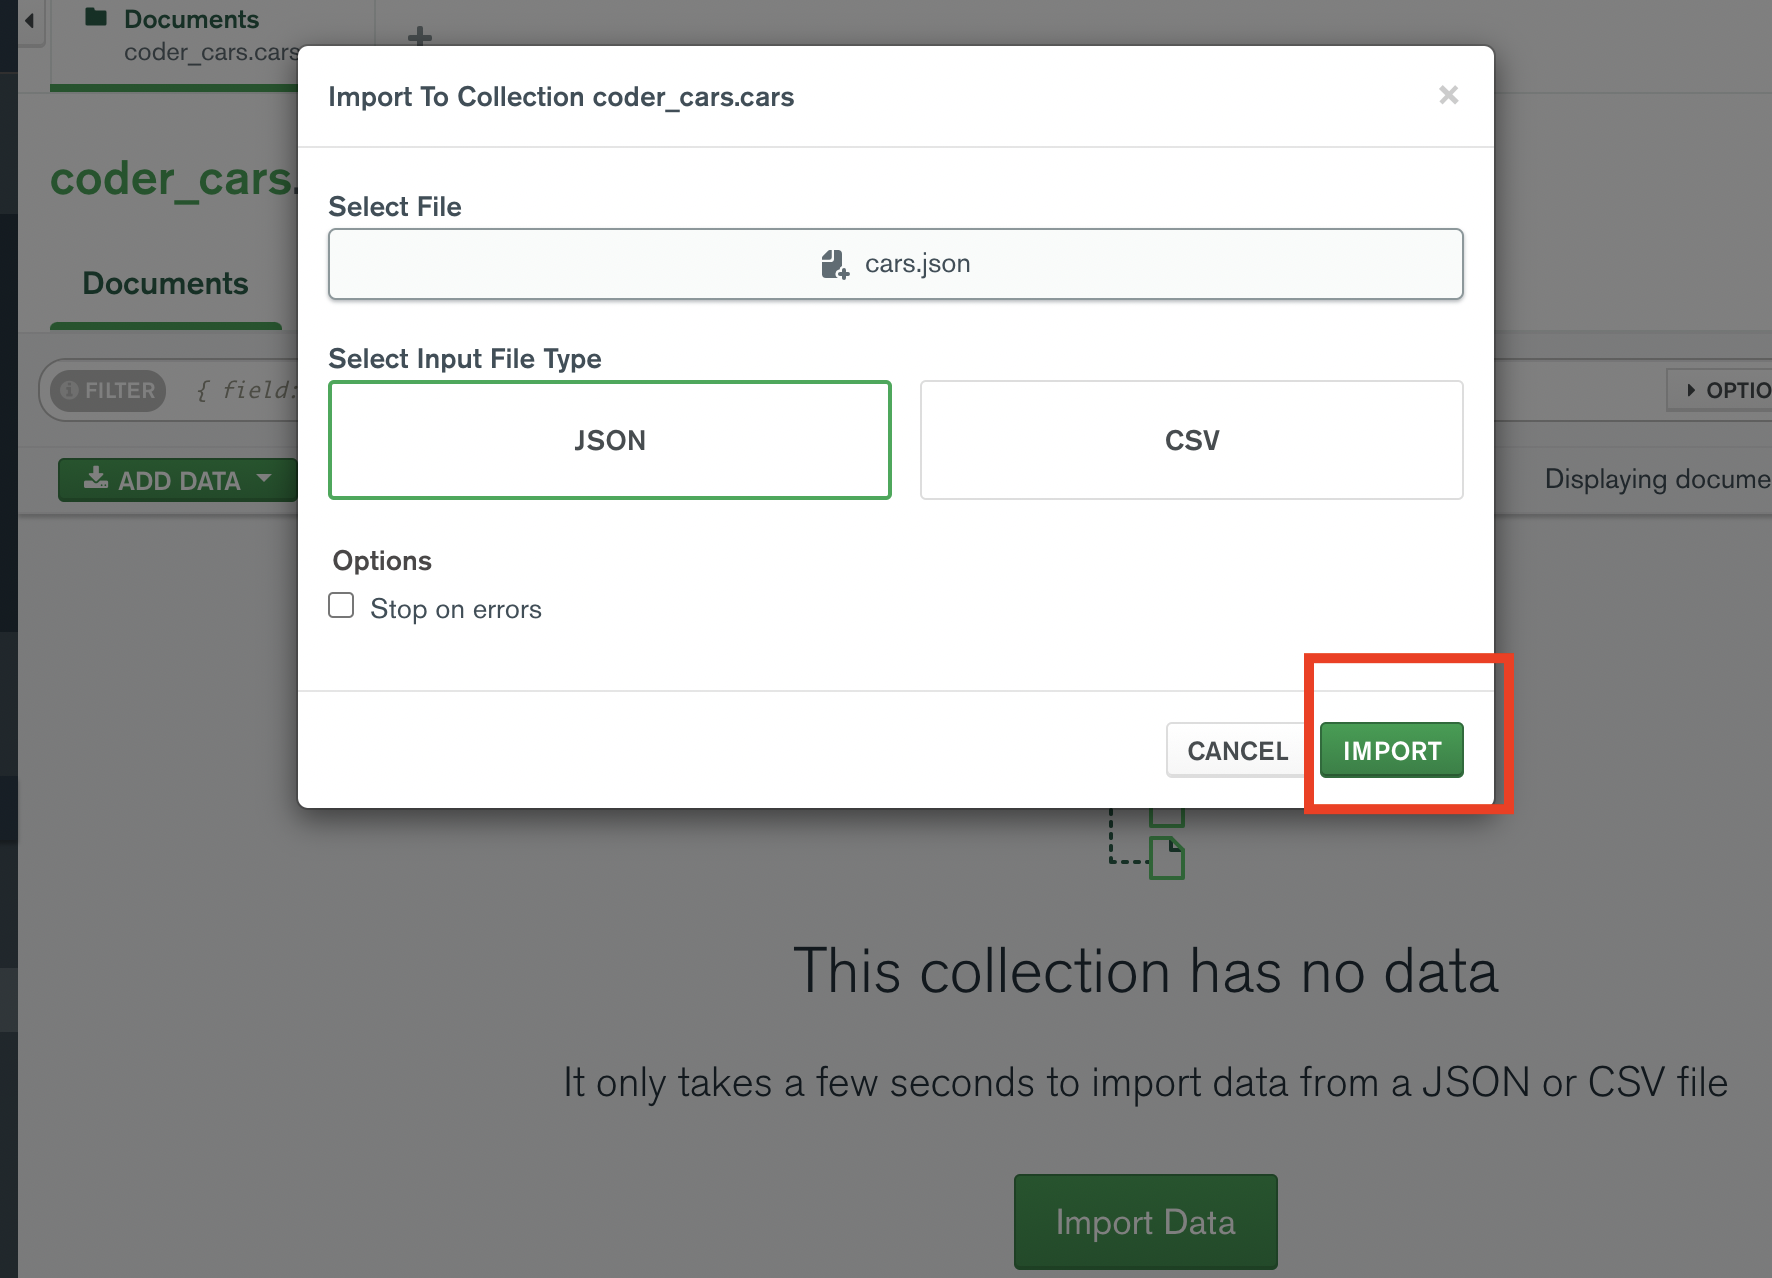
- This is the expected result.
Now, let's get back to your Atlas!
- Switch to the Collections tab to see imported data
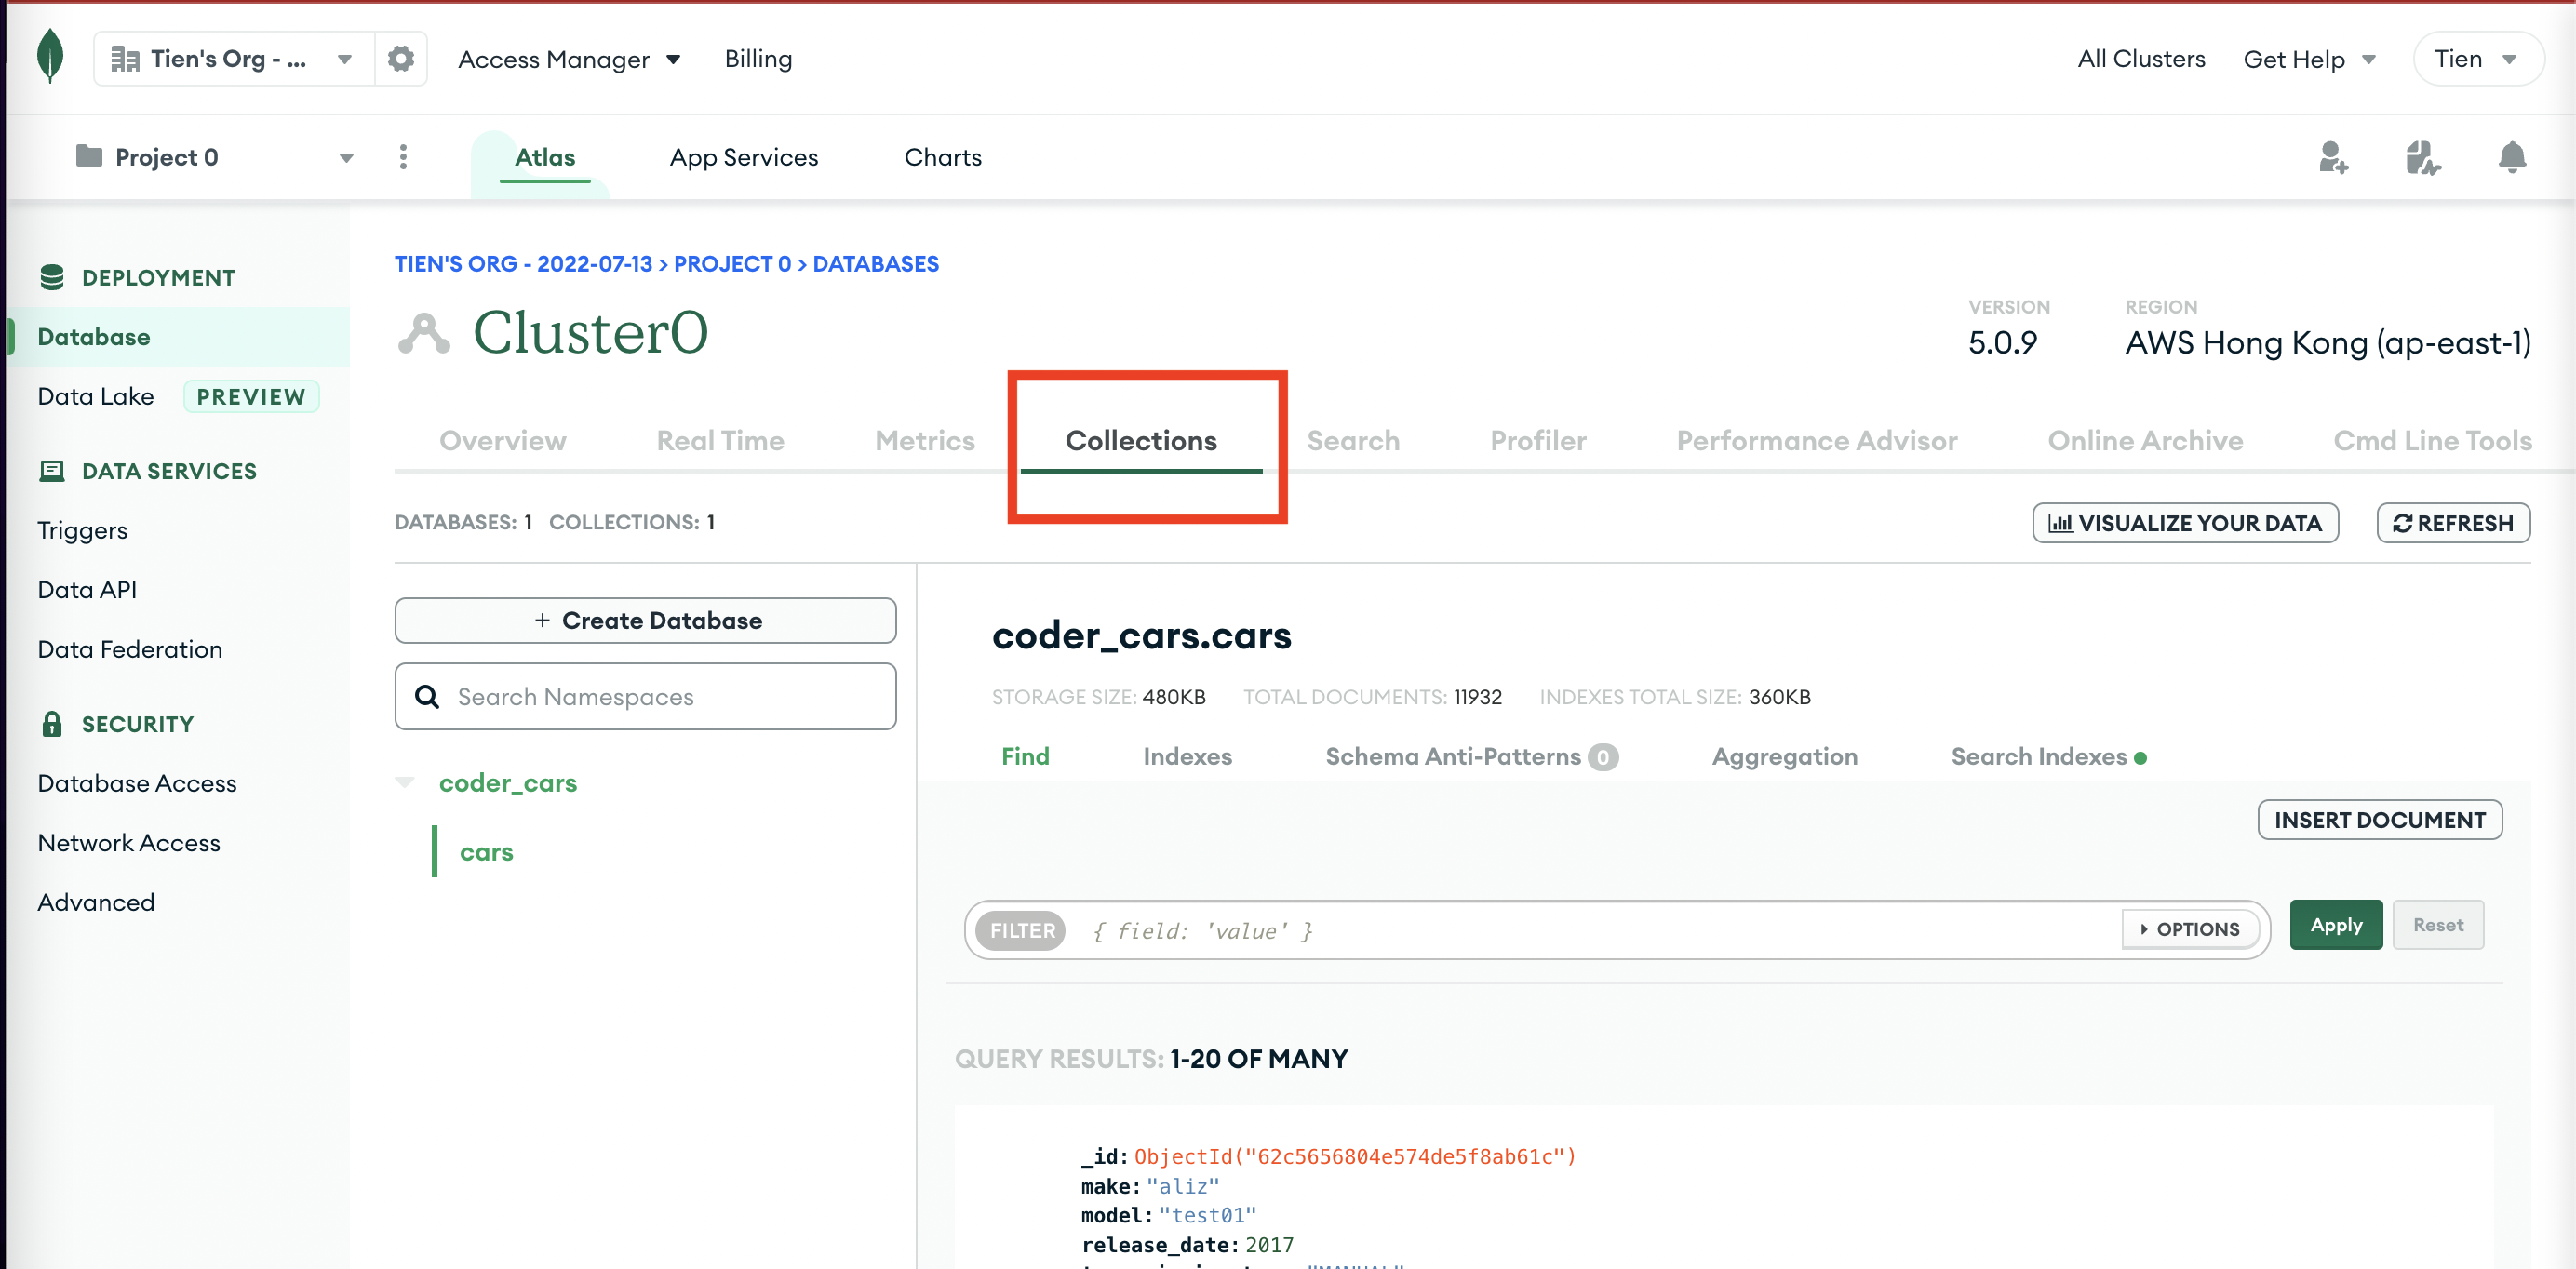
If you see your data then pad yourself in the back.
- In your
.env, connect Atlas server to your backend project.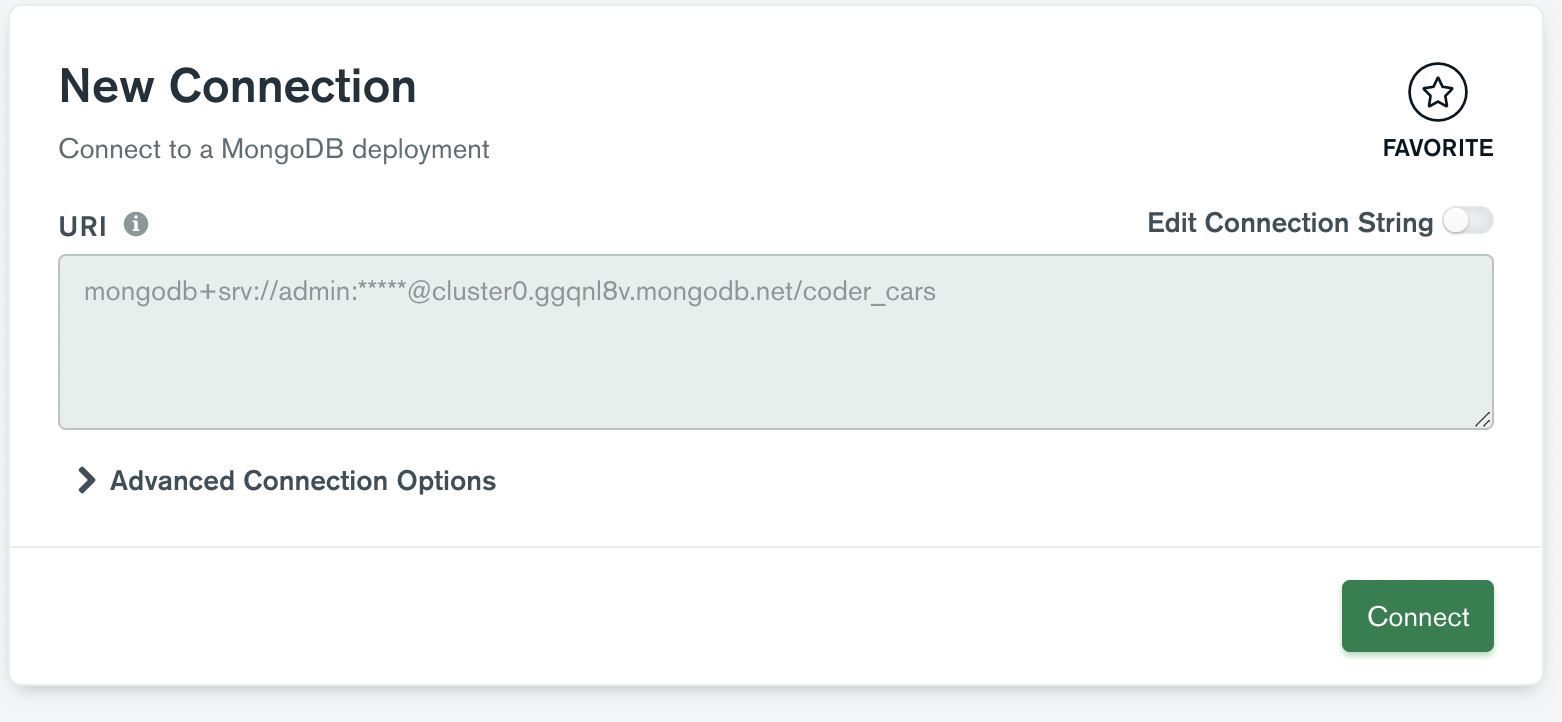

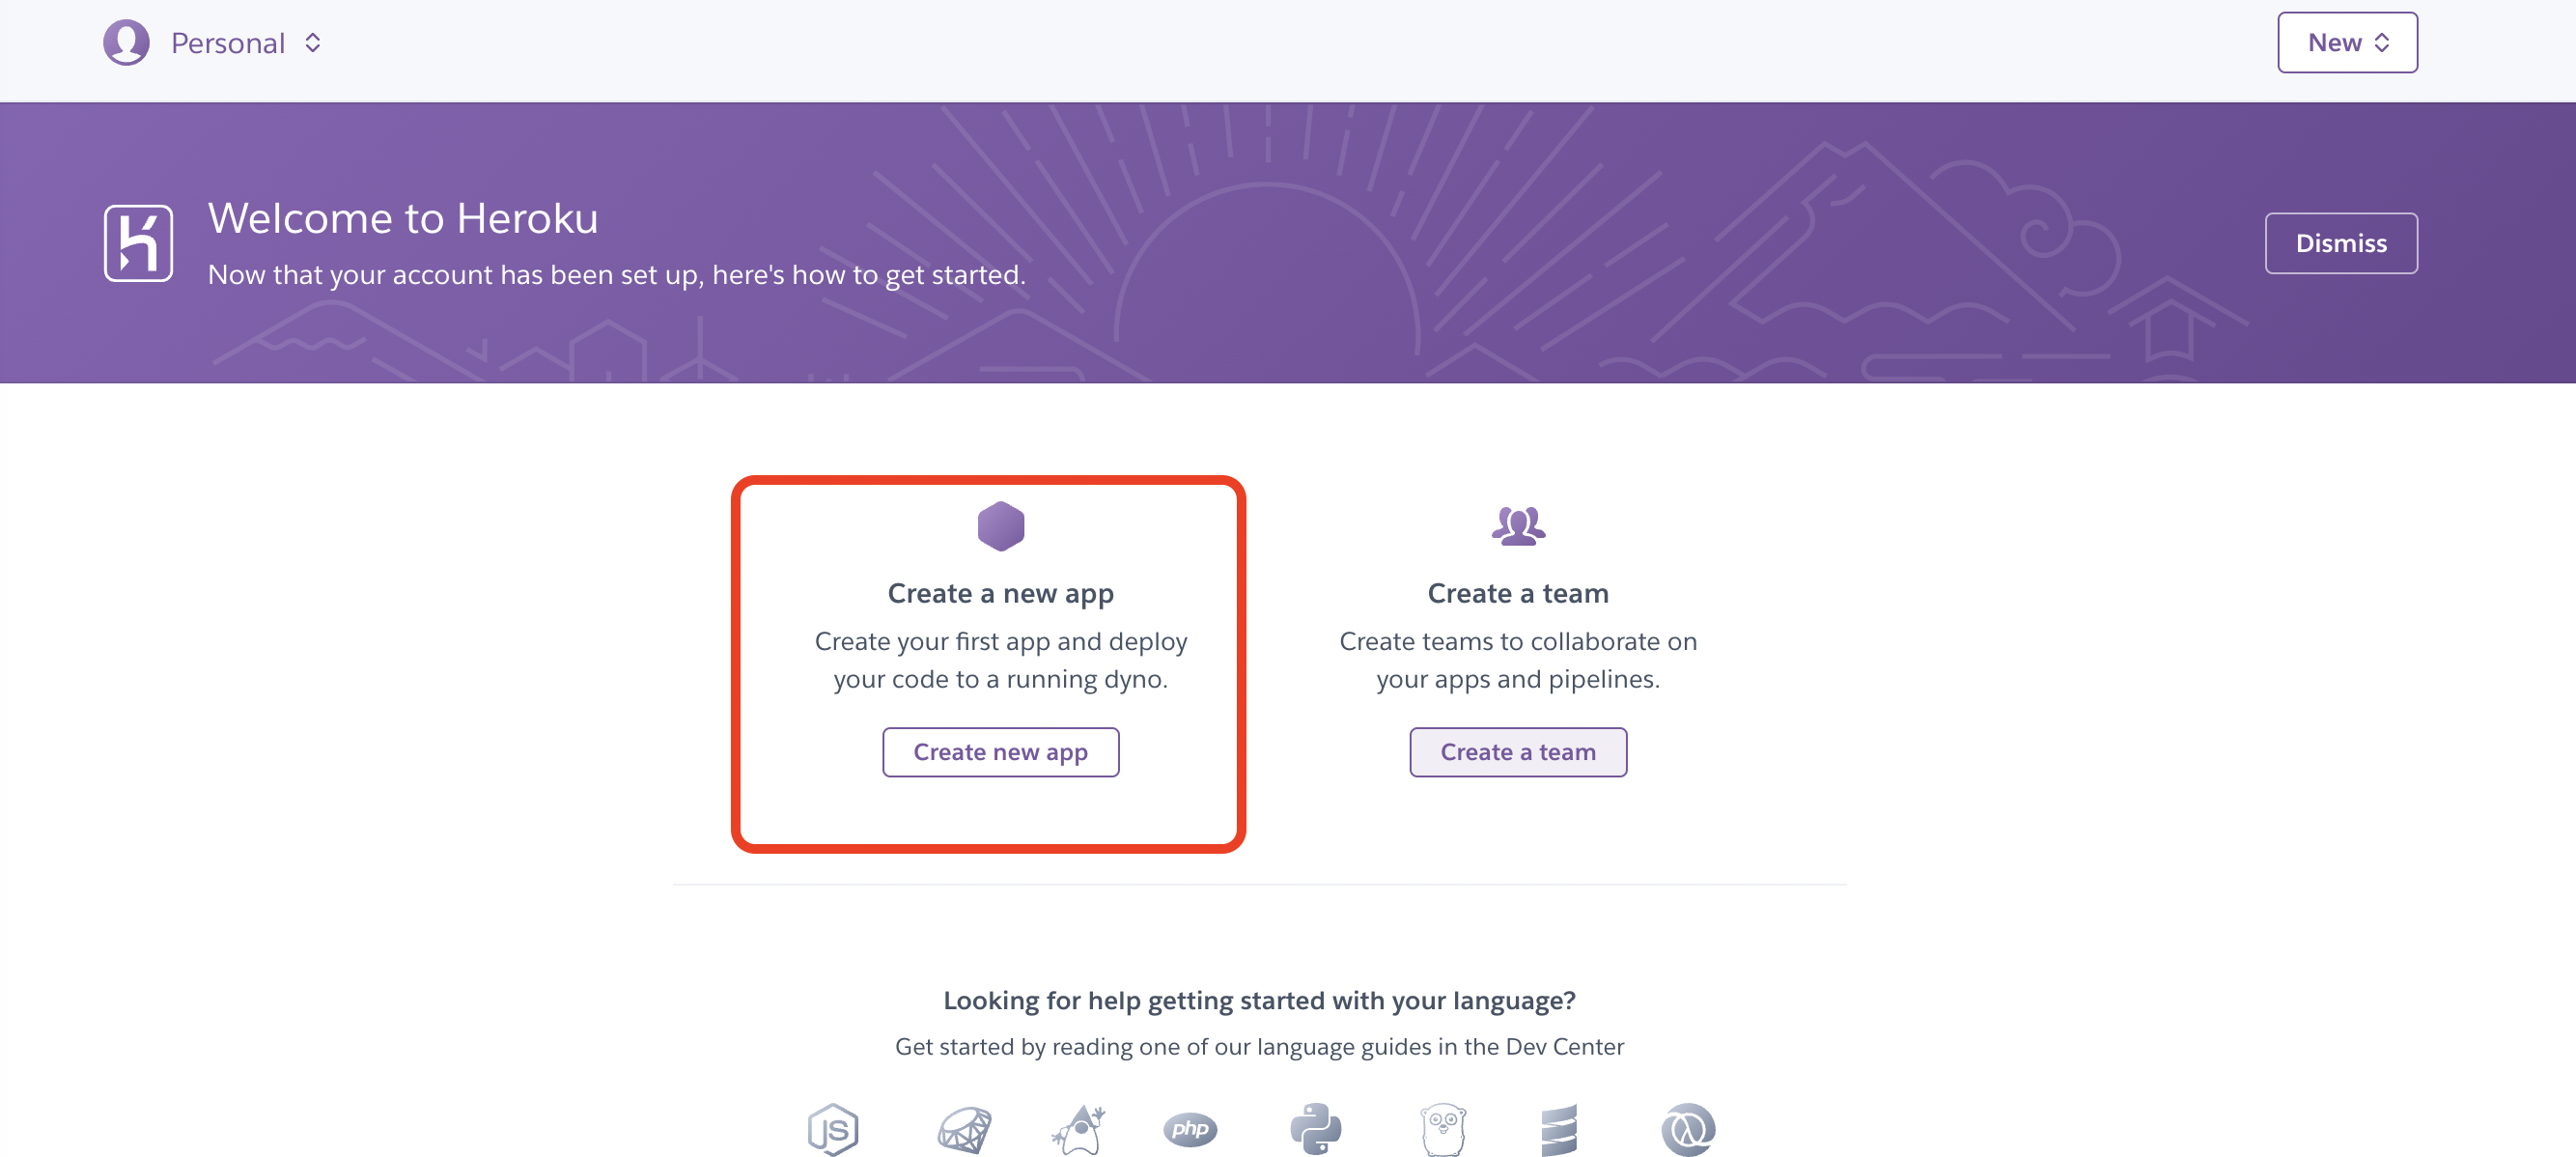
- Create Heroku account
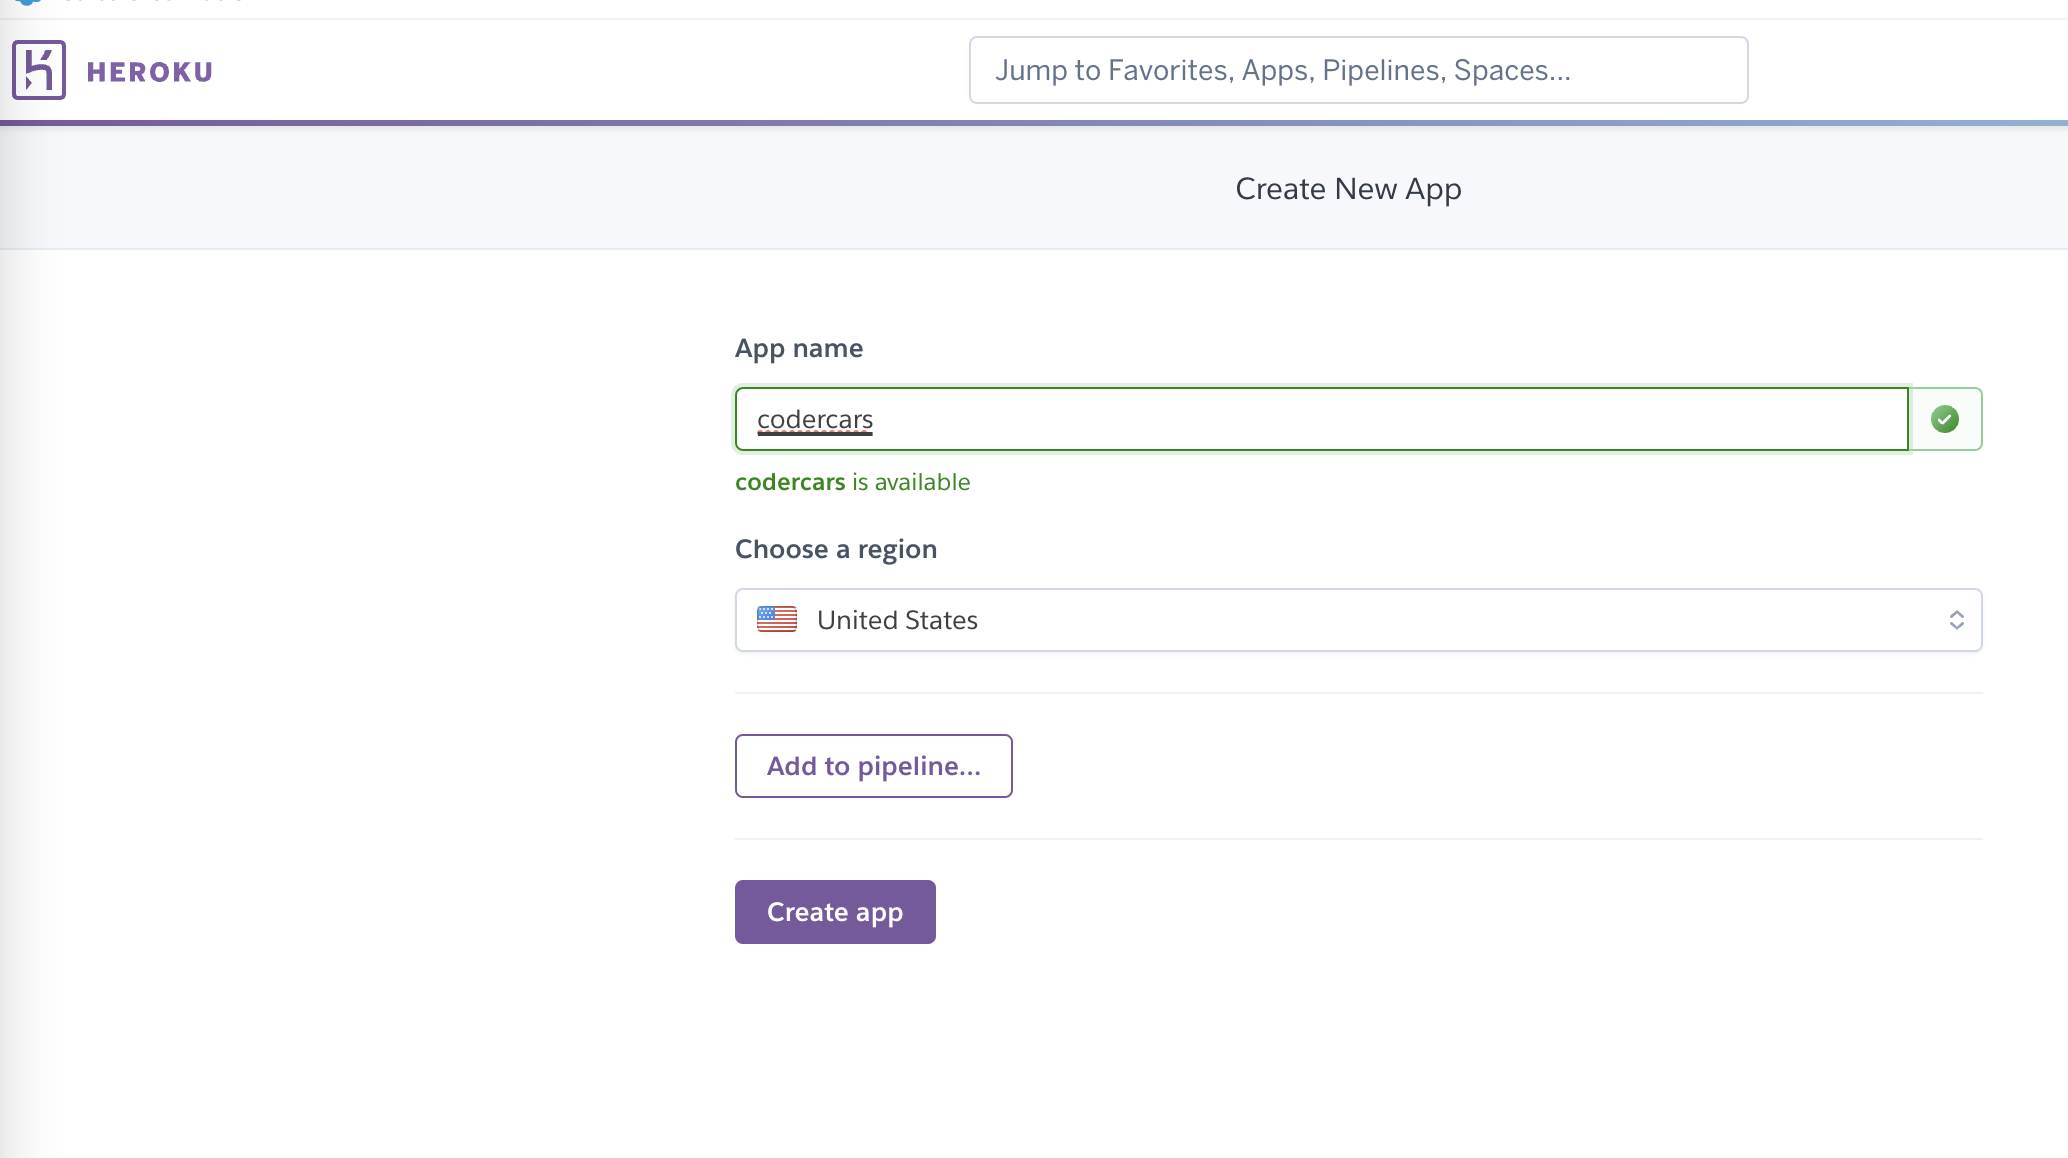
- Create a new project with this button.
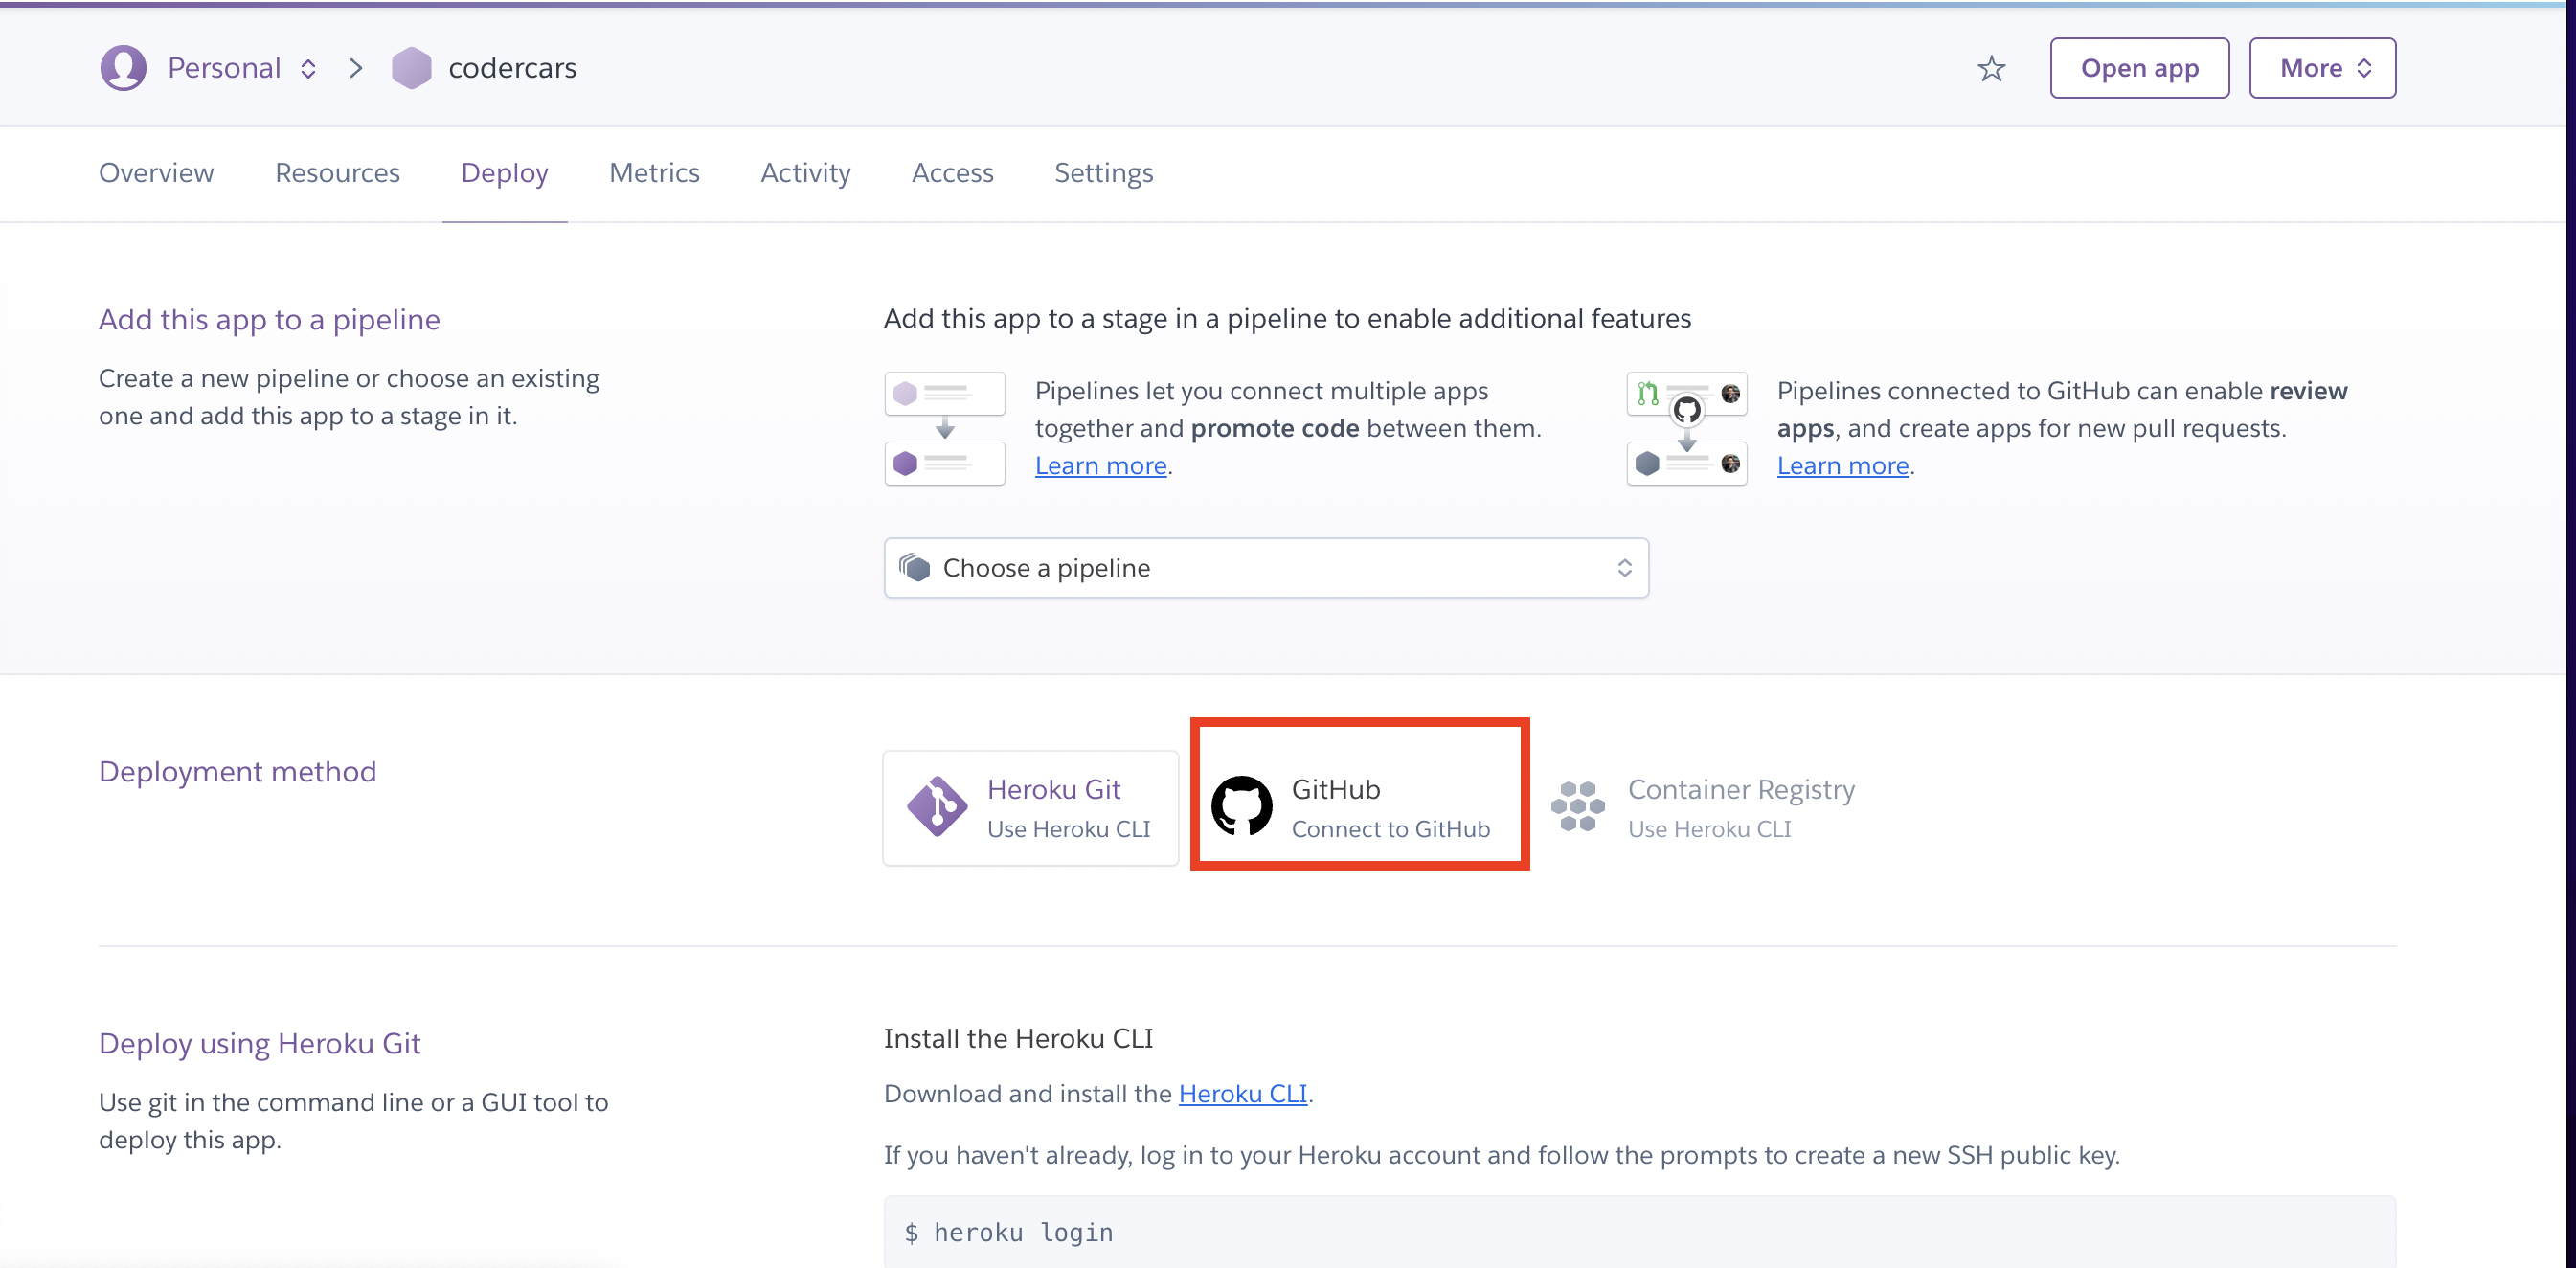
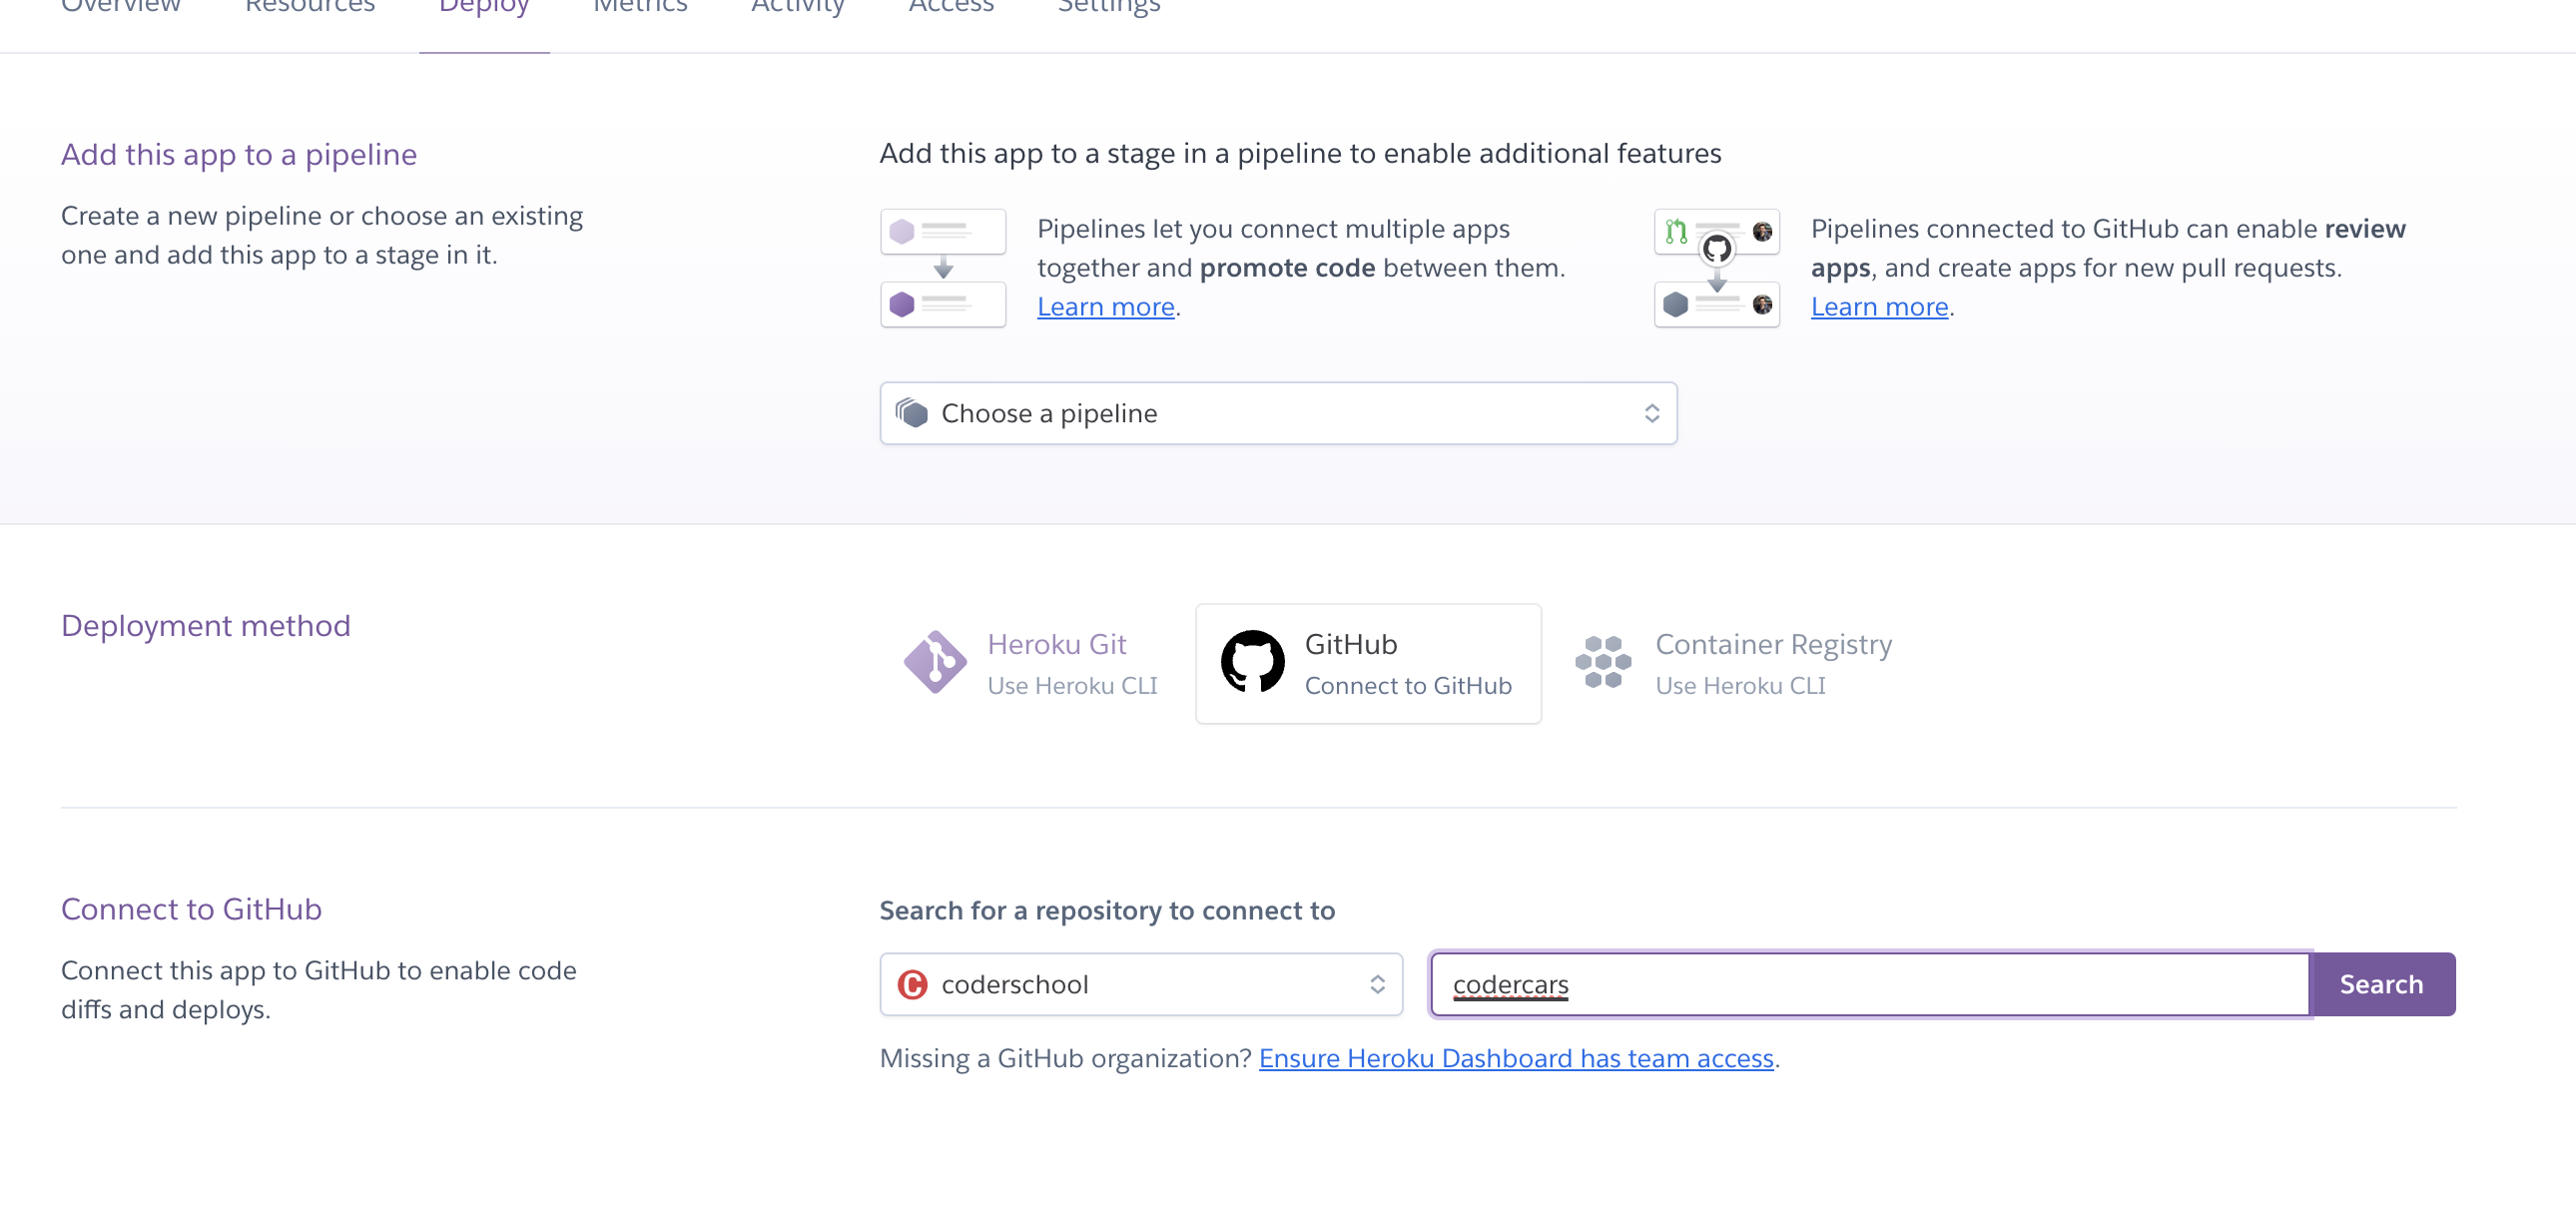
- Connect GitHub and Heroku
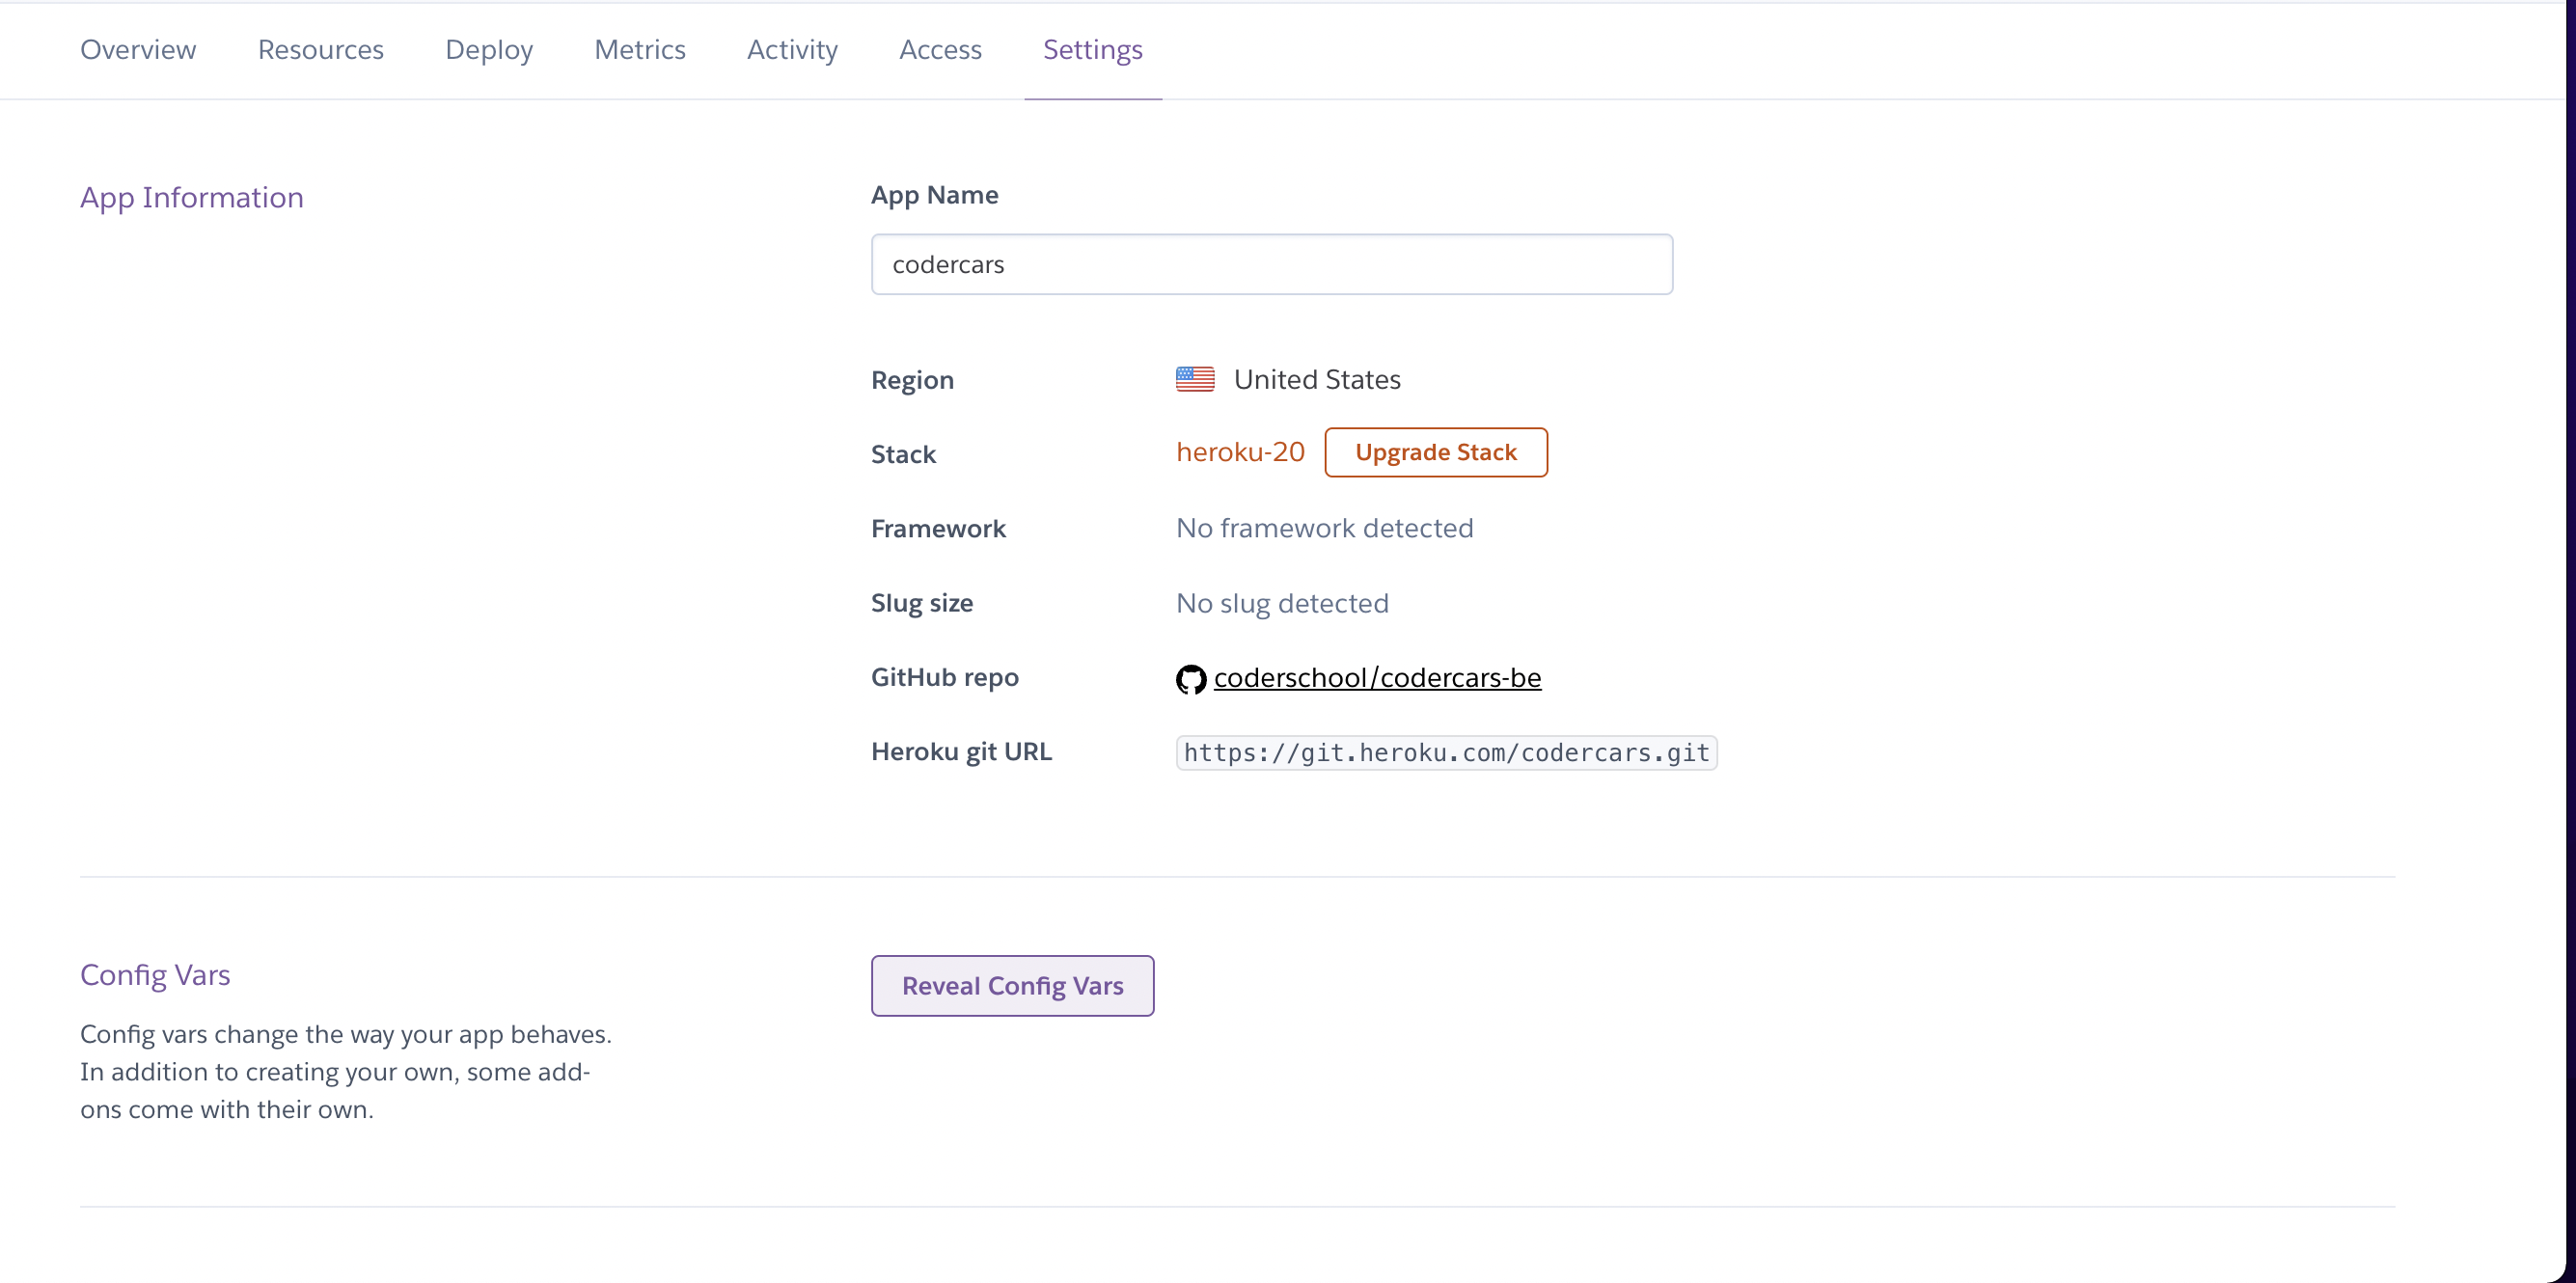
- Config Heroku env so that it point to your Atlas cluster for data query. Key:
MONGO_URI. Value: your atlas Cluster URI.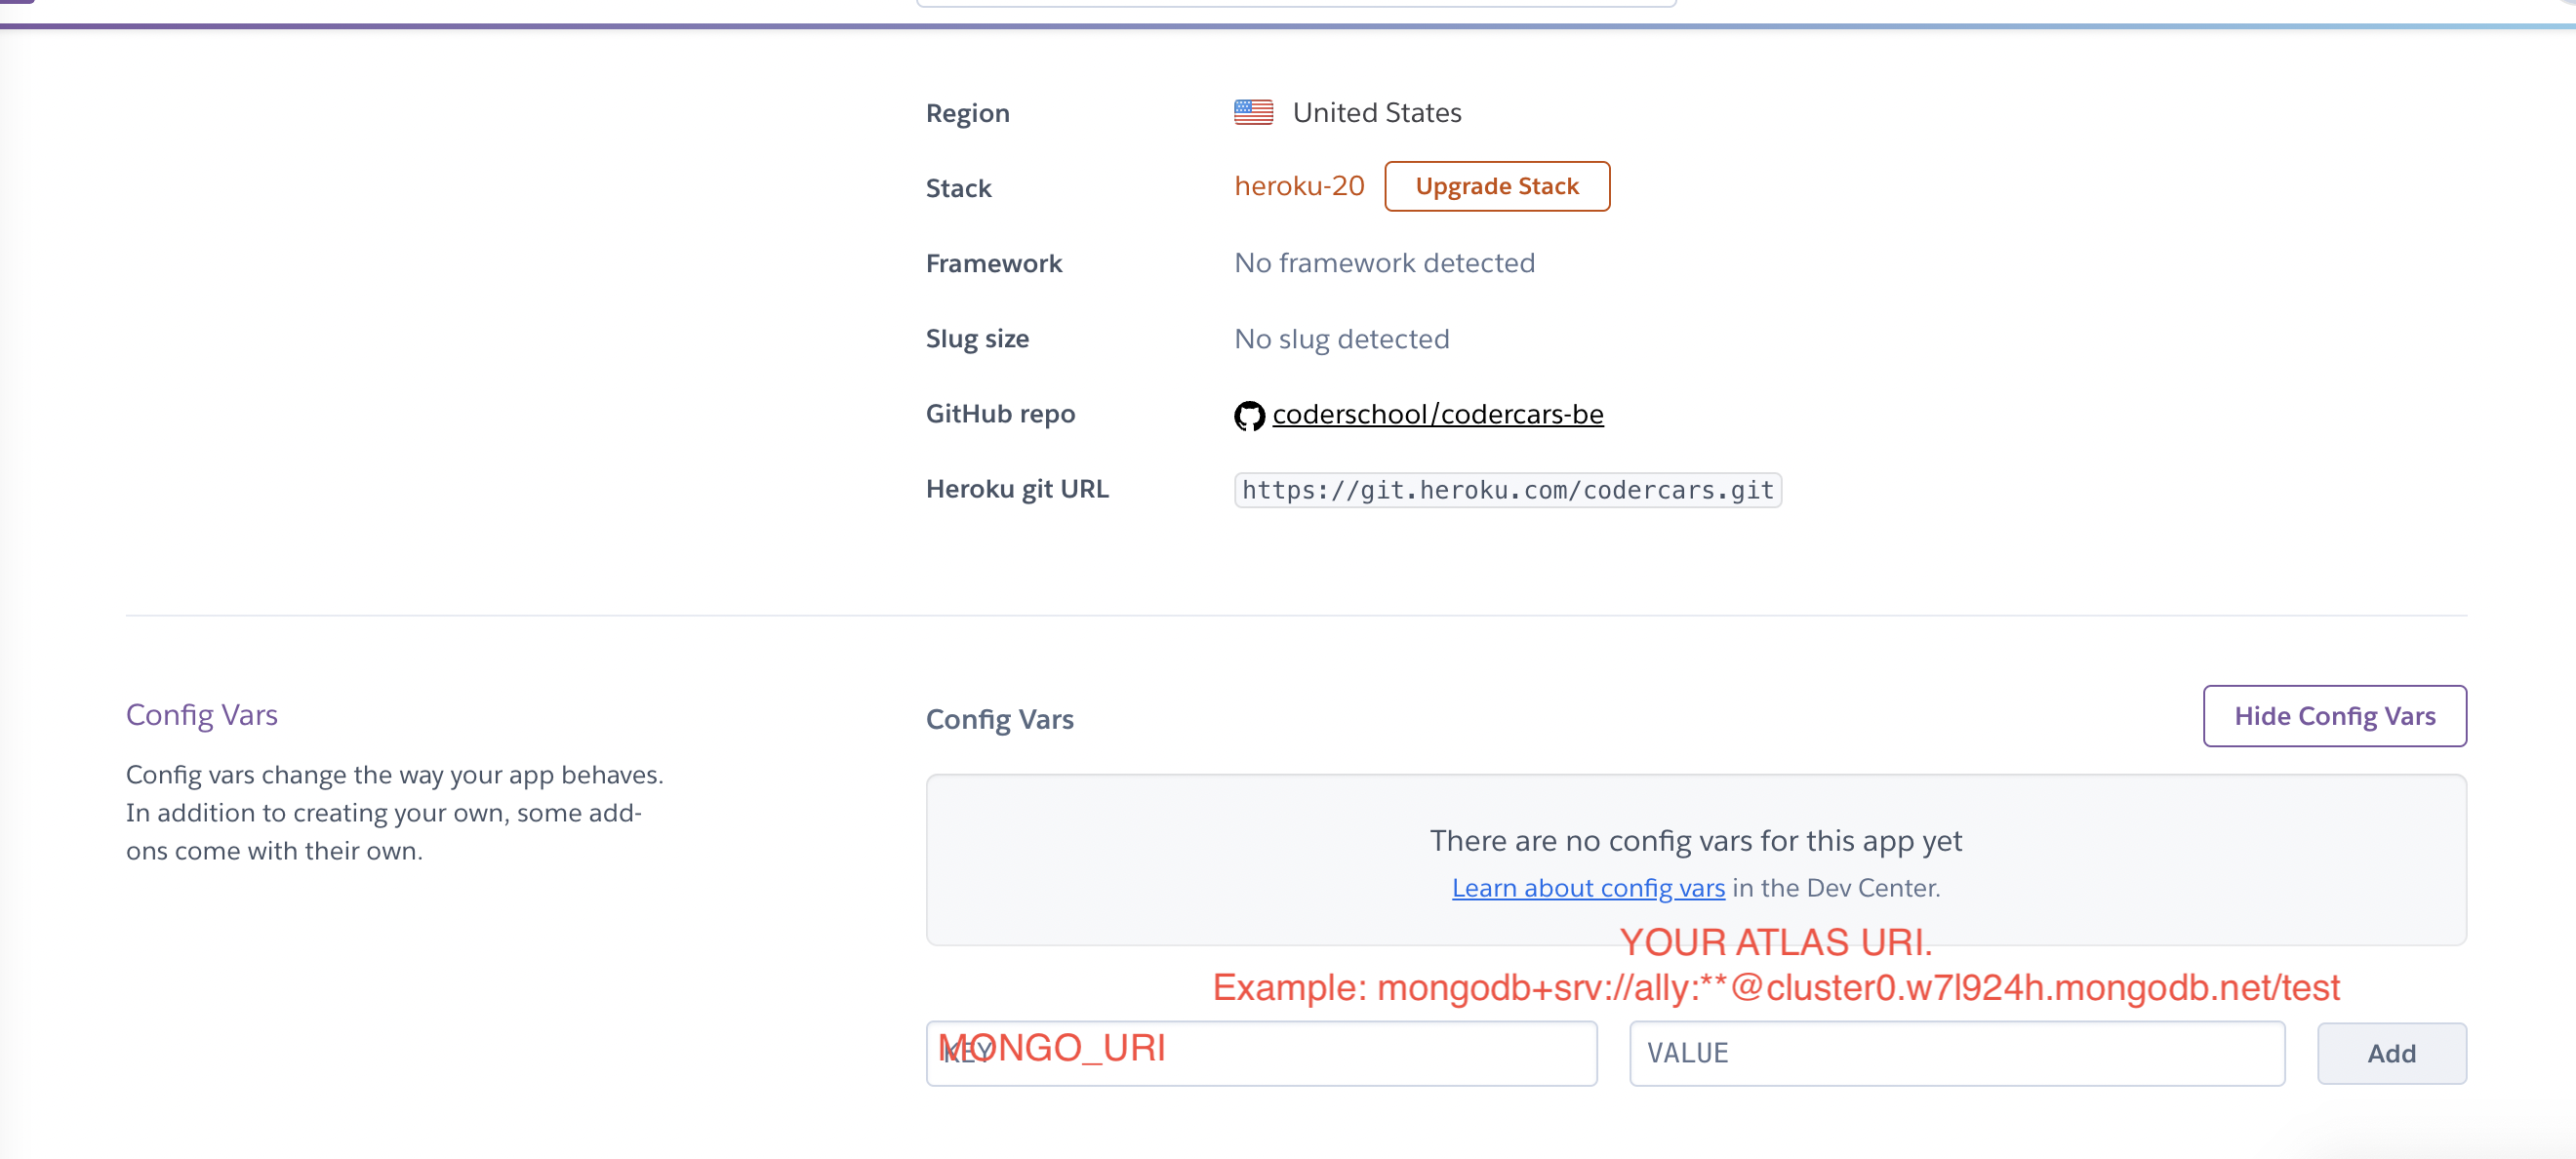
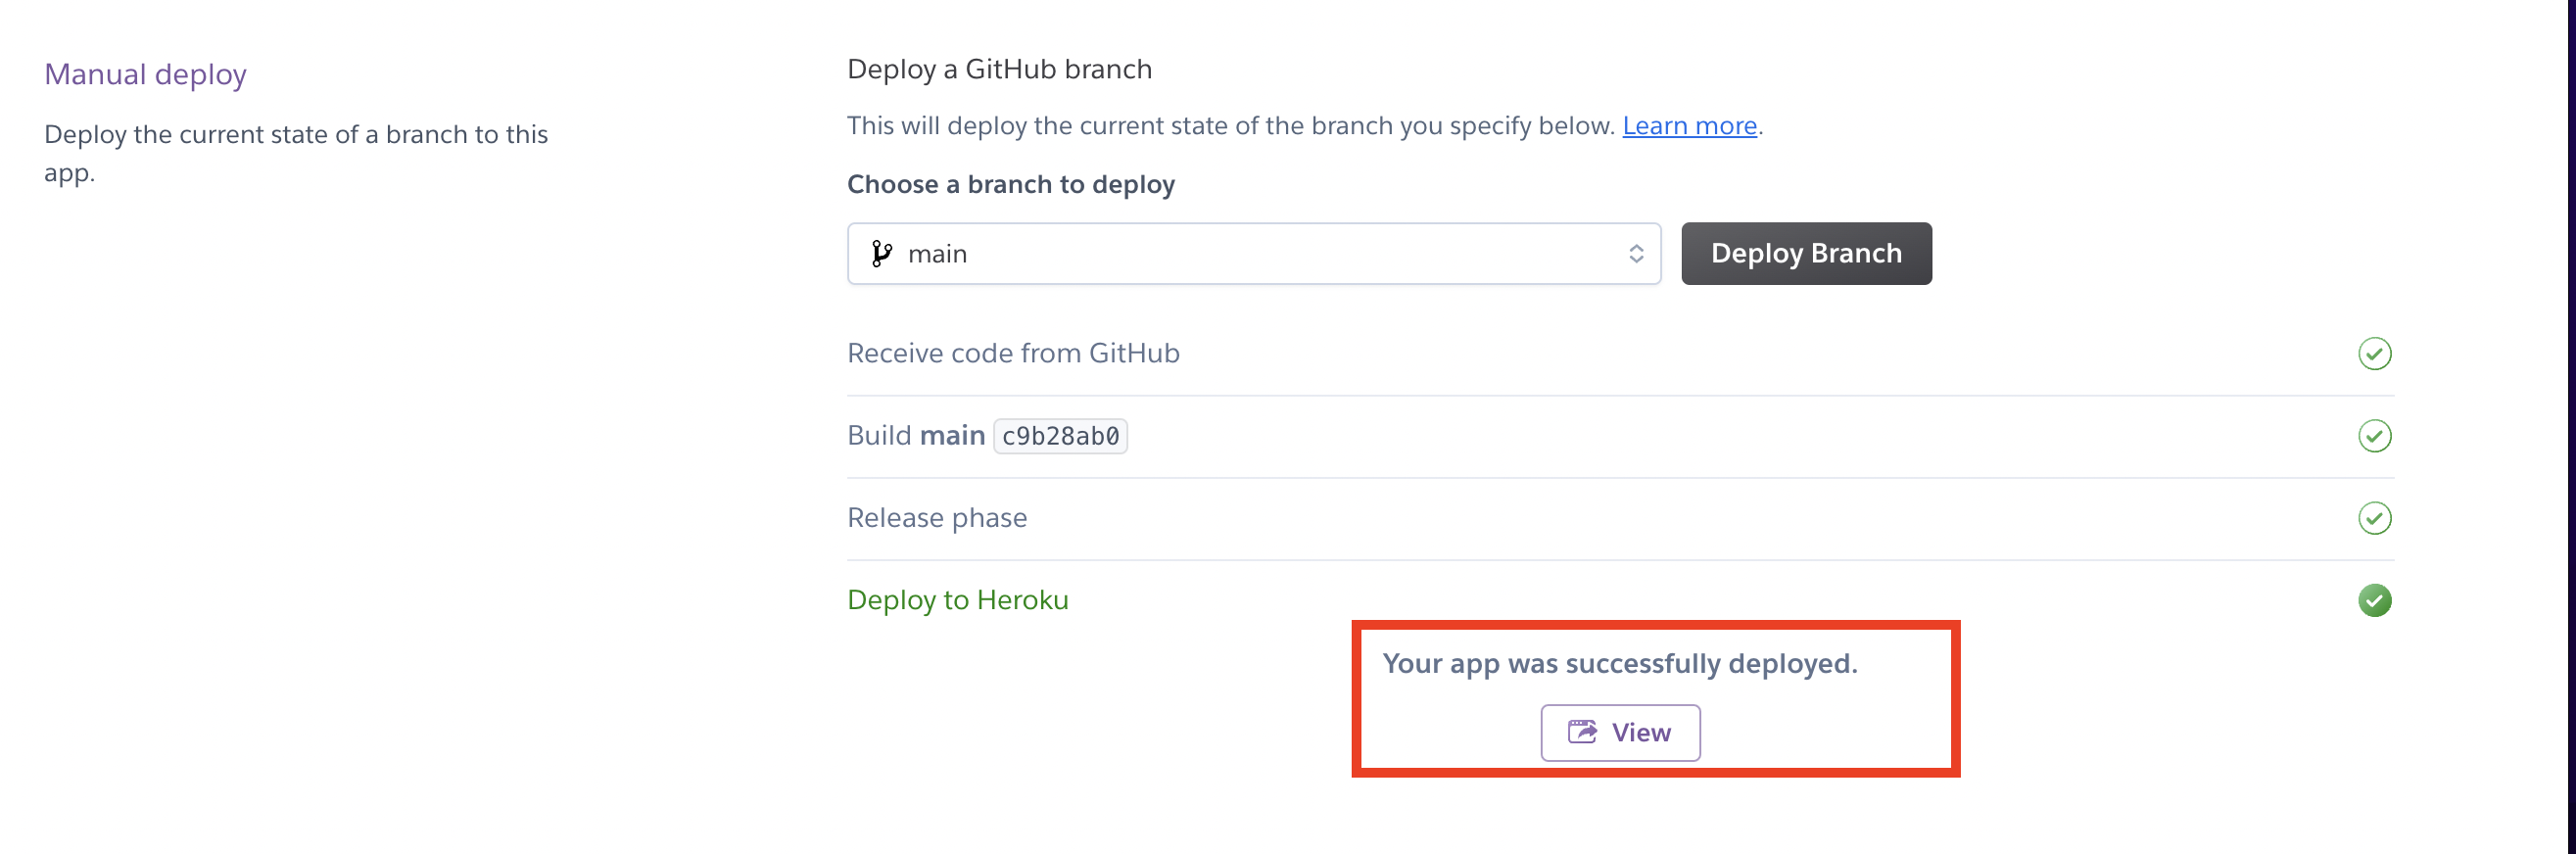
- Choose the branch
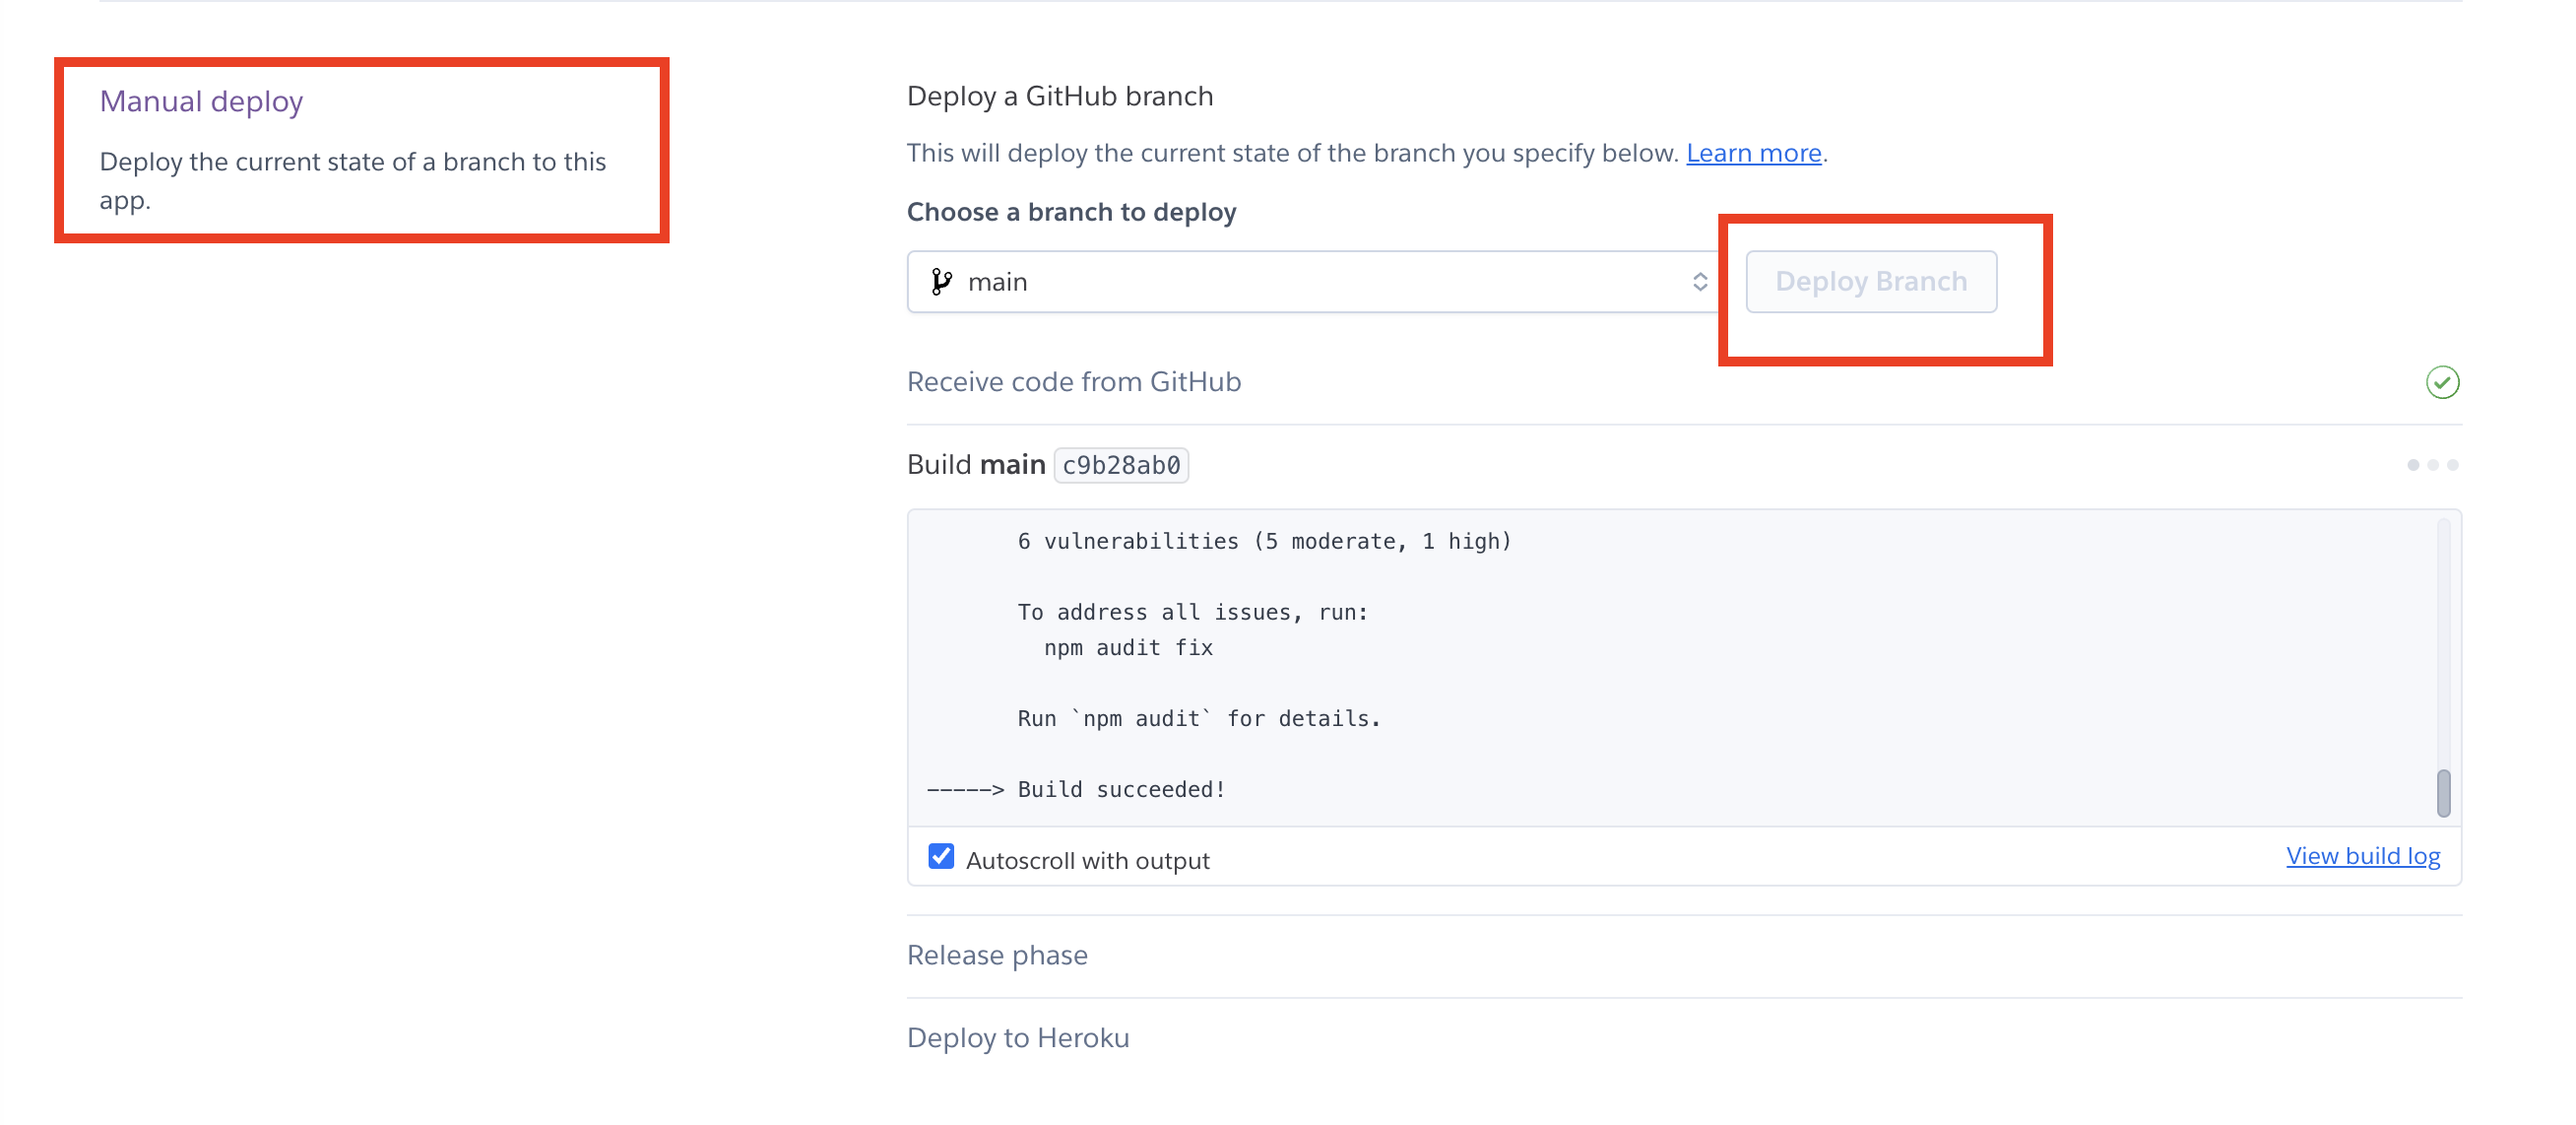
- Now your app is ready to deploy.