Let's create a Calculator App!
As your first big project, there will be a lot of detailed instructions that you can follow along. As you progress, you will be given fewer and fewer instructions (but more freedom) to work with until you can make an app just from a simple idea!
Demo: https://coderschool-calculator.netlify.app/
⚠️ Warning: There are different approaches to a problem, you are encouraged to consider other solutions outside of this guide. But beware that some of the solutions you see might not be good ones. For example, you may see people using eval() to calculate the result, which is a bad practice because eval() is vulnerable to malicious code injection by hackers. You can learn more about why we shouldn't use eval() here.
Requirement:
UX/UI:
- Must style to specifications (customization encouraged).
- The site must be responsive.
Functionality:
- Have at least the clear,
=,+and-functions.
Optional:
- Add the ability to chaining operations (e.g.
1 + 2 + 3 - 4) and display the result after each operation (check the demo). - Make the calculator work properly when you click any operator twice (or more). For example, you click
1then+, then2, then+, then+again. - Soft reset the calculator when there's an error (e.g. NaN) so that we can use the calculator again by clicking any number without having to refresh the page.
- Make the DEL button work as expected.
- Remove leading zeros.
Submission:
You can work on an online editor like CodeSandbox or work locally with Visual Studio Code then push to Github. Then submit the project link to CoderSchool.
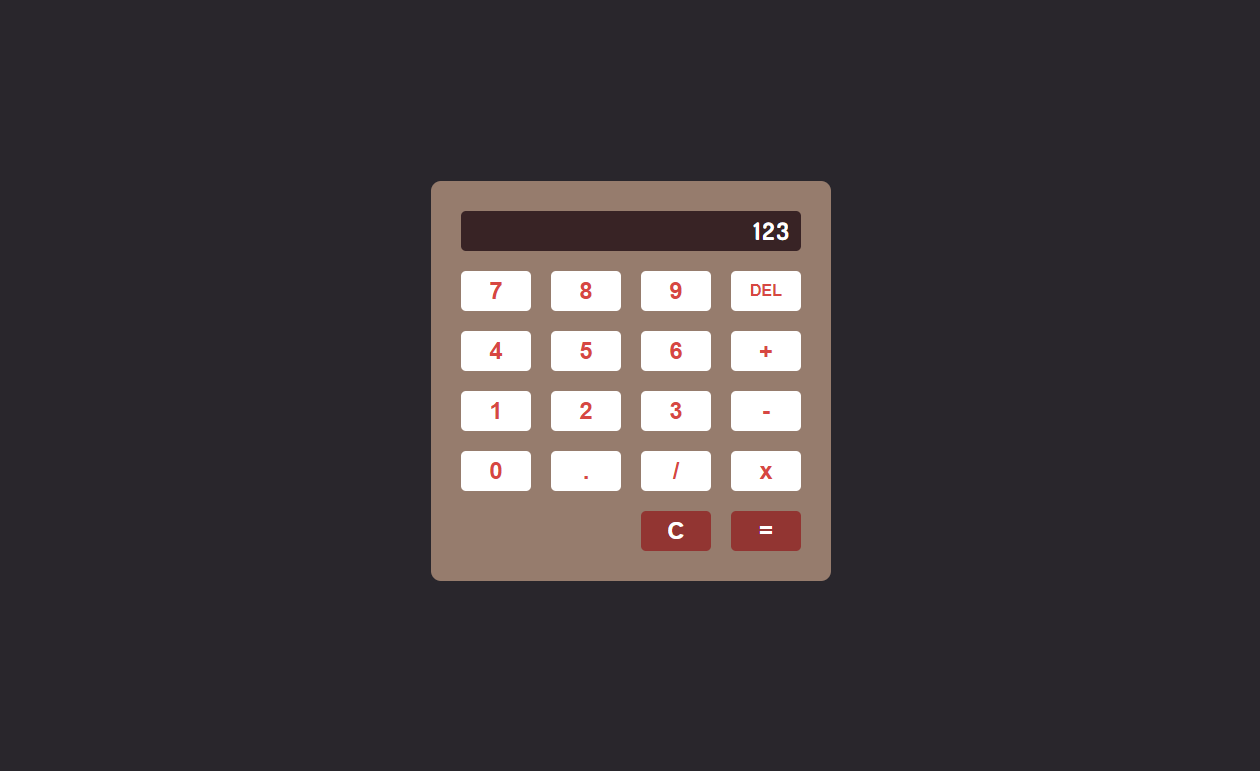
Download the assets here. We will attempt to follow a design by a UX/UI designer.
Each designer may have a different way of presenting the mockup and specifications to you. Sometimes, the design may not be very clear, and as a web developer, we need to be flexible and work with what's given to us. For this exercise, feel free to apply the specifications in your own interpretation.
Specifications:
- Page:
- Background color:
#29262c - Font: Dosis
- Font size: 24px (where applicable)
- Font weight: 700
- Background color:
- Calculator:
- Width: 400px (desktop) or less (mobile)
- Background color:
#967c6d
- Display screen:
- Background color:
#382325
- Background color:
- Button:
- Colors:
#d74742and#fff - Background colors:
#923532and#fff - Height: 50px
- Width: 25% of button area
- Colors:
First, let's create the basic structure of your webpage.
- Create a div with
id="calculator"in the body of your HTML.
Imagine that this div is your final calculator. Give it a background color and a fixed width and height so we can get a feel of the design. Give the body a background color too. You can (and should) use the colors provided in the specifications.
Add box-sizing: border-box to every element to avoid having to deal with overlapping elements and breaking margin and padding (read more).
/* style.css */
* {
    box-sizing: border-box;
}

body {
	background-color: #29262c;
}
#calculator {
	width: 400px;
	height: 400px;
	background-color: #967c6d;
}

Notice that in the design, the calculator is centered in the middle of the page. Let's move our "calculator" there. But before you do, if you inspect, you will see the real body is only this tall and has some weird margin: 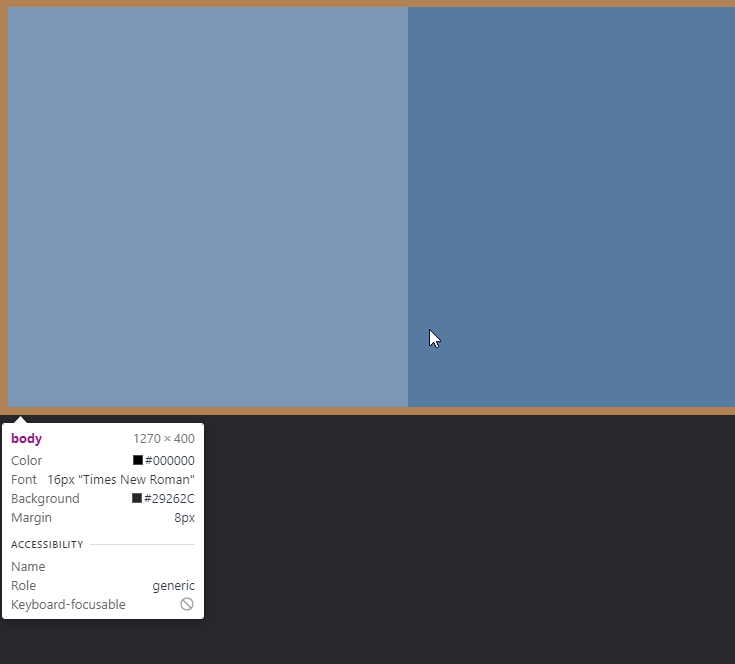
We cannot center the "calculator" vertically if there's no height space, so we need to increase this height to the maximum available to us.
- Set the
bodyheight to 100%.
You will now notice that nothing really happens. That is because its parent, html, constrains the body height. So we need to set the height of html to 100% too.
- Set the
htmlheight to 100%.
Now you can center the "calculator" vertically and horizontally with flexbox.
- Center the calculator with flexbox.
Notice that there's scrollbar which we don't want. Check what element is pushing the body to exceed the height of the browser.
- Get rid of the scrollbar.
When you're done, we can move on to the creating and styling the calculator!
When we develop a website, we need to especially take responsiveness into consideration too because most users will use their mobile devices to access your website/app.
If you set a fixed width of 400px, on mobile devices with a screen size of less than 400px, the devices won't be able to display the full page/app and there will be a vertical scroll, which negatively affects the experience of the users. Therefore we should avoid this.
What we really want is not width: 400px but width: 400px for screens wider than 400px and width: 100% for screens smaller than 400px. While we can use media queries, this can be simply done with the combination of width: 100% and max-width: 400px.
- Remove the fixed width from the previous step.
- Use
max-widthandwidth: 100%to make the "calculator" responsive. - Add some margin to the "calculator".
Check it out! Now the website is truly responsive
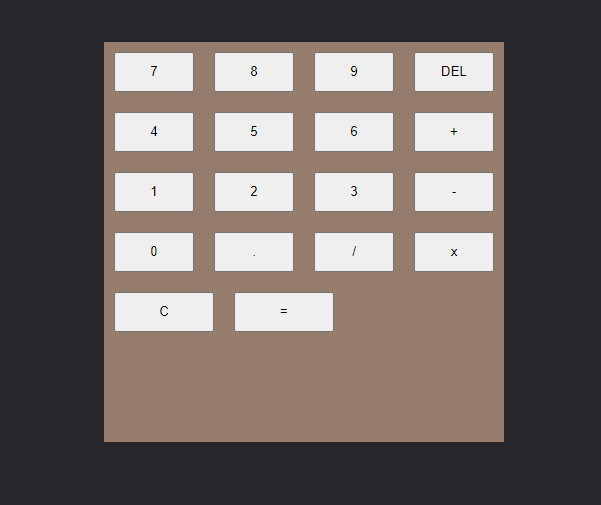
Next, let's add the buttons. we can divide the buttons into rows. Each row consists of a maximum of 4 buttons.
- Use flexbox to make each of the button occupy 25% width of the button area (including margin/padding).
Hint: Use flex-basis. As flex-basis doesn't take margin into account, it's best to wrap each button in a button-wrapper div so we can make this div exactly 25%. Try it with and without the button wrapper div to see.
Without wrappers and margin : 10px on each button:
- Notice the
Cand=buttons take more than 25% width.
<div class="row">
  <button class="button">7</button>
  <button class="button">8</button>
  <button class="button">9</button>
  <button class="button">DEL</button>
</div>
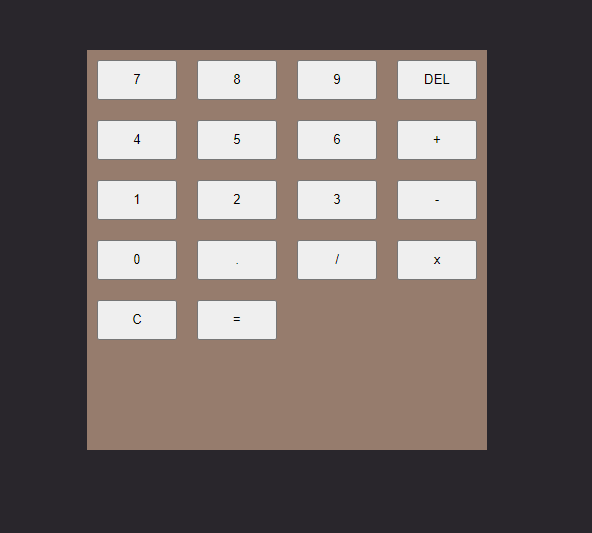
With wrappers and padding: 10px on the wrappers:
<div class="row">
  <div class="button-wrapper"><button class="button">7</button></div>
  <div class="button-wrapper"><button class="button">8</button></div>
  <div class="button-wrapper"><button class="button">9</button></div>
  <div class="button-wrapper"><button class="button">DEL</button></div>
</div>
Now use your CSS knowledge to make this look like the design. Don't forget to add a div with the id display where we will display a number later (you can use a placeholder number for now). After this step, you can get rid of the fixed height too.
- Add an
id="display"div. - Remove the fixed height.
- Style the calculator.
That's it for the UI!
Before jumping into JavaScript, we need to understand the flow of a calculator.
To do an operation, we need to do these steps:
- Set the first number
- Set the operator (via the
+,-,x,/buttons)
- Set the operator (via the
- Set the second number
- Tell the calculator to calculate (via the
=button)
- Tell the calculator to calculate (via the
And to interact with the user, we need to get the inputs from the user and display something to the user at multiple steps too.
- User inputs the first number
- Set the first number
- Display the number on the calculator
- User inputs the operator
- Set the operator (via the
+,-,x,/buttons)
- Set the operator (via the
- User inputs the second number
- Set the second number
- Display the number on the calculator
- User clicks
=
- User clicks
- Calculate
- Display the result of the operation on the calculator
Seems complicated, right? It's actually even more complicated than that! Unlike with a form where the user can type the full number in one go, on a calculator, the user needs to enter every digit individually, so we need to repeat steps #1, #2 and #3 until the user is finished with their number.
Let's dive into it!
There 1 element that you will need to point to and change its content via JavaScript, and that is the display screen of the calculator.
Since we know the id of it, we can ‘get' it via its id:
let display = document.getElementById('display');
Now let's write a function that changes the display according to the button clicked:
const addNumber = (num) => {
    display.innerHTML = num;
}
In our HTML, we can link our buttons to this function like this:
<div class="row">
    <div class="button-wrapper"><button class="button" onclick="addNumber(7)">7</button></div>
    <div class="button-wrapper"><button class="button" onclick="addNumber(8)">8</button></div>
    <div class="button-wrapper"><button class="button" onclick="addNumber(9)">9</button></div>
    <div class="button-wrapper"><button class="button">DEL</button</div>
</div>
If you click any number button, the display will change accordingly!
However, that's not what we want! When you click 1 and 2 on a calculator, you expect to see 12, not 2 replacing 1!
- Make the subsequent numbers add onto the previous one.
As mentioned in the simplifed steps, we will need to know the first number, the operator, and the second number in order to perform an operation. Therefore, we need to define these variables and save values to them before we can display the result to the user.
let num1 = '';
let num2 = '';
let operator = null;
The reason num1 and num2 are empty strings is because when we input 1 then 2, we want 12 not 3, and string is perfect for this, unlike number.
As for operator, it doesn't have to be null. We just need to be able to tell whether or not the user have selected an operator and which one they selected.
These variables will change later, so that's why we use let.
As you work more on your project, you can define more variables as needed.
Now we need to revisit addNumber() to actually save the value into a variable.
10 + 20 = 30
Let's take this simple operation as an example. The flow would be:
- The user clicks
1=> Save"1"tonum1=> Displaynum1on the calculator - The user clicks
0=> Add"0"tonum1(making it10) => Displaynum1on the calculator - The user clicks
+=> Save"add"tooperator - The user clicks
2=> Save"2"tonum2=> Displaynum2on the calculator - The user clicks
0=> Add"0"tonum2(making it20) => Displaynum2on the calculator
For step #3, it's simple. We can create a function and attach it to the + button like this:
const add = () => {
    operator = "add"
}
But for the 2 numbers, how do we know which one to save the input to? If you look at the steps above, you'll see that when the operator has a value, it means that we have switched from num1 to num2.
- Modify your
addNumber()to reflect this.
At this point, your app should be able to:
- Save the first number to
num1. - Save the operator to
operator. - Save the second number to
num2.
Check these variables yourself by using console.log().
Lastly, we can create a function to run when we click =. Let's call it equal.
const equal = () => {
    //
}
What we need to do here is to check what the operator is, and change the display.innerHTML to the result of that operation.
⚠️ Warning: Using eval() will result in a fail grade.
That's it! You've finished the basic calculator app! Check the requirement list and make sure to complete every required features. Try to finish the optional ones too, because pushing to the limit is how you can improve yourself fast.