What You'll Learn
- Creating a new account on all the different services
- What each service does
- How to clone a "starter" template to get started
- How to edit and change content on each template
- How to dig into the code
We'll need a variety of accounts to get things started. Everything is free and requires no credit card to sign up.
- GitHub - where every developer today stores her source code.
- Netlify - this will host your websites (for free).
- Sanity - this site will host and organize your content.
Please register for each service, you'll need them for the next step.

Sanity manages your content. This is important, because it allows people who don't know how to code (also known as "muggles") a chance to change content on the website. Content is usually things like blog posts, images, headlines, frequently asked questions, and so on.
Sanity (and other CMS) have to be told what type of content to expect. For example, you might write something like:
- A blog post needs a title, an image, and an author.
- An image must be of JPG and PNG and be at least 1000 pixels wide.
- An author must have a name, a profile picture, and a description.
In Sanity, we'll define "schema", or blueprints, for every type of content. This is written in code, and don't worry - we won't go in depth until the final step of this tutorial.
Sanity isn't the only option, it's just what many see as a good, modern option. For many more systems similar to Sanity, you can browse the ever-growing directory at https://jamstack.org/headless-cms/. There are also other non-headless (headed?) options, such as Contentful.
Instructions
- Go to https://www.sanity.io/create?template=sanity-io%2Fsanity-template-kitchen-sink to get started. You should have the accounts already set up from the previous step.
- Once you get things started, you should see a link to your studio site. It will finish first. Click on it, and don't worry about the other step.
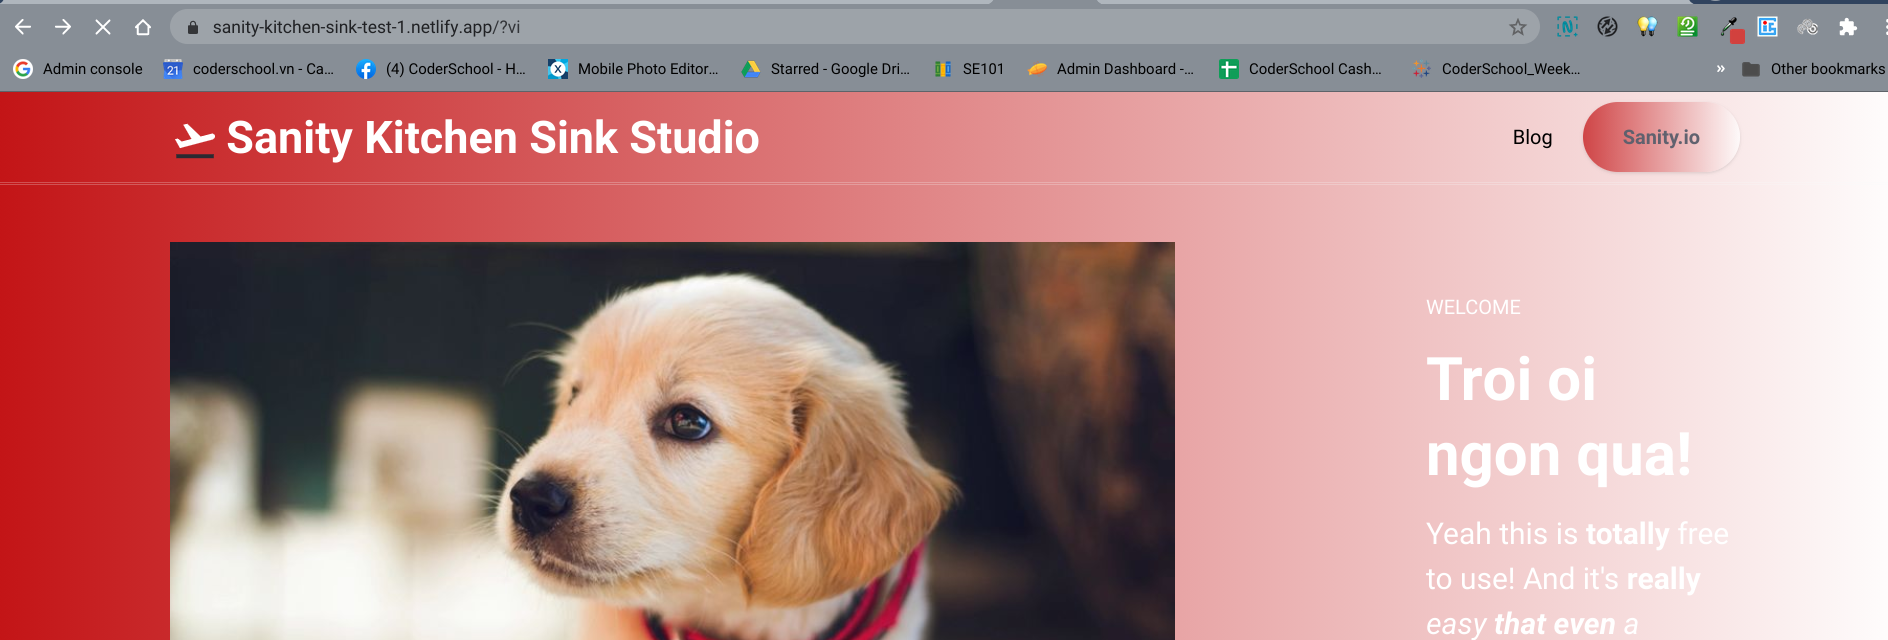
There are actually two sites that will get created:
- The Studio: this is the "admin panel" of your website.
- The Site: this is the actual site.
We'll log into our studio. The studio is really quick to compile (about 30 seconds), but the site takes a while (about 3 minutes). Let's change some things quickly, in each section. We'll change each section: Site Settings, Frontpage, and Blog. We'll walk through each section.
Site Settings
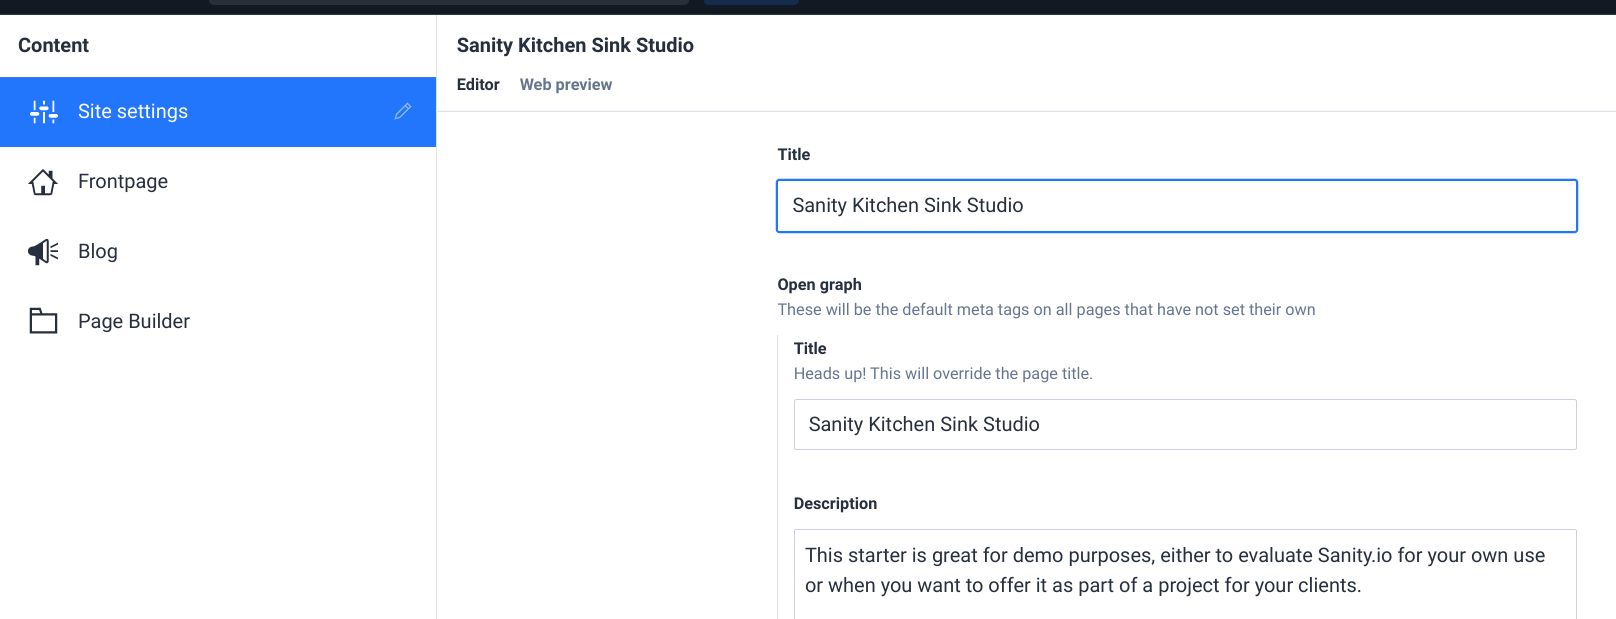
This section controls our "global" site settings.
- Change the title and description to something more fitting.
- Scroll down, and change the "Primary brand color". CoderSchool's official color is
#d2413e(or you can typeindianred), but choose whatever you like (say,aquamarine).
You'll see a "web preview" tab next to editor, but it won't show your changes. Your changes are not instant; they require you to "deploy" a new version of the site. Later, we'll show you how to see "instant" changes, but for now, let's keep editing a few more things and we'll deploy at the end.
Frontpage
We'll play with the main "Hero" image here. We mentioned earlier that we can "structure" the content within Sanity, and this template gives us a lot of structure to play with. Edit a few options here:
- Click on Hero.
- Change the
Heading. - Change the
Tagline. - Upload a new
Image. Note that you can either upload something from your hard drive, or you can use the built-in image search powered by Unsplash. - Once you're done, click the little "x" at the top.
Blog
Now we'll just write a simple blog post. (Originally, these CMS's and Website generators were all based on writing blogs but have slowly expanded into a variety of use cases.) We'll leave this one as an exercise to the reader, just don't forget to click publish.
- Create a blog post.
"Deploying" means sending your changes to the internet. Remember your changes aren't instant; publish does not (really) mean publish. Publish makes the changes in Sanity, but to send those changes to Netlify, you'll have to trigger a deploy. Luckily, this is very easy.
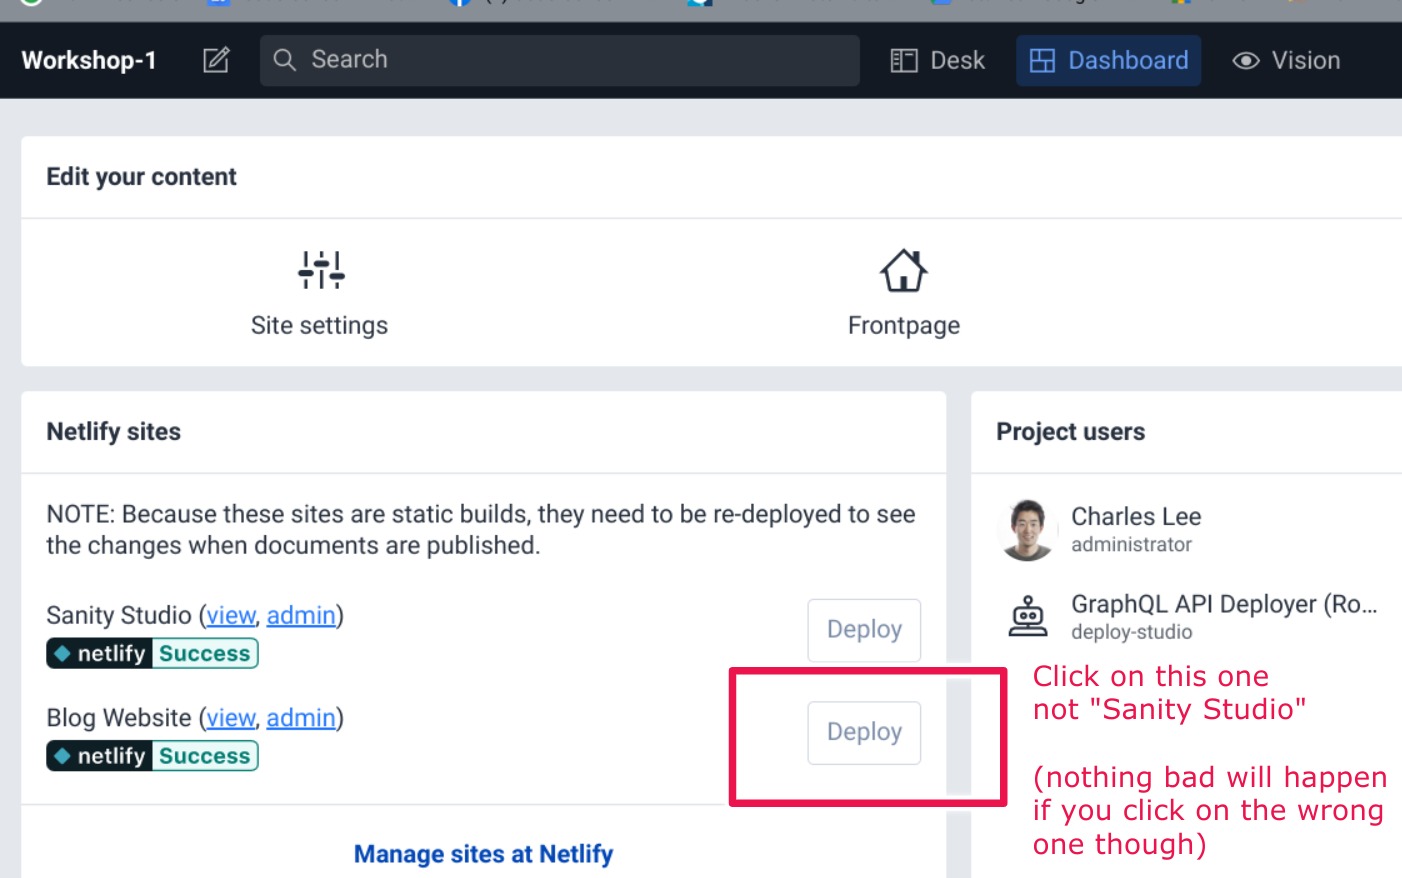
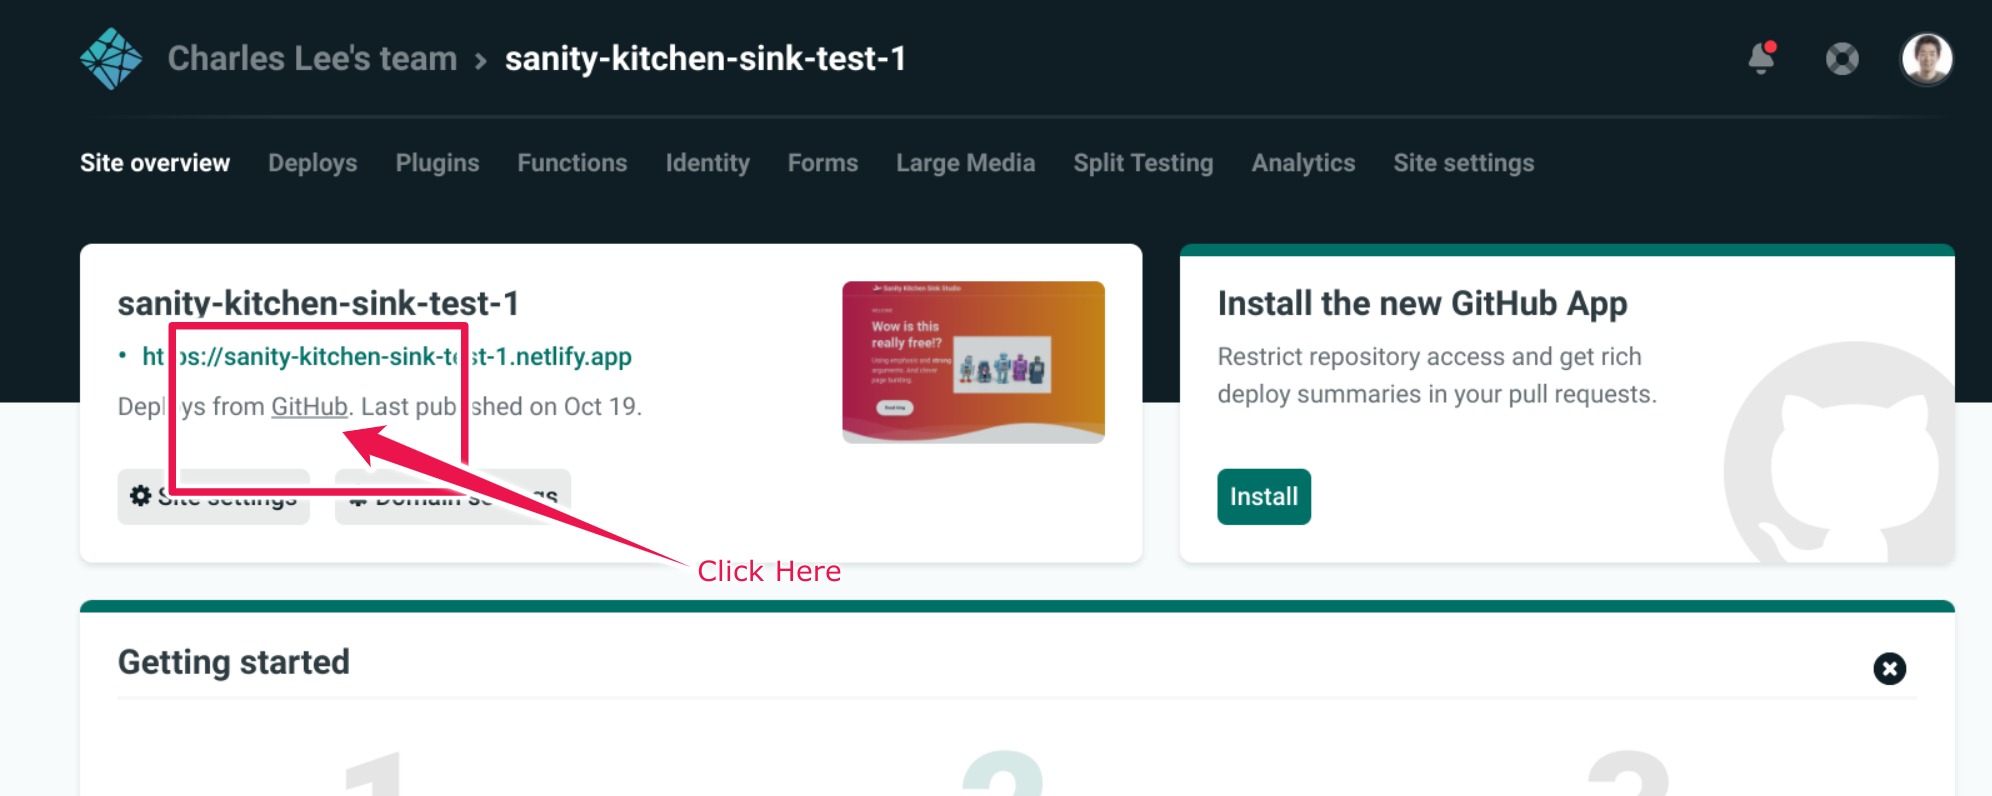
- Click on dashboard at the top, and then click the deploy button, the one we highlighted in red. This will take a few moments, after which you'll be able to share your site with the world!
However, your domain is probably a bit weird. Let's customize that too.


- Log into the Netlify Control Panel
- Select "Domain Settings"
- Select Options –> Edit Site Name
- Change the name to something more personal!
There's a saying: "Do you really want to know how the sausage is made?" Sometimes people would rather not know all the details behind the things that they enjoy. But sometimes, just sometimes, just sometimes it can be fun to understand the details. For the next few steps, we'll have to dig into the code to understand how to implement a very useful but difficult goal: giving our site the ability to have Vietnamese translations.
Understanding GitHub
Go to see the code. If you still remember the link the Sanity creator gave, use that! If you've forgotten, no worries - the link is accessible on your Netlify dashboard as well.
Clicking on that link will open up a whole new world, of code. This is all that powers our site! If you're a coder, you know how to download all this source code locally to your machine and start editing it. If you're not a coder, you'll need some help. You can click around, explore various files. While it is possible to edit all these files on GitHub, this isn't really how developers work; they'll usually download things to their computer, and edit them there.
It's a bit of work to download all the programs and get things set up, but luckily we can use a small shortcut, in the form of another service. More about that on the next step!

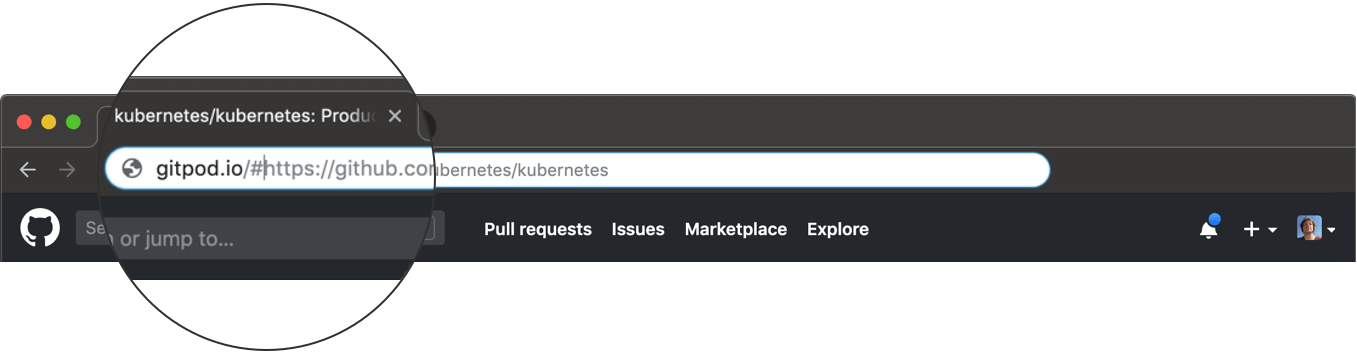
There are a lot of services, but this one is the quickest to get started. It should give you a whole "development environment" ready so you can really start editing the code. After creating an account, you can create a new workspace by opening a new tab, and typing in gitpod.io/# before the URL of your GitHub repository. For example, my address was gitpod.io/#https://github.com/chug2k/sanity-kitchen-sink-test-1.
You'll have to grant access to your GitHub account, and then finally you should arrive at a screen that may make you feel like an elite hacker. Congratulations.
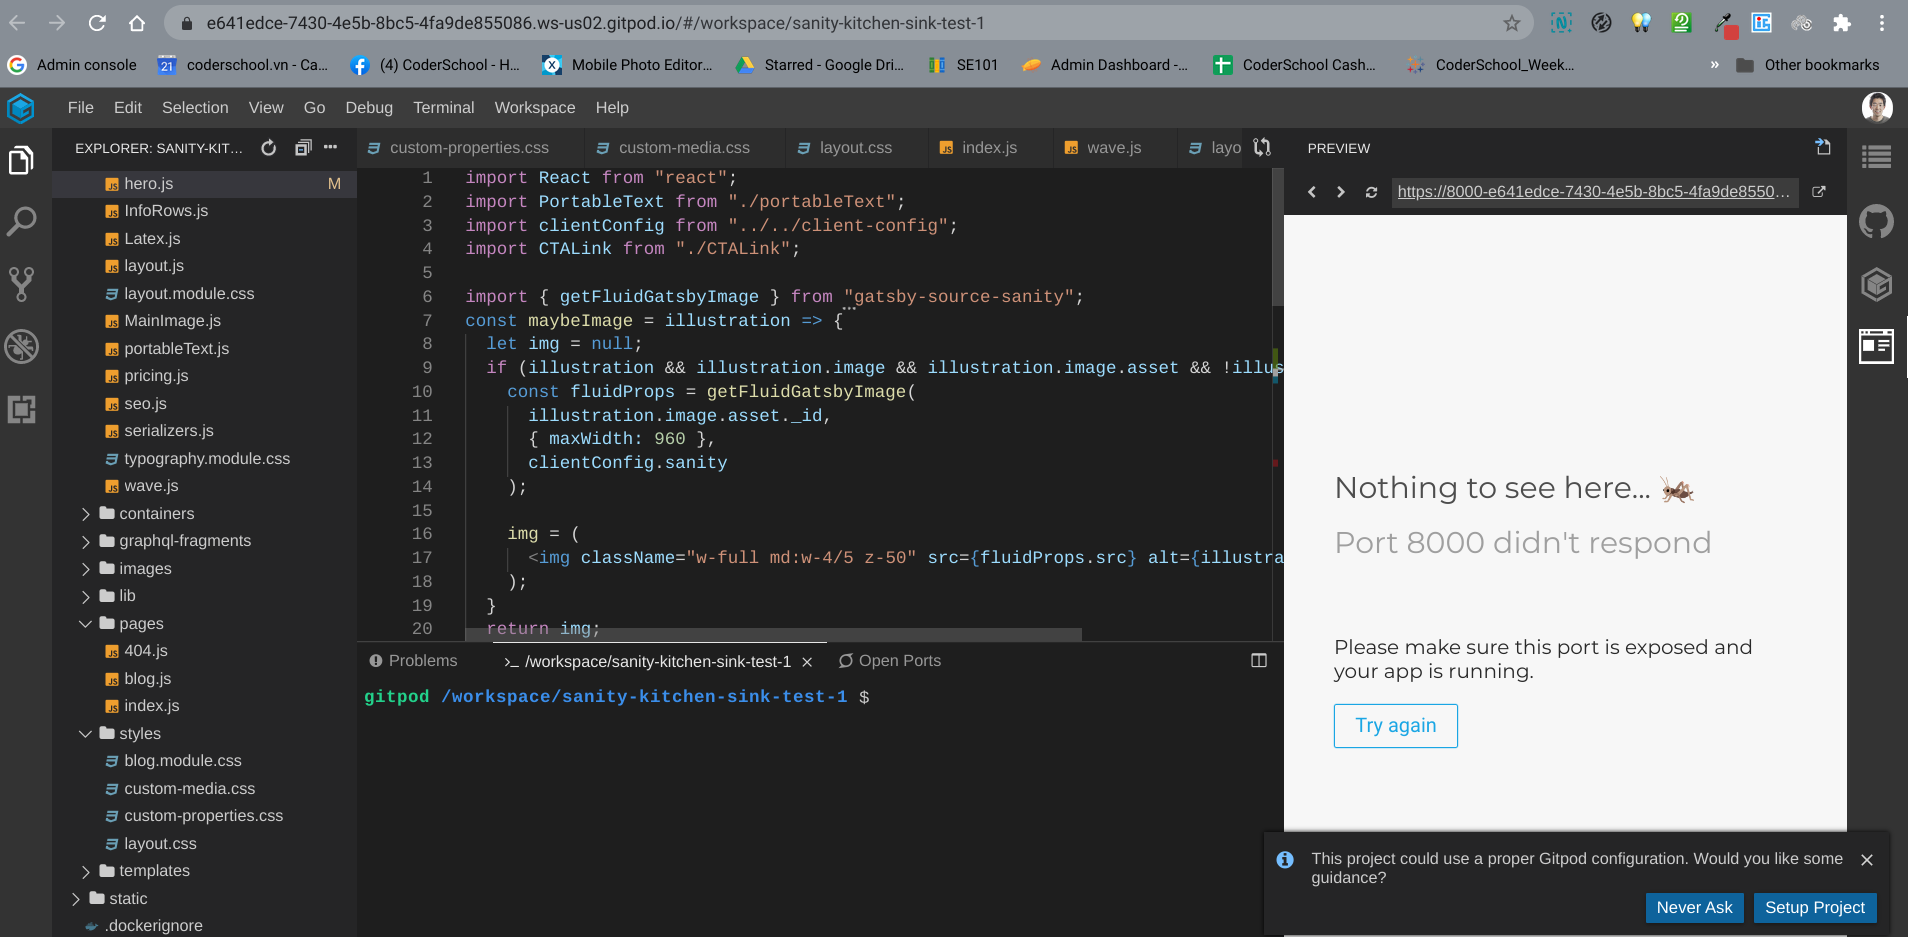
This service makes it convenient to edit code and feel like a real hacker right away. So we'll do that in the next step, by adding support for Vietnamese translations in our code.
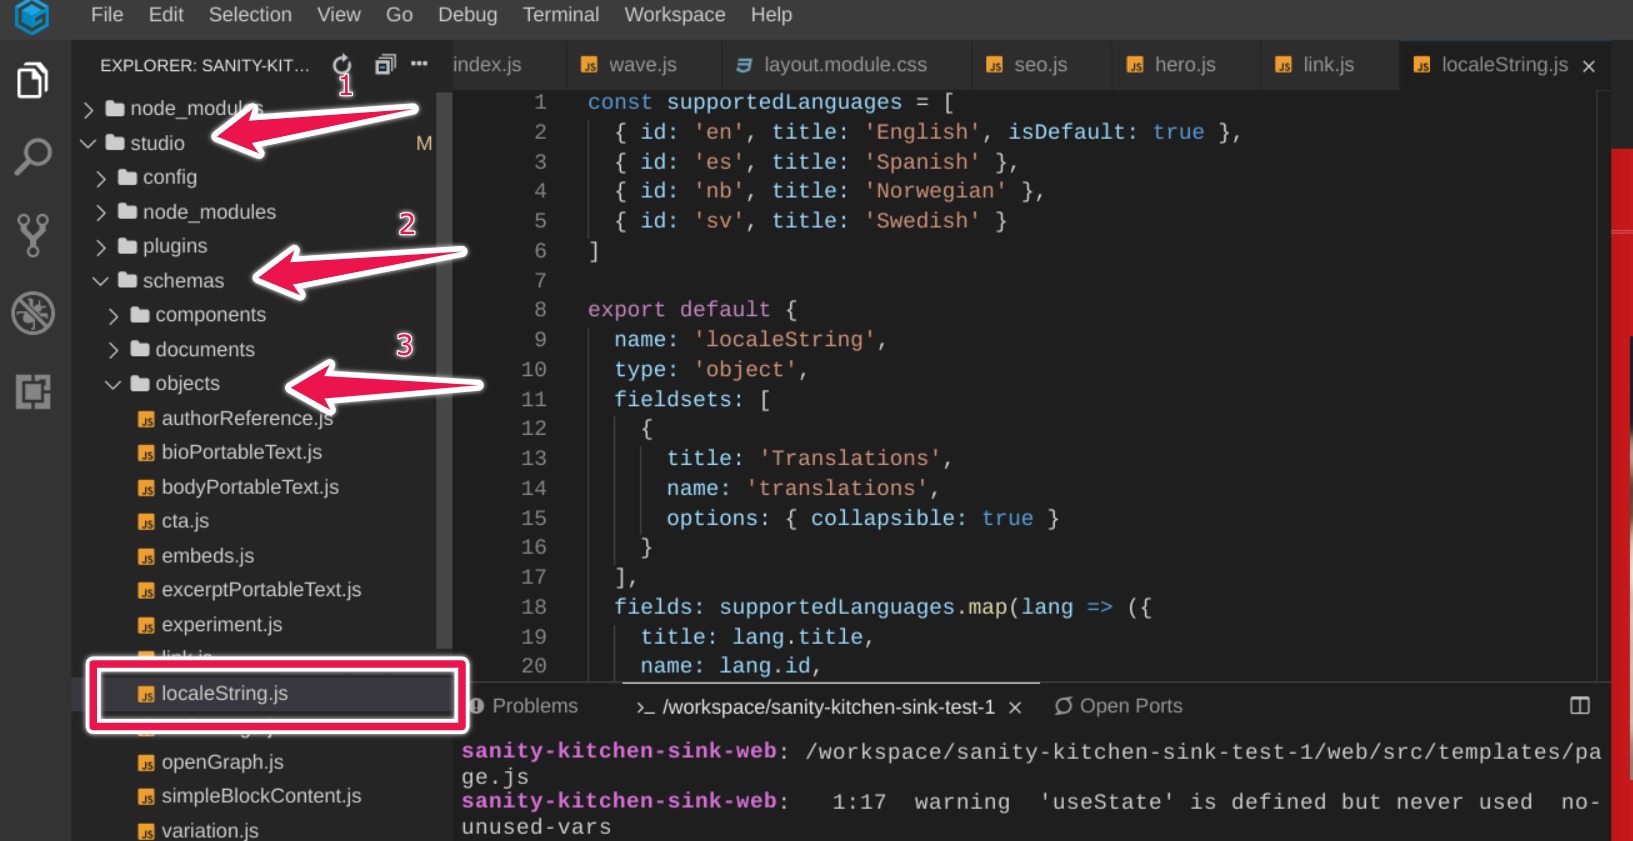
Open a file called studio/schemas/objects/localeString.js. You can find it in the left hand side, with the "file explorer", or if you're 1337 you can use the CTRL+P (or CMD+P) keyboard shortcut to open the file searcher, and type locale and it should be the first search result.
In this file, you should see at the top, code that looks like this:
const supportedLanguages = [
  { id: 'en', title: 'English', isDefault: true },
  { id: 'es', title: 'Spanish' },
  { id: 'nb', title: 'Norwegian' },
  { id: 'sv', title: 'Swedish' }
]
This is JavaScript code. You're going to edit it, to replace Spanish/Norwegian/Swedish with Vietnamese. Take care to not forget any commas!
const supportedLanguages = [
  { id: 'en', title: 'English', isDefault: true },
  { id: 'vi', title: 'Vietnamese' }
]
Great. Now our site has support for Vietnamese, but we haven't configured any fields to use Vietnamese yet. That comes in the next step!
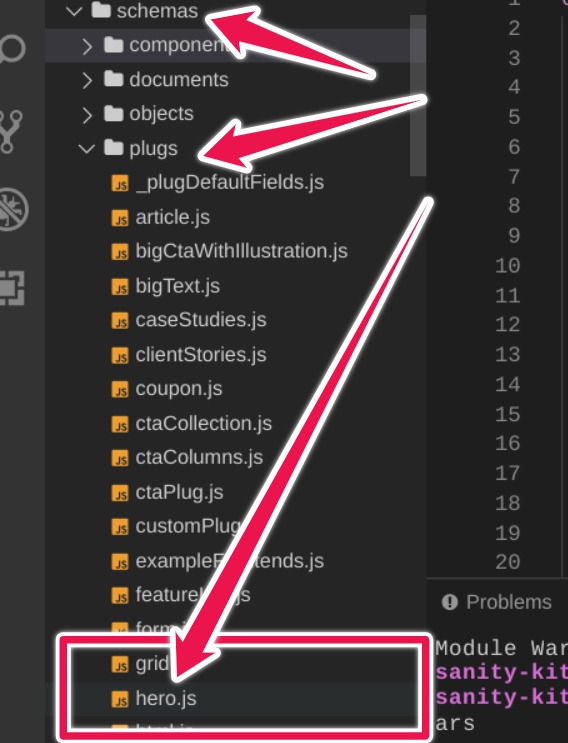
Now open another file, this one called hero.js. It's at studio/schema/plugs/hero.js.
Find the code that says:
    {
      name: 'heading',
      type: 'string',
      title: 'Heading'
    },
And we'll change that middle line, starting with type, so it now reads like:
    {
      name: 'heading',
      type: 'localeString',
      title: 'Heading'
    },
Anytime we change files in the studio directory, we have to re-release a new studio. To do that, we'll "save" our source code changes to GitHub.
In this step, we'll record these changes to GitHub. It's kind of like hitting "save" in Microsoft Word. GitHub holds the "real" copy of all of our code.
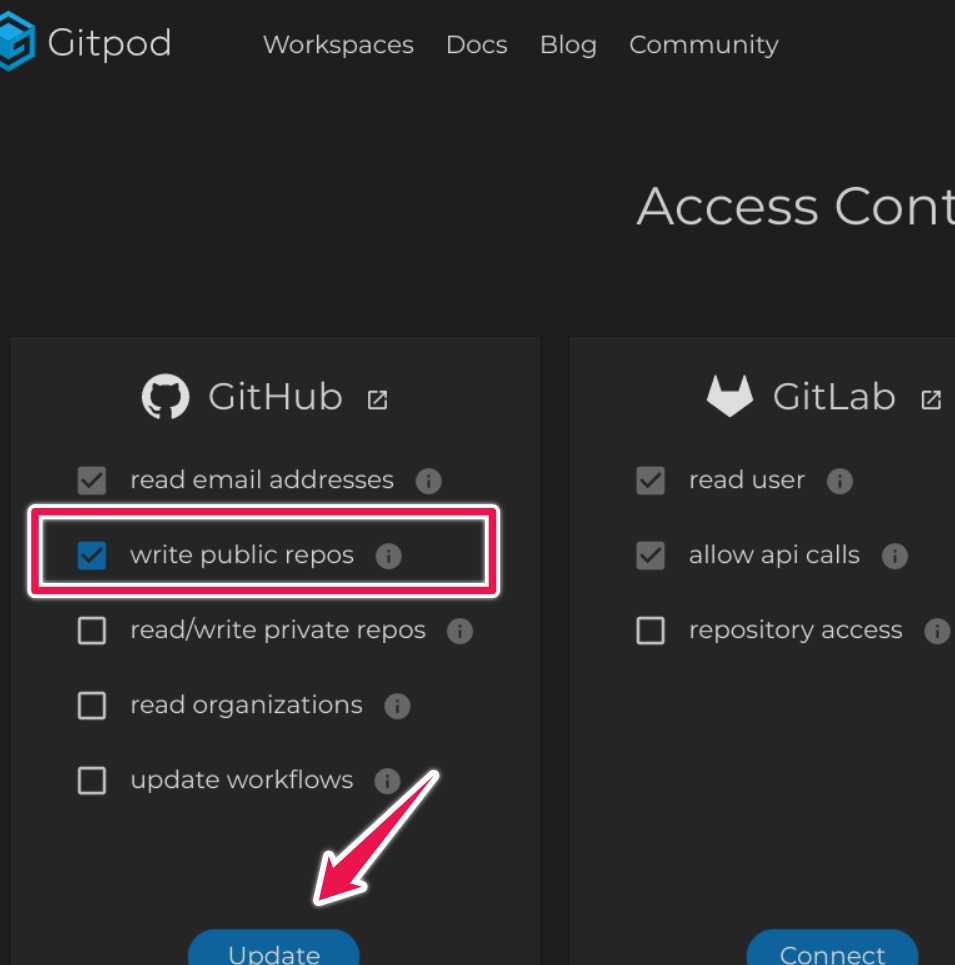
First, navigate to https://gitpod.io/access-control/, click "Write Public Repos", and click "Update".
Now, return to the UI and try to find the "Source Control" button on the left, as shown in the illustration below.
This is easier to show in a video, as shown above. The message you type isn't important, it just can't be blank. It's a bit fast to see, but you have to press ctrl+enter to save changes. If you do it correctly, you should be able to go back to your GitHub page, and see the latest changes. But there are two steps...you'll have to click one more button, at the bottom of the screen.
- Click Sync Button
- Choose "Pull and Push Commits"
If everything is working, then when you go to your original GitHub page, you should see the latest commits.
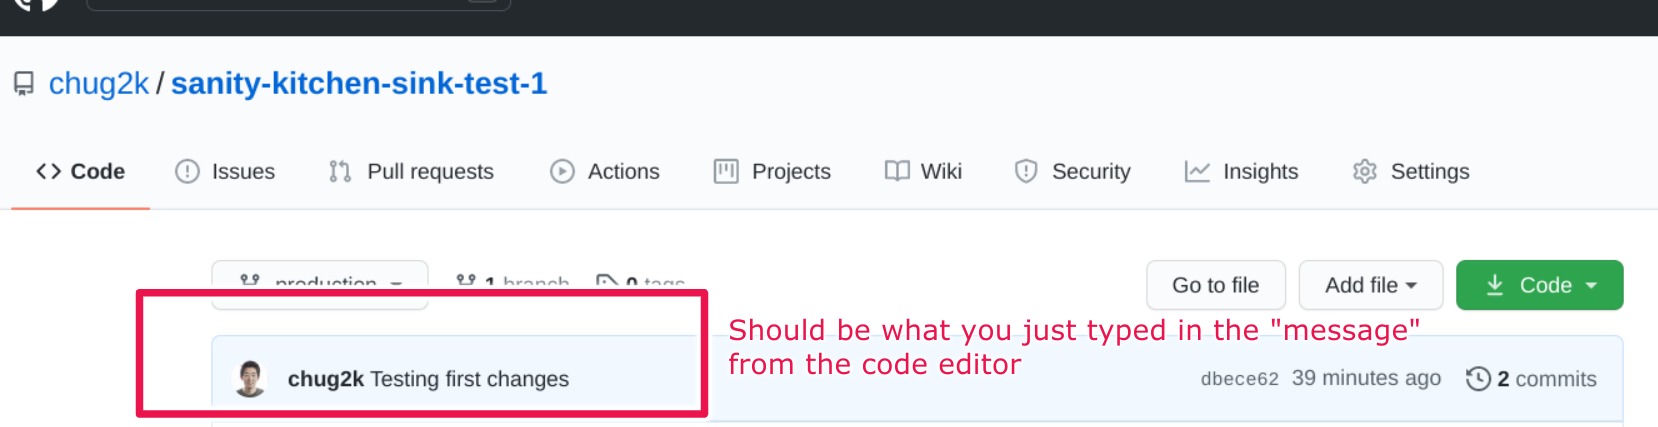
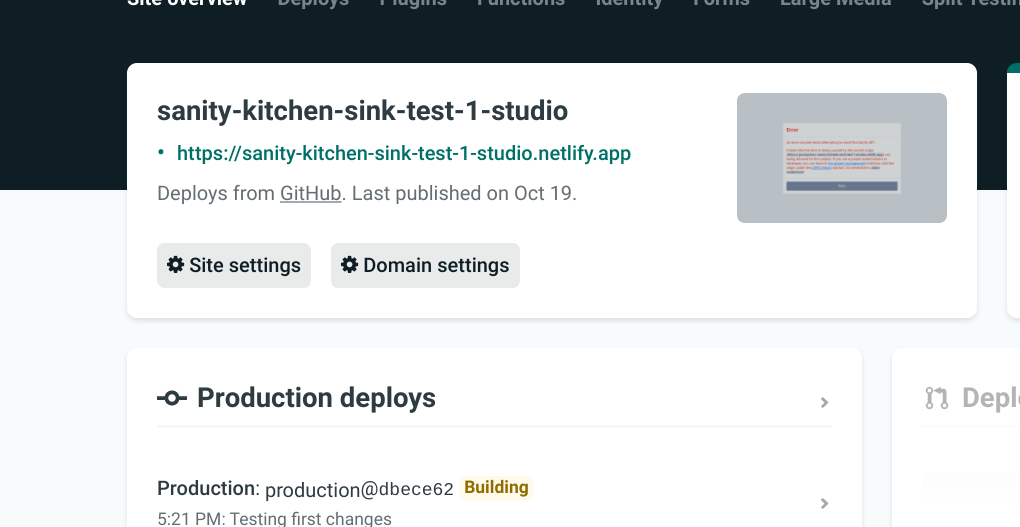
This will automatically start a build of a new studio. You can check on your account at Netlify, and you should see it building.
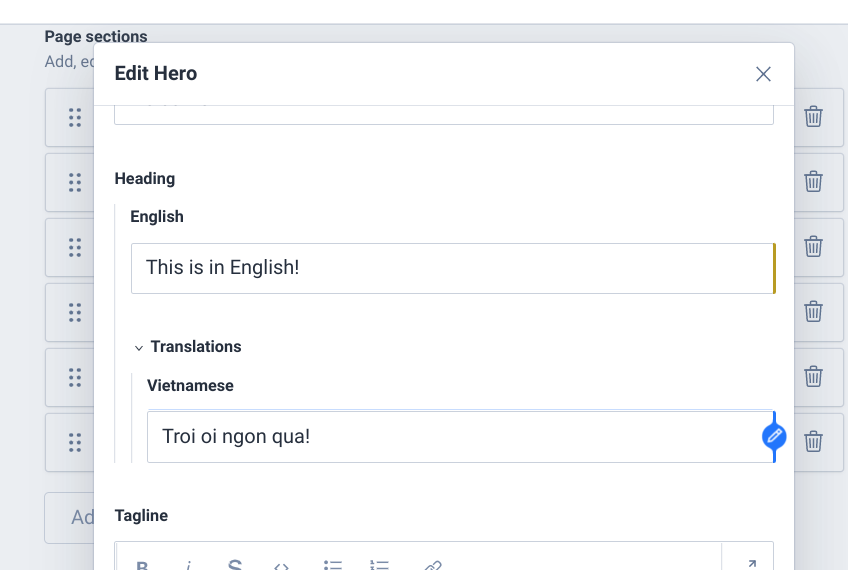
Finally, now it's published, open up your studio link again, and navigate to frontpage -> hero. You should now see the option to enter in Vietnamese content! You'll see an error - that's okay, just click "Remove Value". And now, finally, we can show Vietnamese.
This step is going to be really fast, as we don't really have time to explain everything that's going on, and we'll cheat.
Today, we'll just make it so loading our page with ?vi in the URL will render the hero section in Vietnamese (otherwise English).
Find the file hero.js in the web/src/components directory not the schema/objects version. On that file, find the text:
<h1 className="my-4 text-5xl font-bold leading-tight">{props.heading}</h1>
This is the main header text. We now need to support Vietnamese, so change this line to:
<h1 className="my-4 text-5xl font-bold leading-tight">{(typeof window !== 'undefined' && window.location.search.includes("vi")) ? props.heading.vi : props.heading.en}</h1>
Awesome. Normally this is all you'd have to do, but for this demo...you'll have to make just one more small change. Open the file called studio/package.json and make one tiny change that we won't explain. Change the line (which should be line 11):
"graphql-deploy": "sanity graphql deploy --playground",
to:
"graphql-deploy": "sanity graphql deploy --playground --force",
After you're done, do the same thing as Git before - commit your changes, and synchronize with server. In a few moments, you should be able to see your site! And at the end of the url, just type ?vi if you'd like to see it in Vietnamese.