
Today we build our first mobile app. These are the tools we'll use for the job.
We'll learn the following:
Requirements
- Install Expo CLI
- Install React Native
- Install Expo & React Native Dependencies(XCode and/or Android Studio)
- Install Expo GO on iOS & Android
The Expo CLI allows us to generate out projects(files/folders/apps), start the app's bundler/server, and even start new builds on expo's remote servers.
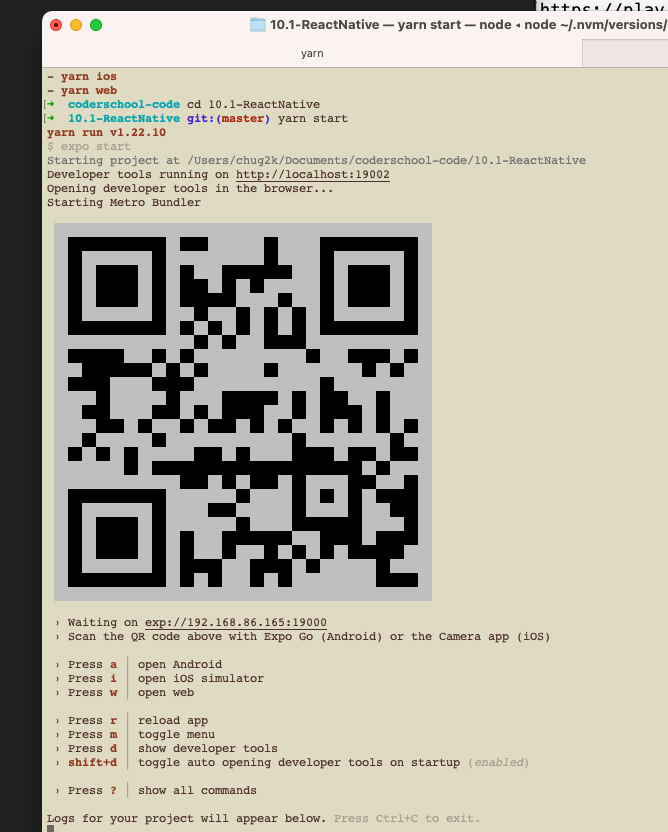
Start small by just creating a new project and then turning it on for local development.
- We'll create a new project named
9.1-ReactNative.
expo init 9.1-ReactNative
cd 9.1-ReactNative
yarn start
You should see a screen that looks like this:
React Native Primitives
React and React Native are the same idea, just with different vocabulary. The web browser already knows about HTML and understands what to do with a <div> or <p>. The Android/iOS systems don't understand HTML, but have similar concepts. We also have something that looks a lot like CSS, which we have to import too.
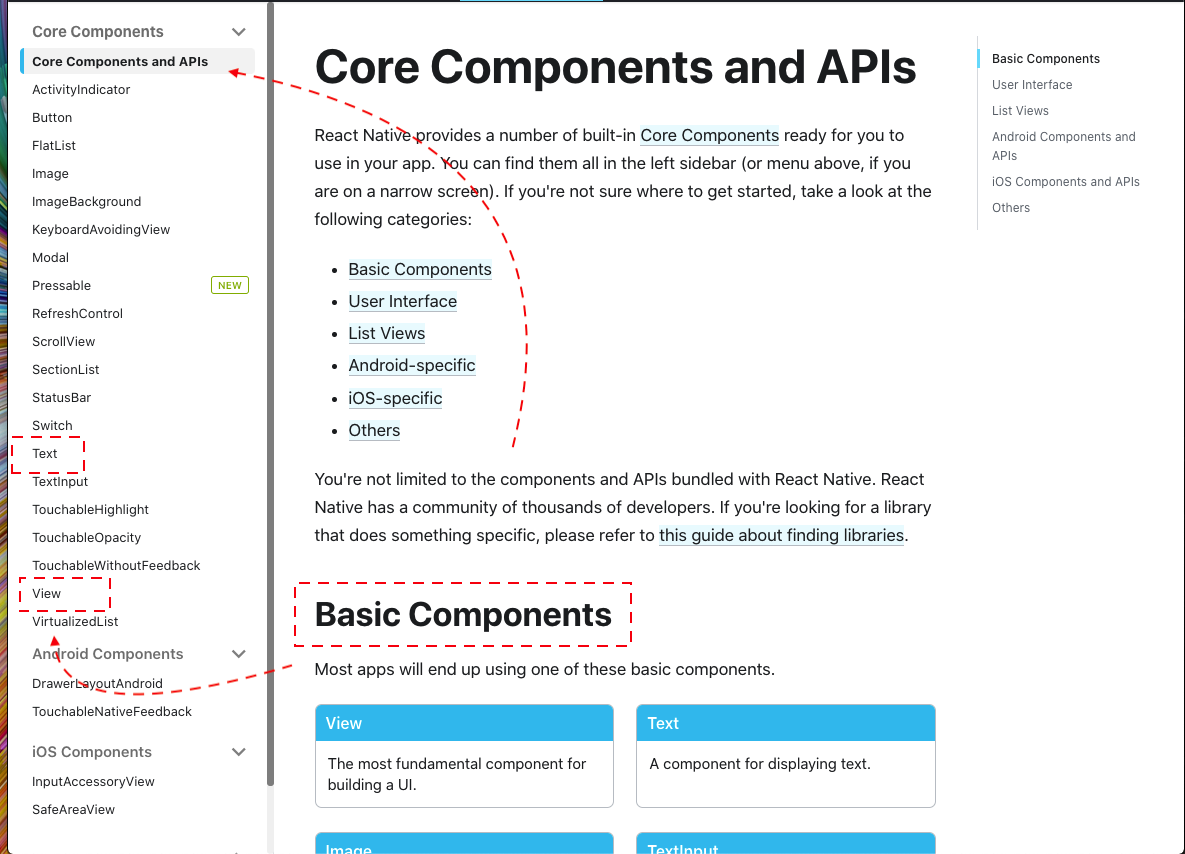
In React Native use <View> instead of <div> and <Text> instead of <p>.
Both <View> and <Text> need to be imported from React Native.
import { Text, View } from "react-native";
Things are almost the same as HTML, with a few small differences.
- Remember to import them
- Capitalized
- No
classNameprop, you use astyleprop (more on this later) - Some are platform specific. A primitive may or may not be available on a given platform.
- A lot of them will render differently based on the platform. A text input on Android looks a bit different than iOS.
There are many other primitives you'll have to learn in the future. You can find a full list here.
If you've done your work, you should see "Open up App.js to start working on your app!". Let's change that quickly to have some images, and a button, and we'll see that most everything is the same as the web version. React is great.
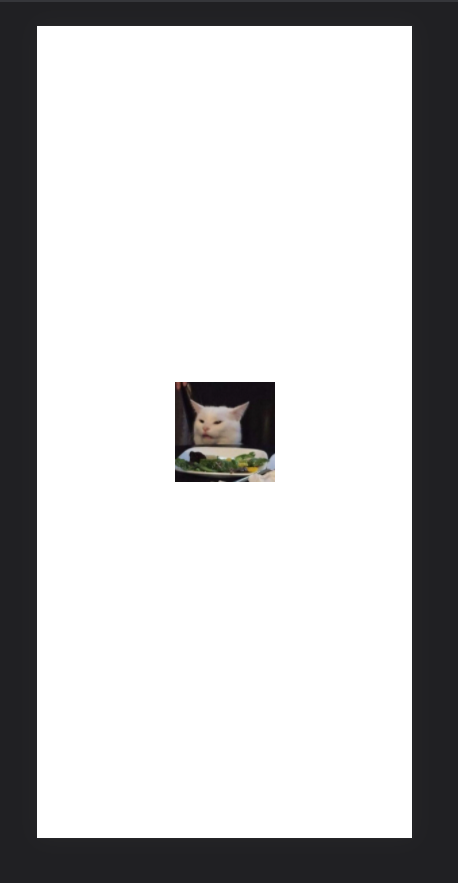
Now let's build something cooler: a cat app. This should be a simple exercise that gets you used to programming in React Native.
There's no <img> tag, instead we'll have to import Image. The props and way to use it are a good illustration of how React Native can differ from React.
Here's a cat image you can download locally. Put it in your assets folder (or choose a different, happier cat).

- Add an import:
import { StyleSheet, Text, View, Image } from 'react-native'; - Import the cat image:
import Cat from "./assets/cat.jpg"; - Now add the Image somewhere inside the component:
<Image source={Cat} />
Refresh, and ... oh shoot. On React Native, we need to give the size of the image. We can't add a width and height prop, we need to add to a style prop.
The easiest way to do this is:
<Image source={Cat} style={{ height: 100, width: 100}}/>`
This is like defining inline styles in HTML. It's okay, but not the cleanest way. You can refactor into the "stylesheet" (kind of like your CSS file) at the bottom:
const styles = StyleSheet.create({
  container: {
    flex: 1,
    backgroundColor: '#fff',
    alignItems: 'center',
    justifyContent: 'center',
  },
  image: {
    width: 100,
    height: 100
  }
});
and change your Image to:
<Image source={Cat} style={styles.image} />
Hooray, now you have a cool cat.
Turns out there's a Button in React Native as well, but the handler is called onPress (not onClick). Everything else just about how you'd expect, including useState.
At the top of your App component:
const [meow, setMeow] = useState(0);
  <Image source={Cat} style={styles.image} />
  <Text>{meow}</Text>
  <Button title="Meow" onPress={() => setMeow(meow + 1)} />
Press Meow and see the counter go up.

You can find a cat noise here: cat noise mp3.
One thing that we haven't made clear is what this "Expo" thing is, after all. It offers some additional functionality, on top of regular React Native that makes things easier. Here's a trivial example:expo-audio.
Let's play a meow. But later you'll have more fun doing things with the Camera or Accelerometer.
First, when we install "expo" specific packages, you'll want to use expo install.
expo install expo-av
Follow the rest of the instructions on the page at https://docs.expo.dev/versions/latest/sdk/audio/#playing-sounds; you should be able to figure it out by now!
Bonus: On long press, make a lion roar.