That was theory, the following exercise will ultilize these 2 hooks from react-redux
- useSelector.
- Grab snippets of state from the store.
- useDispatch.
- Send actions to the store which change it's state.
Requirements
- As a user I can create a todo.
- As a user I can delete a todo.
- As a user I can edit a todo.
- As a user I can mark a todo as done.
- As a user I can add a color tag to a todo.
- As a user I can see a list of todos.
- As a user I can see the number of todos.
- As a user I can view only the completed todos.
- As a user I can see the number of completed todos.
- As a user I can view only the incomplete todos.
- As a user I can see the number of incomplete todos.
Clone the following repository - it's like the create-react-app starter kit, with small additions.
git clone https://github.com/coderschool/redux-fundamentals-example-app
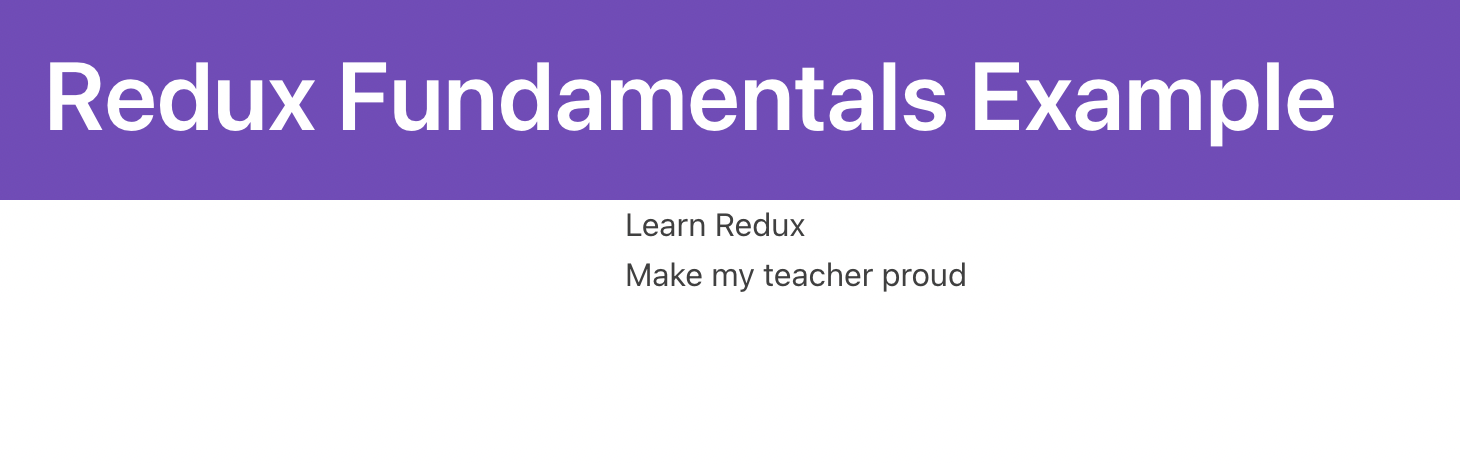
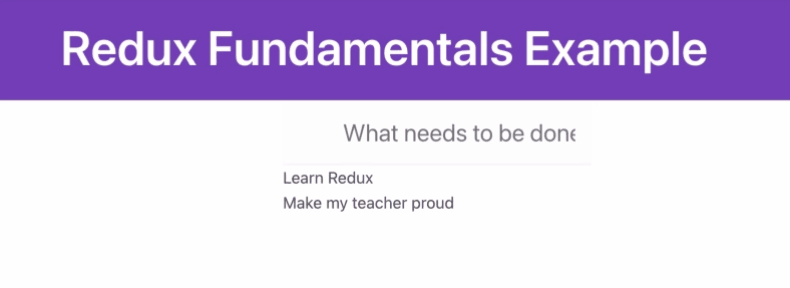
Then run yarn, to install dependencies, or npm start should show you the following:
We'll need one extra library:
yarn add react-redux
Install that library, and now open your index.js. Add the following import at the top:
import { Provider } from "react-redux";
You need to wrap your entire project in a Provider similarly to how with React Router, we wrapped our App in a Router.
Change the code at the bottom of index.js to do so:
ReactDOM.render(
  <React.StrictMode>
    <Provider store={store}>
      <App />
    </Provider>
  </React.StrictMode>,
  document.getElementById("root")
);
Note the store={store}. This is what makes the store available to all components inside of our App, but we need to first define store. Let's do that in a separate file.
Above that block, add:
import store from './store'
And create a new file called store.js in the same directory as index.js.
Inside our store, we'll try to keep it as simple as possible (this is where we start to diverge heavily from the official tutorial, by the way):
import { createStore } from "redux";

const initialState = {
  todos: [
    { id: 1, text: "Learn Redux" },
    { id: 2, text: "Make my teacher proud" },
  ],
};

const reducer = (state = initialState, action) => {
  return state;
};

const store = createStore(reducer);

export default store;
Negative : Normally we'd keep our reducer in a separate file, as the logic in the reducer is generally the most complicated. We'll do that in future weeks, but for now, we'll just keep it all in store.js.
We'll want a list of items, that displays each todo items. We'll create two components: TodoList and TodoListItem.
Create a components directory in your src/ folder, and create the two components.
src/components/TodoList.js:
import React from "react";

const TodoList = () => {
  return <div></div>;
};

export default TodoList;
src/components/TodoListItem.js just takes one prop for now, the todo, and displays it:
import React from "react";

const TodoListItem = ({ id, text }) => {
  return <div>{text}</div>;
};

export default TodoListItem;
Our TodoList component won't need props passed to it from Redux, and in fact, can just access our "store" directly.
TodoList.js:
import React from "react";
import { useSelector } from "react-redux";
import TodoListItem from "./TodoListItem";

const selectTodos = (state) => state.todos;

const TodoList = () => {
  const todos = useSelector(selectTodos);

  return (
    <ul className="todo-list">
      {todos.map((todo) => (
        <TodoListItem key={todo.id} {...todo} />
      ))}
    </ul>
  );
};

export default TodoList;
Bravo. Note how the data is now coming magically from the initialState that we defined in store.js! We never had to pass any sort of prop to TodoList from App.js.
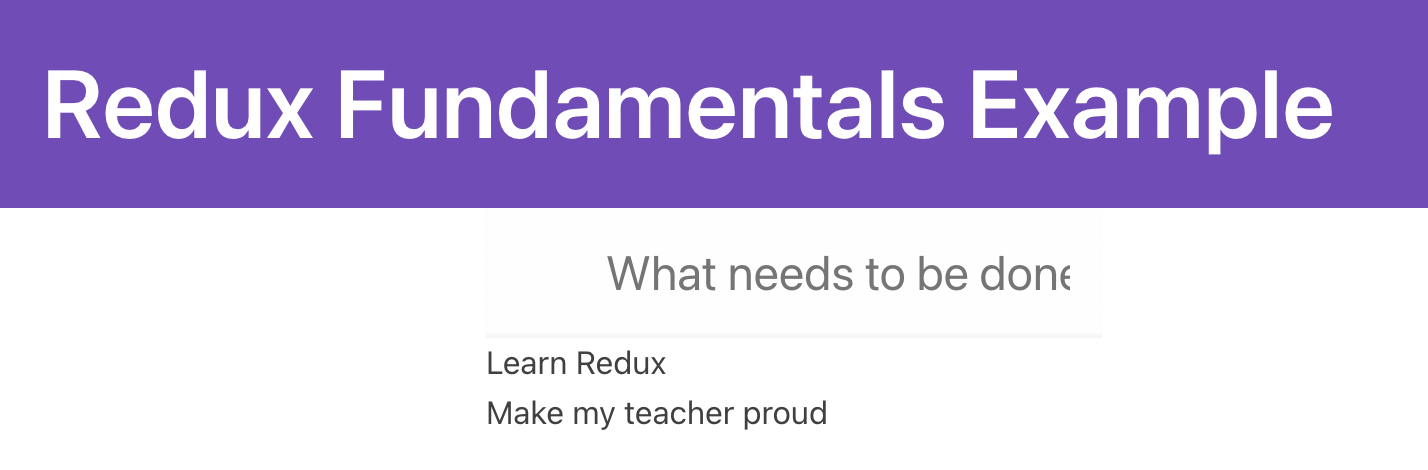
Now we'll need a simple way to add todos. Let's create a new (ugly) component in src/components/Header.js:
import React, { useState } from "react";
import { useDispatch } from "react-redux";
const Header = () => {
const [text, setText] = useState("");
const handleChange = (e) => setText(e.target.value);
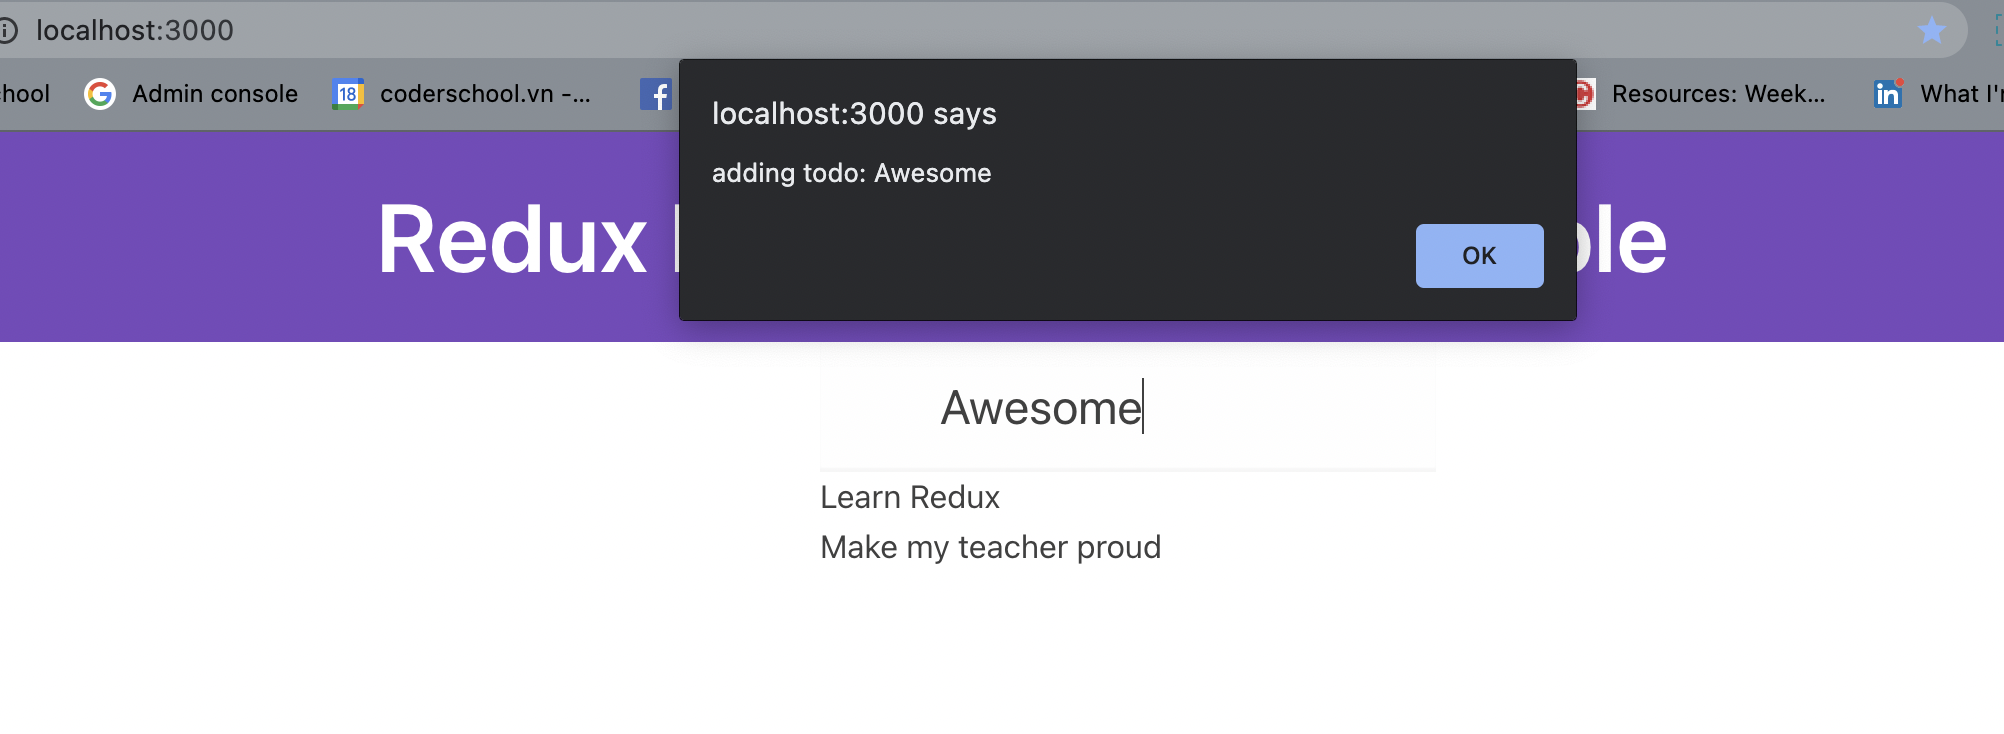
const handleKeyDown = (e) => {
// If the user pressed the Enter key:
const trimmedText = text.trim();
if (e.which === 13 && trimmedText) {
alert("adding todo: " + trimmedText);
}
};
return (
<header className="header">
<input
className="new-todo"
placeholder="What needs to be done?"
value={text}
onChange={handleChange}
onKeyDown={handleKeyDown}
/>
</header>
);
};
export default Header;
Nothing is new here, except the fact that we listen to the "enter" key to submit a todo (we could also listen to a form submit, if we wrapped everything in a form). For now though, we just alert the user, instead of sending the actual data through.
Add this Header component above TodoList in App.js.
Pressing enter in the field should pop up a simple alert:
Now we just need to do one final step: connect our app to the store to add todos. Go back to Header.js, and add (the first line should be there, with text, setText but the useDispatch is new):
const [text, setText] = useState("");
const dispatch = useDispatch();
You'll need to import:
import { useDispatch } from "react-redux";
Now replace the alert with the following line:
dispatch({ type: "addTodo", payload: trimmedText });
setText("");
That second line is just to clear the box when we're done (remember this should go inside the if statement checking to see if the enter was pressed).
And finally - this is the hard part. Go back to store.js, and add in this logic:
const reducer = (state = initialState, action) => {
  if (action.type === "addTodo") {
    return {
      todos: [...state.todos, { id: 3, text: action.payload }],
    };
  }
  return state;
};
Negative : We definitely should not hard-code the value 3. You should find the max id, and add one to it. That brainteaser is left to you!
Now, your app should be complete.
Go consult the official tutorial and add in additional features. Demo here and instructions here.